


1 Workmanship: Hide Ugly Pipes - Kitchen
2 Workmanship: Hide Ugly Pipes - Bathroom/Toilet
3 Workmanship: Hiding Pipe-Accessible-HDB Guidelines
4 Workmanship: Plumbing
Preamble
HDB flats built in the 70's and early 80's focused only on the basics. Aesthetics if any were very much an afterthought. The kitchen in my flat showed that design approach: water, sewage and air pipes were all
Take for instance the service pipes. Which seemed all over the place. The bathroom has 6 pipes, 3 on the left side, another 3 huge ones on the right. While the kitchen has ~2 huge pipes. With another one in the toilet, I counted a total of nine. Yikes - 9!! I was astonished there were that many.
Kitchen: Ugly Pipes

"No problem," the ID remarked, ".. just cover up those pipes". As access has to be maintained to the pipes, he suggested making floor-to-ceiling doors to hide them. I felt the ID's idea was an overkill. "The placement of the fridge at the corner will hide the pipes," I countered.
"No problem, just cover up those pipes.."

Hiding Ugly Kitchen Pipes
Taking measurements

How many carpenter uses a spirit level these days?

The right tool ensures quality workmanship

Mark of a professional: Ensuring verticals with spirit level

"Mind the dust.."

Expertly handling the electric jig saw

Ensuring tight tolerances

Result? Close & perfect Fit!

No shoddy work here!

Neat!

Completed Frame, Ready for Laminating
2 Laminate the Frame
Marking out a Thin Laminate Strip

The master at work

Laying the thin Laminate Strip

Close attention to detail

Specialist tool to cut the laminate cleanly

He does the crucial laminating process himself!

3 Fixing the Panel Doors
Ensuring electrical wiring aren't inadvertently covered up

Left Panel Door Fixed

Truly impressive job so far!

Fixing the Right Panel Door

Right Panel Door Fixed

Finishing touches with silicon gun

Completed Frame with Panel Door Opened

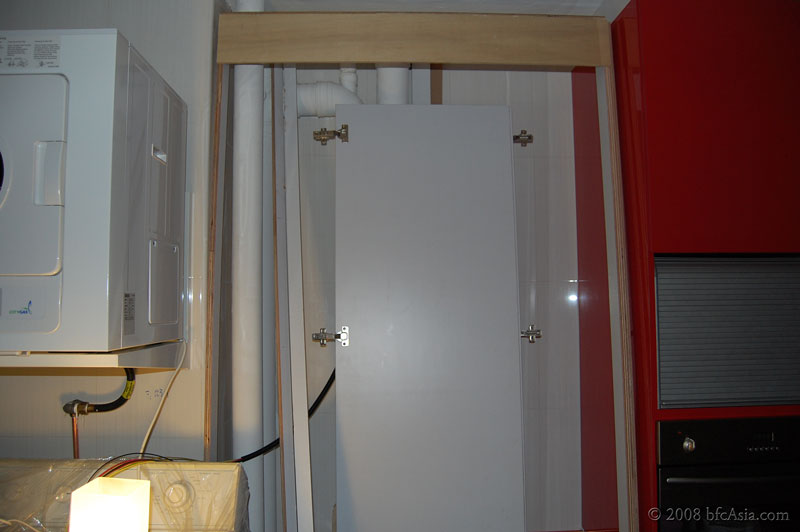
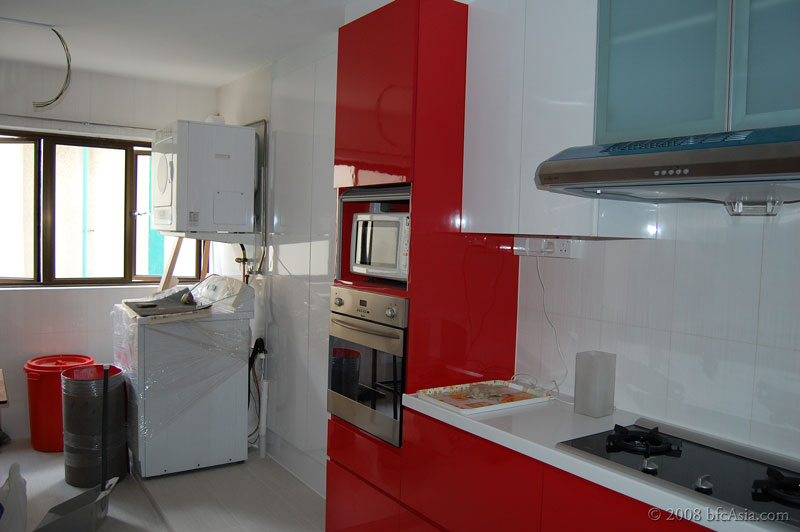
Pipes now fully covered up!

Viola! Completed Door Panels - no more ugly pipes
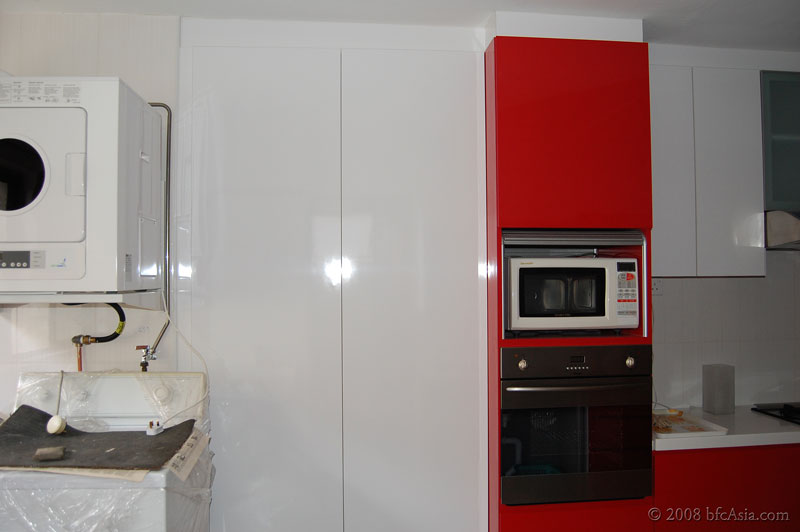
The GE Profile Fridge will front the Panel Doors
Mr Sia the lead carpenter told me he entered the trade at the age of 13. Now 31 years old, he had made
The guy was extremely hardworking, skipping lunch to continue the work. He was meticulous and took obvious pride in his craft, working a total of 4 (!!) hours to complete the frame and door. I was also impressed with his personality: never once did he raise his voice at the 17-yr old apprentice who was his understudy.
Both guys were Malaysians from Johor. In some perverse way I felt fortunate the Malaysian state had not prospered to the same extent as Singapore. Otherwise we would be paying much higher prices for excellent skills and talent from across the Causeway.


Related Posts
1 Workmanship: Hide Ugly Pipes - Kitchen
2 Workmanship: Hide Ugly Pipes - Bathroom/Toilet
3 Workmanship: Hiding Pipe-Accessible-HDB Guidelines
4 Workmanship-Plumbing
Workmanship Series
1 Good Workmanship
2 Workmanship: Dispute Resolution
3 Workmanship: Walls & Floor
4 Workmanship: Laminated Floor
5 Workmanship: Electrical Work
6 Workmanship: Air-Conditioner
7 Workmanship: Doors & Architrave
8 Workmanship: Gas Piping & Gas Dryer
9 Workmanship: Kitchen Works
10 Workmanship: Hide Ugly Pipes
11 Workmanship: Windows
12 Workmanship: Plumbing


