Showing posts with label pipe. Show all posts

Hiding the Pipe-Making it Accessible-Meets HDB Guidelines

Related Posts
1 Workmanship: Hide Ugly Pipes - Kitchen
2 Workmanship: Hide Ugly Pipes - Bathroom/Toilet
3 Workmanship: Hiding Pipe: Accessible - HDB Guidelines
4  Workmanship: Plumbing

Preamble
This post is in response to a reader James who asked how to pipe ugly pipes, making it accessible and not contravening HDB guidelines.

Thank you, James, for your question.

TWO BASIC PIPE CATEGORY

As you can see from my blog photos, bascially there are 2 categories of pipes. The big, flat, ugly pipes, usually

BATHROOM: Ugly Pipes

KITCHEN: Ugly Pipes


of cast iron or PVC - run from the ceiling to the floor in the toilet, bathroom and kitchen. The ugly vertical pipes connect to the flat / apartment above and below your HDB flat unit.


The other category are the 1-inch stainless steel pipes that bring and discharge water to your flat unit. If your 1-inch water pipes are of copper, I suggest you change it to stainless steel.

Plumbing Rates

Related Posts
1. Workmanship: Plumbing


Several readers have asked what the 'normal' charges would be for plumbing jobs. Many related being fleeced by unscrupulous plumbers. As previously blogged, some (crafty) plumbers didn't even turn up for appointments in an 'attempt' to push up rates! I know because it happened to me.

Well, plumbing rates may change overtime, but here's a table to give you an idea of the ball-park repair costs for plumbing jobs locally:

Local Plumbing Services - Plumber Contractor Condos, Landed Properties, Offices, HDBs, Shops and Buildings

DESCRIPTION OF SERVICES
UNIT RATE
1. Clear toilet bowl choke
$60 - $250
2. Clear floor trap choke
$40 - $150
3. Replace kitchen sink/basin tap (normal type)
$60
4. Supply & replacement of bottle trap for kitchen sink
$40
5. Replace Cistern/Basin/Sink flexible hose
$20 - $40
6. Labor & material to repair exposed copper pipe leak
$80
7. Rectify water discharge into toilet bowl by replacing new siphon.
$80 - $120
WATER LEAKAGE DETECTION
8. Labor & Equipment to detect water leakage of concealed pipes in condominiums.
$120 - $200
9. Similar  as above in landed property including underground pipes.
$250 - $350
10.Similar to commercial properties including underground pipes.
$500 and above
Additional charge for transport
$15
Warranty 60 days for workmanship
Charges Fee of $30
Inclusive of Transportation and Checking / Troubleshooting of Plumbing System

Charges Fee will be waived upon confirmation of repair job done.

Warranty 60 days for part(s) replacement

Related Posts
1. Workmanship: Plumbing


Workmanship: Hiding the Pipes - Bathroom

Related Posts
1 Workmanship: Hide Ugly Pipes - Kitchen
2 Workmanship: Hide Ugly Pipes - Bathroom/Toilet
3 Workmanship: Hiding Pipe-Accessible-HDB Guidelines

Preamble
It was a week before the LNY. My ID's regular window fabricator and installer - a local factory - had already stopped taking orders. Gosh, the ID had overlooked LNY and failed to place an early order with the window contractor! Owing to this oversight, work on the bathroom partition wall had to be postponed. The proposed partition would bisect the bathroom window, and it was necessary to replace the old window before work could start on the proposed partition wall.

Old bathroom window had to be replaced first!

The ID's weak project management and failure to plan ahead delayed window replacement and pushed back all dependent jobs by 2 months.


The window fabrication factory already had a huge order backlog. Which was compounded by the public holidays: the factory workers, mostly Malaysians, took their annual leave to coincide with Lunar New Year for a longer holiday period!

Taking Measurements
A second problem arose when the ID took measurements. The measurements indicated he would do a single large window replacement in the bathroom. "No way!" I uttered in disbelief. "Wouldn't it look strange for the bathroom window to show only 3 aluminum edges with the partition wall butting right on it?" I pointed out. He stared at me blankly, clueless and lost for an answer. Finally I said, "Look, do it this way.. split the single bathroom window into two windows and frame both. That way there is a framed window edge against the partition wall. That would give the bathroom window four aluminum edges with the partition wall butting against it. Just like a normal window."

My solution is depicted below:
Inside View: Bathroom window split into two to align with proposed partition wall

Outside view: Bathroom window split into Two

Luckily I caught the 'one-for-one window replacement' error before the ID gave the measurements to the window factory!

Making the Partition Frame
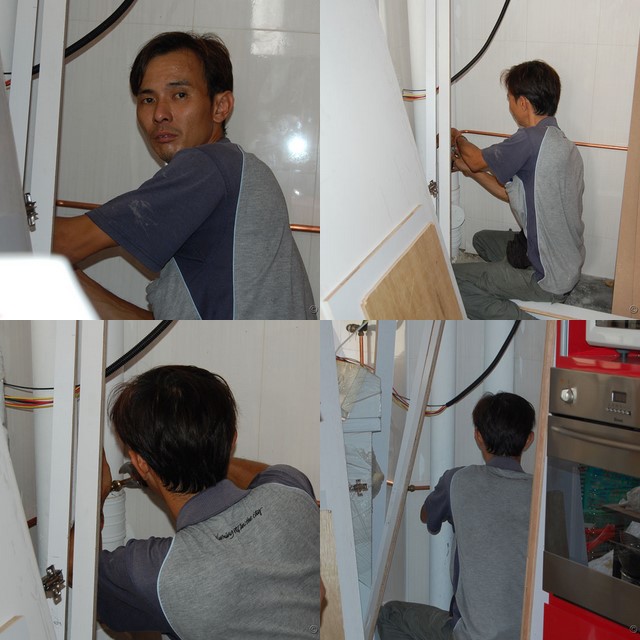
The ID's sub-con came in the morning - Tue 18-Mar-08 - to put up the partition for the bathroom.
Window correctly framed against Partition

Imagine how window would look with no aluminum edge against Partition!

Cutting the partition frame

Electric wiring carefully arranged to hide behind partition frame

Left side of frame completed

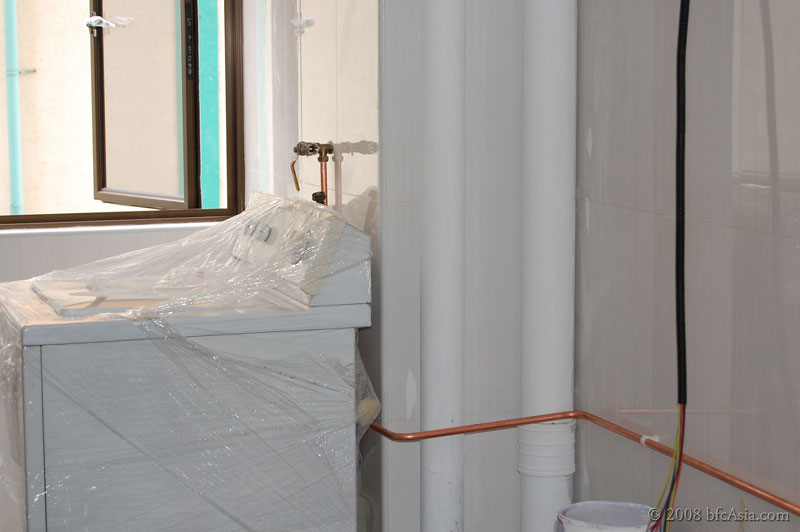
Temporary measure for water supply while awaiting final plumbing

Taking measurement

Re-taking measurements to ensure structural integrity and alignment

Sigh.. pipes criss-crossing everywhere!

Metal frame cut to accommodate air-con drip pipe

Metal framework completed

Frame ready to install Partition Hardboard

Rain-shower arm installed

Work will continue after plumbing completion...

Plumbing work in progress.. shower tap fitted!

Partition wall ready for tiling

After tiling of Partition Wall

Bathroom Window properly framed against Partition Wall

Completed Bathroom with Partition Wall after Tiling

Ready for your Rain Shower?

Final Thoughts
This bathroom renovation was a huge challenge for me. I was fully stretched in terms of time, energy and patience by the sheer amount of work and coordination required. How was that? Well, I had to deal with several major issues.

First, my ID screwed up with his late orders for window fabrication and installation by his regular window contractor. That delayed work for 2 full months. Second, plumbing works on the kitchen sink, wash basin, and toilet bowl were delayed several times when the regular plumber failed to show up.


When he did show up, it was already 6 pm or late in the evening. To top it all, he fouled up (pardon the pun) the toilet bowl installation, detailed in another post. And when he also did a bad job with the rain shower alignment, I decided he had to go. The ID was unprepared for that eventuality, however. He didn't have a contingent plan and had difficulty sourcing another plumber. That created more delays. Which in turn led to delays in bathroom tiling and installation of the partition wall.

Not that the delays made renovating the bathroom any easier or more relaxed. On the contrary, the problems compounded what was already a complex task, as close coordination was required of several inter-dependent works:
  • replacing the old bathroom window, 
  • electrical wiring for the water heater and ceiling light, 
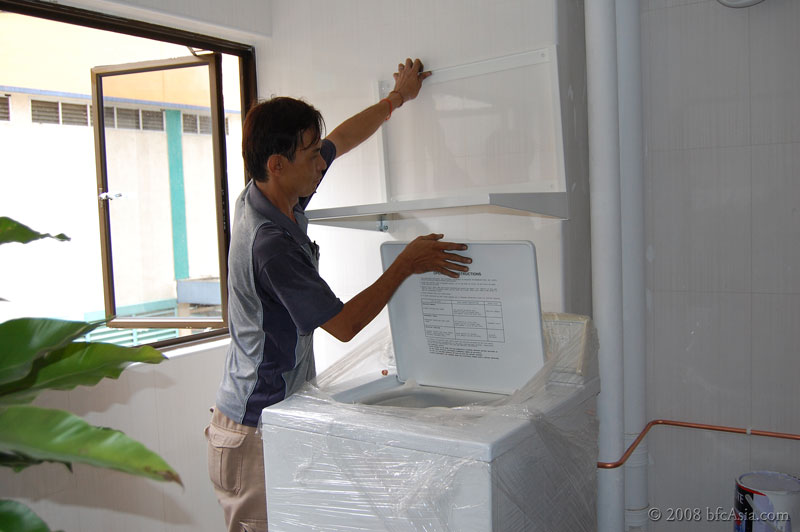
  • plumbing to the water heater, wash basin, washing machine, kitchen sink, toilet, 
  • installing the partition wall, 
  • tiling the bathroom wall, 
  • installing the water heater and rain shower, 
  • accessorizing the bathroom with towel rail, glass rack shelving, etc
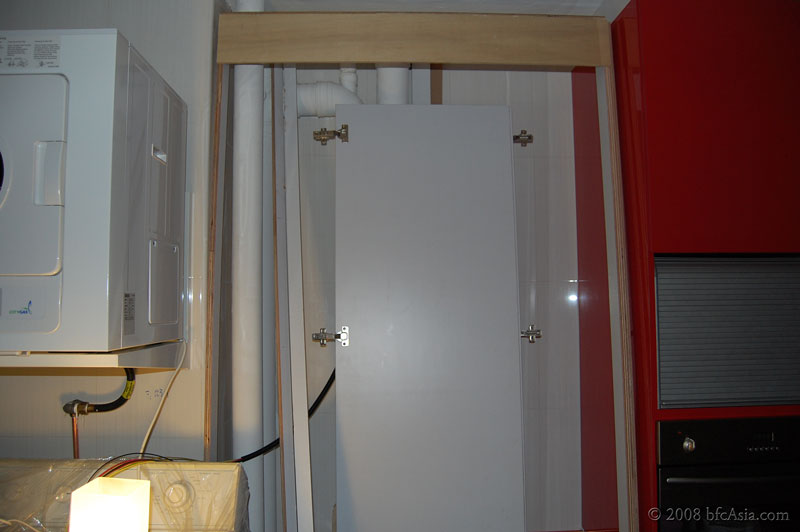
  • not forgetting the air-con drainage pipe that had to be laid out well before installation of the partition wall could begin.
And all the above had to be worked on in the small confines of the bathroom!

Not surprisingly, I had to be present at the job site most of the time to shore up the ID's lack of focus. I was there to ensure work was coordinated as several works were going on at the same time. Fortunately I had out-sourced

air-con supply and installation independently of the ID. I also dealt directly with the electrician, after getting the contact from the ID. And you know what? As you could see in the photos, these two works were the only ones completed in the bathroom, well ahead of the window replacement, partition, tiling or plumbing!

Lesson: If you expect good workmanship from the ID and his workers, you must be ready to step in when circumstances demanded of you. You can't let things be or the errors will compound and lead to disputes.


Related Posts
1 Workmanship: Hide Ugly Pipes - Kitchen
2 Workmanship: Hide Ugly Pipes - Bathroom/Toilet
3 Workmanship: Hiding Pipe-Accessible-HDB Guidelines

Workmanship Series
 1 Good Workmanship
 2 Workmanship: Dispute Resolution
 3 Workmanship: Walls & Floor
 4 Workmanship: Laminated Floor
 5 Workmanship: Electrical Work
 6 Workmanship: Air-Conditioner
 7 Workmanship: Doors & Architrave
 8 Workmanship: Gas Piping & Gas Dryer
 9 Workmanship: Kitchen Works
10 Workmanship: Hide Ugly Pipes
11 Workmanship: Windows
12 Workmanship: Plumbing

Workmanship: Gas Piping & Gas Dryer

Workmanship Series
 1 Good Workmanship
 2 Workmanship: Dispute Resolution
 3 Workmanship: Walls & Floor
 4 Workmanship: Laminated Floor
 5 Workmanship: Electrical Work
 6  Workmanship: Air-Conditioner
 7 Workmanship: Doors & Architrave
 8 Workmanship: Gas Piping & Gas Dryer
 9 Workmanship: Kitchen Works
10 Workmanship: Hide Ugly Pipes
11 Workmanship: Windows
12 Workmanship: Plumbing

Revamp of Original Post

On Fri 19-Apr-08 Citygas contractor Ng Chee Kong came to run the gas pipe and install the Rinnai clothes dryer I had ordered from the Citygas showroom.

Gas pipe was run on 19-Apr-08

Joints on gas pipe are prohibited inside storerooms. This is to prevent gas leaks that might occur and form an explosive mixture. Ng bent the gas pipe inside the store enclosure so that the pipe could run below the worktop. I didn't object although I could. Technically my store had no door, so ventilation was ample. Anyway, pipe joints present a leakage risk, so I didn't object. Besides, the pipe inside the store would be hidden by my metal cabinet later.

Pipe bent as joints are disallowed in store enclosure

Gas Connector to Rinnai burner hob

Gas pipe to Rinnai dryer

Ng lives in Johor and commutes to Singapore daily for his work. He told me he often reached home about midnight now, as everybody seemed to be renovating

their flat, probably because of the hot property market in recent years. He said many now preferred to use town gas instead of LPG for convenience and safety.

Safer than LPG? Yes, he said town gas is lighter than air and so leaks are less likely to cause an explosion because of diffusion, provided the kitchen windows are not shut and there is free circulation of air. LPG is heavier than air and leaks are more dangerous as the gas will collect faster and not dissipate as much into the air.

Gas pipe running below worktop

Most of the gas explosions reported in recent years involved LPG cylinders. Either the regulator had not been changed or the wrong tank was used. In a case 1-2 years ago when an old lady died from a gas explosion, the gas delivery guy was summoned by the CID and questioned at length. Luckily he was cleared because the surviving member of the family acknowledged his wife was at fault. She had insisted on buying a particular tank that was not meant for home use against the advice of the gas delivery man.

Checking bracket height for dryer

Owing to a spate of incidents involving gas explosions, the authorities have tightened regulations. Now all gas delivery man are tested before they could get a

license to deliver and install gas tanks. And it has become mandatory to change gas regulators every 5 years.

Golly, I was surprised because at my old place I had used the same Esso regulator for the past 20 years -- without any incident! Maybe I was lucky, but we always made it a point to turn off the gas knob on the regulator each night before we went to bed.

Gas Meter Installation

Ng fixed the gas meter today (Fri, May 2)

Ng came this morning (Fri, 2-May-08) to install the gas meter outside the flat, as well as to adjust the gas pipe near the Maytag washer. The gas pipe had to be cut and adjusted so that it would not get in the way of the door panel to be installed later. The door panels serve to box up and hide the ugly vertical pipes running from the ceiling to the floor.

Quality-certified gas hose

Some years ago a guy in his twenties died from gas inhalation when he was asleep. The gas had leaked from the kitchen and filled the bedroom. The windows were all shut in the flat as the air-conditioning was turned on. The father who slept in another bedroom was unaffected. Investigations revealed that during installation of the kitchen cabinets, a worker had accidentally punctured the gas pipe (hidden inside the wall) when he drilled the wall to hang a cabinet.

LESSON: Whether your gas pipe is concealed or not, always do a check when the kitchen cabinets are installed by the workers. Owners alway think the worker should know. Don't make this assumption. I have seen so many mistakes (detailed elsewhere on the blog) made by the plumber, the carpenter, the electrician, etc in the course of my flat renovation that I now regularly check the work -- before and after the workers had finished what they were doing.

And don't assume you are safe from leaks when the gas pipe has been installed and everything works properly. Once a while check your gas appliances for any leak --

drill your nose is a good detector for this.

Also, if your immediate neighbor is renovating the kitchen, check that the worker on the other side of the wall separating your two kitchens does not accidentally through the wall to inadvertently puncture your gas pipe! Don't be surprised -- although rare, that incident actually happened.

Workmanship Series
 1 Good Workmanship
 2 Workmanship: Dispute Resolution
 3 Workmanship: Walls & Floor
 4 Workmanship: Laminated Floor
 5 Workmanship: Electrical Work
 6  Workmanship: Air-Conditioner
 7 Workmanship: Doors & Architrave
 8 Workmanship: Gas Piping & Gas Dryer
 9 Workmanship: Kitchen Works
10 Workmanship: Hide Ugly Pipes
11 Workmanship: Windows
12 Workmanship: Plumbing

Workmanship: Hide Ugly Pipes

Related Posts
1 Workmanship: Hide Ugly Pipes - Kitchen
2 Workmanship: Hide Ugly Pipes - Bathroom/Toilet
3 Workmanship: Hiding Pipe-Accessible-HDB Guidelines
4  Workmanship: Plumbing

Preamble
HDB flats built in the 70's and early 80's focused only on the basics. Aesthetics if any were very much an afterthought. The kitchen in my flat showed that design approach: water, sewage and air pipes were all

over the place. All placed without a thought as to how they would affect the bathroom or kitchen layout.

Take for instance the service pipes. Which seemed all over the place. The bathroom has 6 pipes, 3 on the left side, another 3 huge ones on the right. While the kitchen has ~2 huge pipes. With another one in the toilet, I counted a total of nine. Yikes - 9!! I was astonished there were that many.

Kitchen: Ugly Pipes

"No problem," the ID remarked, ".. just cover up those pipes". As access has to be maintained to the pipes, he suggested making floor-to-ceiling doors to hide them. I felt the ID's idea was an overkill. "The placement of the fridge at the corner will hide the pipes," I countered.

"No problem, just cover up those pipes.."


Later I accepted his idea when I (erroneously) detected an occasional stench coming from the floor trap that was connected to the main discharge pipe. Boxing up the corner with floor-to-ceiling doors would mitigate the stench, I thought, before a more permanent solution was reached with the authorities on the stench issue. Let the Cover Up begin!


Hiding Ugly Kitchen Pipes
Taking measurements

How many carpenter uses a spirit level these days?
The right tool ensures quality workmanship

Mark of a professional: Ensuring verticals with spirit level

"Mind the dust.."

Expertly handling the electric jig saw

Ensuring tight tolerances

Result? Close & perfect Fit!

No shoddy work here!

Neat!

Completed Frame, Ready for Laminating

2 Laminate the Frame
Marking out a Thin Laminate Strip

The master at work

Laying the thin Laminate Strip

Close attention to detail

Specialist tool to cut the laminate cleanly

He does the crucial laminating process himself!

3 Fixing the Panel Doors
Ensuring electrical wiring aren't inadvertently covered up

Left Panel Door Fixed

Truly impressive job so far!

Fixing the Right Panel Door

Right Panel Door Fixed

Finishing touches with silicon gun

Completed Frame with Panel Door Opened

Pipes now fully covered up!

Viola! Completed Door Panels - no more ugly pipes

The GE Profile Fridge will front the Panel Doors

Mr Sia the lead carpenter told me he entered the trade at the age of 13. Now 31 years old, he had made

it all: tables, chairs, beds, wardrobes, kitchen cabinets. Even houses constructed from timber and wood planks upto two storeys high!

The guy was extremely hardworking, skipping lunch to continue the work. He was meticulous and took obvious pride in his craft, working a total of 4 (!!) hours to complete the frame and door. I was also impressed with his personality: never once did he raise his voice at the 17-yr old apprentice who was his understudy.

Both guys were Malaysians from Johor. In some perverse way I felt fortunate the Malaysian state had not prospered to the same extent as Singapore. Otherwise we would be paying much higher prices for excellent skills and talent from across the Causeway.


Related Posts
1 Workmanship: Hide Ugly Pipes - Kitchen
2 Workmanship: Hide Ugly Pipes - Bathroom/Toilet
3 Workmanship: Hiding Pipe-Accessible-HDB Guidelines
4 Workmanship-Plumbing

Workmanship Series
 1 Good Workmanship
 2 Workmanship: Dispute Resolution
 3 Workmanship: Walls & Floor
 4 Workmanship: Laminated Floor
 5 Workmanship: Electrical Work
 6  Workmanship: Air-Conditioner
 7 Workmanship: Doors & Architrave
 8 Workmanship: Gas Piping & Gas Dryer
 9 Workmanship: Kitchen Works
10 Workmanship: Hide Ugly Pipes
11 Workmanship: Windows
12 Workmanship: Plumbing
 

Copyright © 2008-2011 bfcAsia - All photos and contents are copyrighted material of shunFoto.com • All Rights Reserved