


1 Mistakes Made
2 Worktop-to-Hood Distance
3 Dish Drainer Cabinet
4 What Will We Do Differently?
5 Kitchen - Mistakes
6 Plumbing - Sinks
As the major works have been completed, except for carpentry works for the living, dining and bedrooms, it is useful to review and consider what changes if any we will make if we have to redo the entire flat renovation. Useful for our readers, we hope, and certainly useful for our next renovation.
The following is our initial list. As we experience living in the renovated flat, we may have more to add.
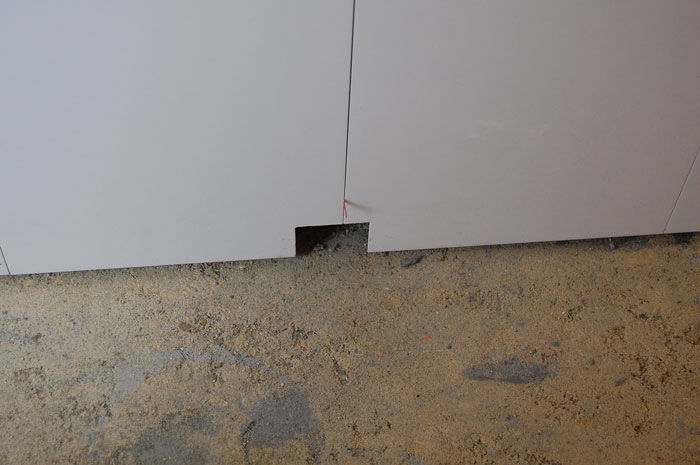
Water Outlet Holes
Instead of creating holes along the respective kerb side to channel waste water to a central outlet, as in our bathroom, toilet, and kitchen, we would insist that the tiler create floor traps directly on the respective floors, and cover each floor outlet with stainless steel traps. Why?
Debris left behind

Well, when water flows to a central outlet as in the bathroom or toilet through kerbside holes, the debris is not flushed out effectively. We had to sweep and mop up the debris that remained behind after the water had flowed out to the hole.
It is not difficult to understand why a floor outlet is more effective than a kerb
But if you pour the dirty water slowly and directly into a floor outlet, ALL the debris is flushed away with the water, leaving nothing behind, right?
I laid the blame squarely on the ID. He had failed to brief the tilers before they commence the wet works on what I had wanted. The ID had worked with them for several years and had trusted their judgment.
Besides, kerbside traps had grown in popularity with owners in recent years. Indeed they looked prettier than ugly floor traps. Everyone seemed to be asking the ID/tilers for that. The tilers had assumed I would also want that and had gone ahead without asking the ID.
When the ID and I visited the job site and saw the newly screeded kitchen floor ready for tiling, it was too late to change. The waterproof membrane had been laid and the cement had already dried.
OK, lesson learnt: I will be more assertive next time, and made sure the ID briefs the tilers before they commence the wet works.
Outlet hole in toilet
Relocate existing bathroom door to create kitchen space
Close up bathroom existing door and create new door at dining room wall. The closed-up bathroom door will create more space in the kitchen for cabinets.
Polish granite floor after tiling
Ask tiler to polish granite floor after tiling, especially to smoothen edges between adjoining granite tiles. This is particularly important if the granite tiles are not perfectly laid as any slight imperfection between two adjoining granite floor tiles can be felt underfoot.
Electrical works
Do electrical wiring and painting immediately after wet works. Without electrical wiring, lighting is not available when natural light condition becomes dim.
Obviously the electrical wiring must be completed before you install the air-con.
Windows
Do windows after hacking and before wall tiling.
If you wish to install ventilation fans in toilets and bathrooms, it is essential you contract for window works early in your renovation to allow time for contractor to get HDB approval.
Plastering works
Get walls screeded, plastered and smoothened. Do same for ceiling if you don't install false ceiling. Will probably screed smooth and plaster even if I don't install false ceiling. Might as well do it once-and-for-all, in case I decide to install false ceiling in future.
Plumbing and gas works
Ensure plumbing is well-coordinated and do that after hacking, before wall tiling. This is because tilers have better skills in cutting tiles to fit the piping. Plumbers simply don't drill or cut tiles as well as the tilers.
Likewise, get the gas connected early before doing the kitchen cabinets.
Get the sanitary dealer to create and open "holes" required for soap dispensers, etc before delivery of the kitchen sink or wash basin. Otherwise you will be in a no-win situation if your plumber refuses to take responsibility if he damages the sink when drilling the hole in the sink for the soap dispenser.
Door framing and doors
Do door frames after hacking and before tiling, and coordinate with the tilers. Don't forget to do main entrance door frame as well before floor is tiled.
Painting
Do painting after electrical wiring and wall smoothening and plastering have been
Kitchen cabinet
Probably get one of the solid wood worktop from Ikea.
Get carpenter to provide wood dividers along the lines of Blum's Orgaline organizer or Ikea's Ratiionell dividers and inserts for drawers. Reason? Our drawers were made to fit our kitchen layout, with widths of 73cm and 62cm, not standard widths for the Orgaline or Rationell series. Wood dividers for drawers are relatively easy and straight-forward to D-I-Y.
Probably get the carpenter to fix translucent plastic panels for the wall cabinet pelmet in place of white laminate plywood. Then fix energy-saving light tubes or bulbs inside the pelmet to illuminate the kitchen at night when the main kitchen light is switched off. Not only will the illuminated panels produce a soothing and pretty lighting effect, there is also no need to turn on and off the main kitchen light whenever any family member enters the kitchen for a short while. Which is what we do all the time!
Ensure the ID works out the cabinet design with the carpenter before the cabinets are made. Example: the carpenter was unable to fix removable baskets under our kitchen sink because the ID had assumed the carpenter could simply install the basket runners after making the sink cabinet. By the time the ID realized that was not possible without first removing the sink, it was too late.
We will get the Blum's Aventos bi-fold lift system for the dish drainer instead of the present 60 deg lift-up glass panel. That is to preempt any possibility of the panel getting in the way of taller guests who use the kitchen sink, the reason why we originally specified roller door for the disk drainer unit. As it is, the glass panel clears our 175cm height with inches to spare when opening or closing, but will hit taller guests.
Oh, also to research on another laminate brand to use for the cabinets. Definitely we will not use EPL Laminate (TAK) again, as we think it is prone to abrasions (read our earlier post).
We will also take more time to determine drawer depths for our kitchen, to ensure optimal usage of limited drawer space. Most IDs will speak in terms of outside dimensions, which is appropriate for design and layout but not useful when talking about functionality. An 7-inch drawer height for instance gives an internal depth of only 3.75-inches, after allowing for framework and internal braces.
Our glass splash back was installed after the cabinets had been installed. That would be fine if there were
That was a difficult task. The glass panel was made to measure, and had to fit exactly onto the back wall. So there was zero leeway in moving the glass panel during installation, and the installers did not bring any plastic sheet to protect the side cabinet.
Somehow the installers managed to put up the glass panel, leaving only a 5" vertical scuff mark on the laminate, but no scratch.
We accepted the scuff mark, but wondered if the glass panel could have been installed before putting up the tall oven cabinet? That was a possibility, but would have entailed more planning and more work. Putting up a plastic protective sheet on the side laminate would be a simpler and better way to prevent scratches or scuff marks on the laminate, and we would do it that way in future.
Finally, the all-important question - would I change the ID? Well, that is the subject of another post!!

Related Posts
1 Mistakes Made
2 Worktop-to-Hood Distance
3 Dish Drainer Cabinet
4 What Will We Do Differently?
5 Kitchen - Mistakes
6 Plumbing - Sinks


6 comments:
Hi!
Thanks for sharing your experiences it's very helpful for a new homeowner like me!
Just to check, what exactly are EPL Laminates? Are they the same as Lamitak?
Thanks!
hi edel, I was told they're the same, but i'm not sure myself. Speaking of which, i think i will try formica in future.
Formica has been around since my parents' generation, and it is a tough laminate, if I recall my childhood. Its popularity fizzled out bcoz newer and more attractive laminates made the scene while formica remained the same.
Recently, however, I came across the new range of formica, and was surprised to see a very attractive lime-colored formica with dimpled dots !! Ask yr id or go around to check this out. I think you'll agree with me the new range is beautiful - though I wonder if its toughness will remain?
greencaol
Hi, I don't understand the part about the water outlet holes. You mean the tiler can arbitrarily create a drainage hole? Also wouldn't it be bad if debris flowed into the drainage and get choked?
Yes, dk, before the reno started i told the id clearly i wanted stainless steel for the floor waste trap. However, by the time i went to the flat and saw the id / tiler already did the floor waterproofing, it was too late to do anything abt the waste-trap other than to hack the floor all over again. Which damages the waterproofing layer. The id was pathetic, and said sorry many times, so what could i do? i relented and he assured me it would look nicer, more aesthetic, blah, blah. Beauty was not what i wanted, i wanted practicality! In the end i had to go along, or the schedule will be set back by a couple of weeks.
By then I had been scheduled to move into the flat in 1 week's time boz i had over-extended moving from my old apt by 1 month already, and the 3-month period given had expired! So, yes, the careless id / tiler did me in.
Now i'm paying the mistake cost - my drainage is blocked and i hv to solve it at much cost.
So you're right, never compromise or be lenient with the id, if it concerns something as impt as the floor trap, if he has to do it all lover at his cost, insist on it n don't be soft-hearted.
Thanks for your quick reply, but I still don't understand what an outlet hole is. I'll be starting reno in my new hdb flat so there's already plastic floor traps installed in the kitchen and toilets. We might have to build a cabinet base over the kitchen's drainage so will need an outlet channel.
How does your toilet outlet work? I saw in your other posts they put a pipe through the plastic trap?
hi dk,
the outlet hole refers to the hole cut in the partition wall so the bathroom water can flow into the plastic floor trap inside the partition wall.
My advice is never to cover the existing plastic floor trap. Even if yr want to build a cabinet base over the existing drainage (i assume you mean the waste trap) pl don't do it.
I regret very much now my situation bcoz debris gets stuck and problems every few weeks or so.
hope this helps.
cheers
Post a Comment
Hi, thanks for your comments. While I will strive to answer all your queries please be patient as I am overwhelmed at work.
Thanks for your understanding,
GreenCoal