1 Mistakes Made
2 Worktop-to-Hood Distance
3 Dish Drainer Cabinet
4 What Will We Do Differently?
5 Kitchen - Mistakes
6 Plumbing - Sinks
Plumbers -- like their Citygas counterpart -- seem to be in short supply these days.
After waiting several weeks, with no-shows on two occasions -- a plumber team of 3 young guys finally showed up at my door on Mon, May 5th. Guess what? It was 4.45 pm when they showed up!
At that hour most workers would be packing up to go home. Dusk was closing in, my flat had no ceiling light, and I wondered how they would manage in my dim kitchen. Peeved, but somewhat relieved they finally came, I agreed to let them in.
After all, though the kitchen cabinets and worktops had been completed weeks ago, my kitchen had lain idle. What good is a kitchen without the sink?
The plumbers seemed well-briefed on the jobs required.
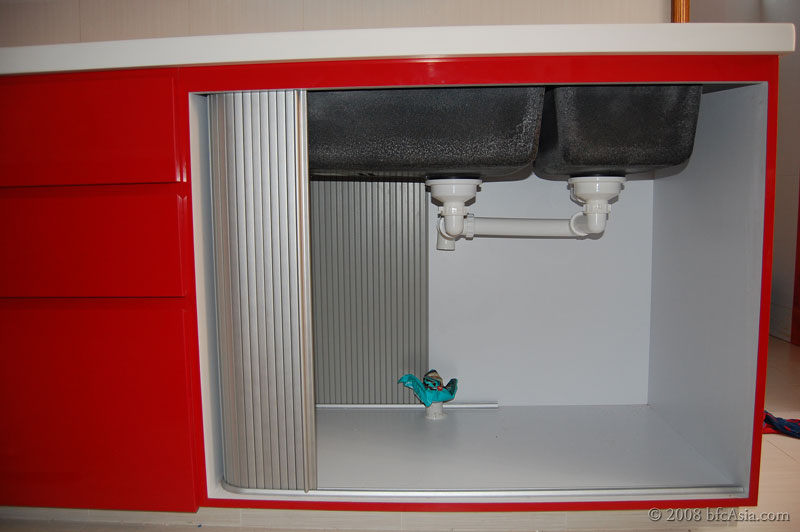
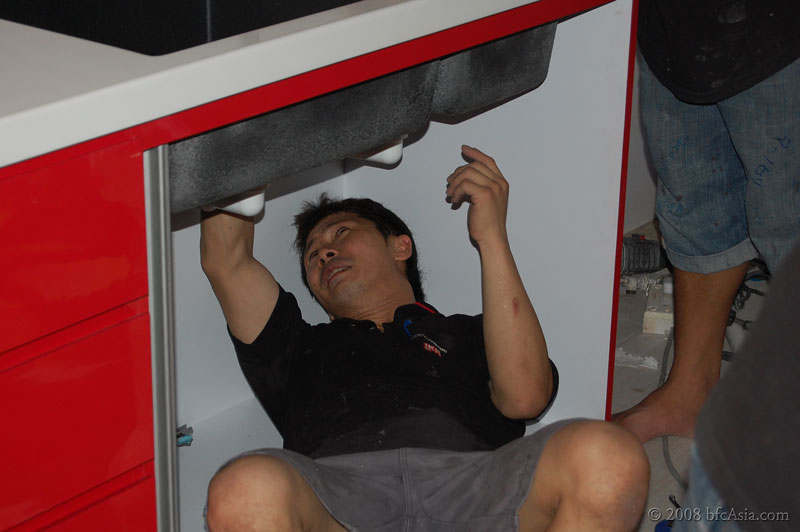
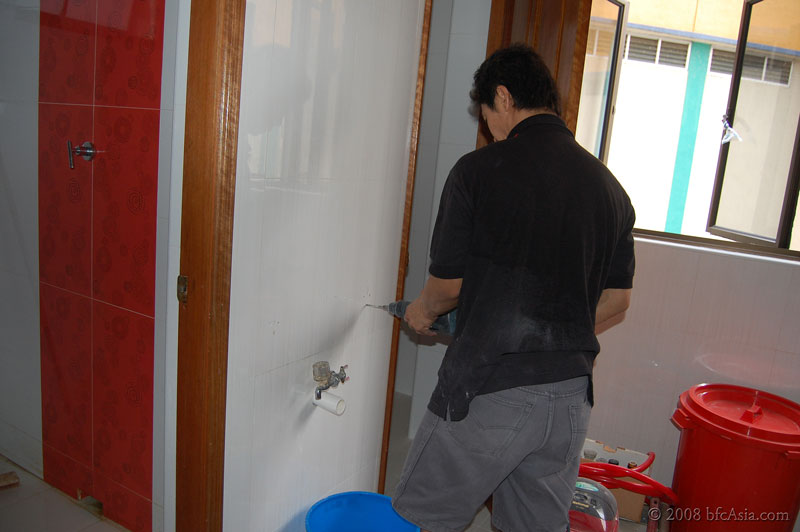
Plumbing the kitchen sink

Despite that, I decided to butt in now and then to ensure they do their job properly. I had seen enough of the previous plumber (see my earlier posts) mucking up my rain shower piping and toilet bowl installation to let the plumbers carry on as usual. Fortunately these guys did not resent my intrusions. They took the cue and sought my placement instructions when they had to install a particular accessory or fitting.
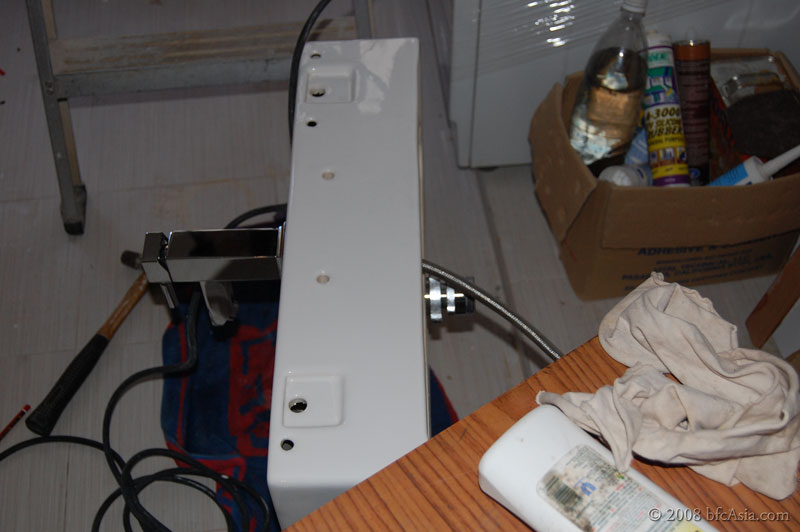
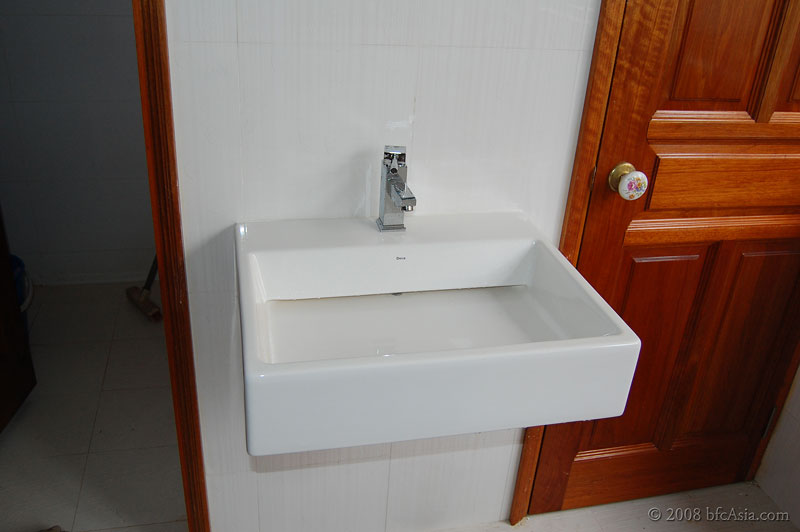
Installing the Wash Basin
The apartment came with a single bathroom and a separate toilet, both of which were too tiny for a wash basin inside. Designed in the stark 70's style -- basic, ugly
It was also not possible to re-orient or move the squat toilet bowl needed to give a single bathroom-cum-toilet enclosure, due to the sewage pipe on the floor connecting to the ceiling of the apartment unit below. Any changes to the sewage pipe would affect the flat below.
With no space inside either the bathroom or the toilet for a wash basin, the only viable location was on the wall outside between the bathroom and toilet. To mitigate the very visible and open location of the wash basin, we decided on a designer basin hung on the wall, complemented by a full-height wall mirror and glass shelving.
We chose a basin tap that is squarish in design to fit in with the rectangular basin.
Deca Wash Basin

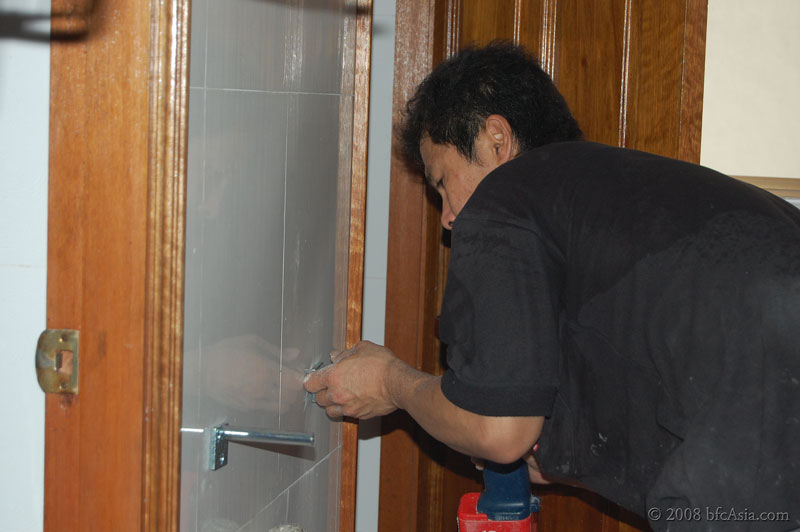
Installing the Basin Tap and Waste Fitting
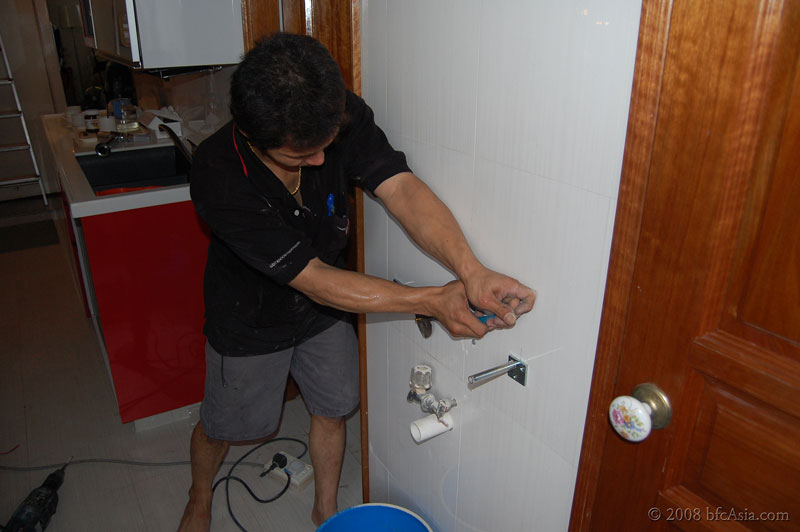
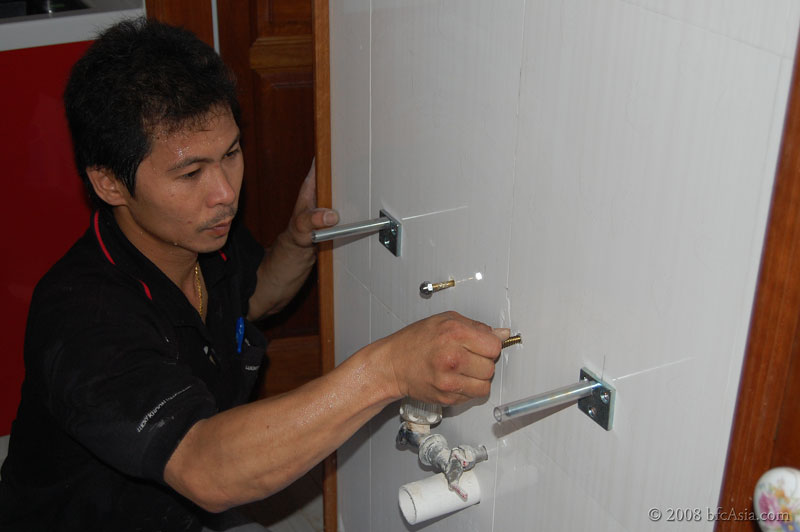
The wall anchor bolts and sink bracket support

Drilling the bracket support

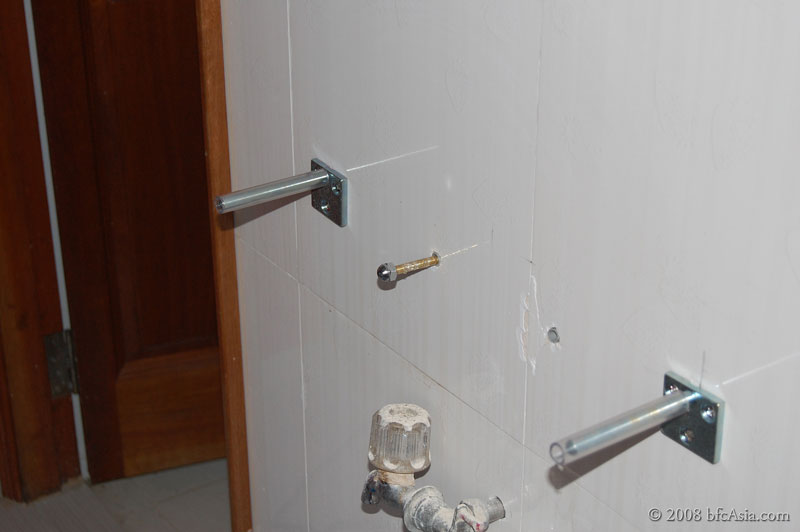
Fixing the wall anchor bolt

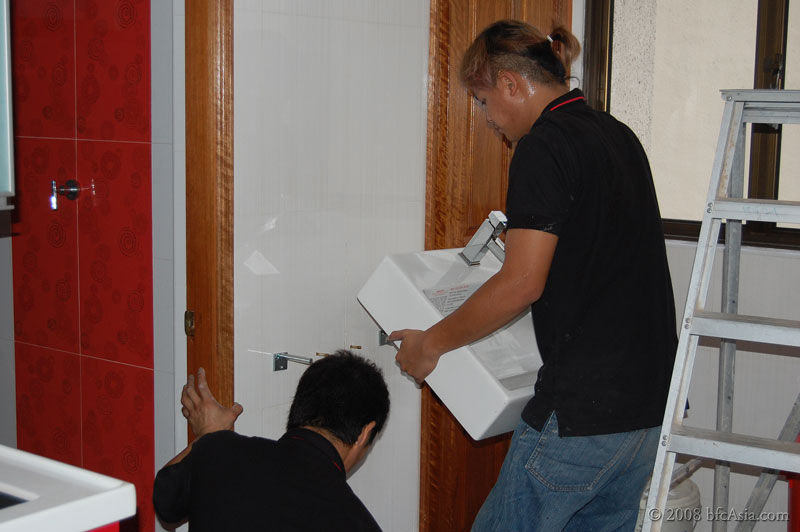
Lifting the sink onto the supports
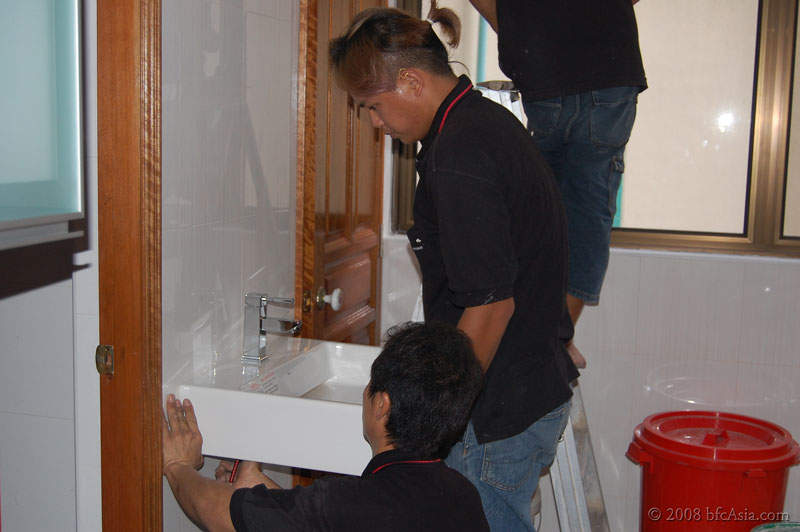
Tightening the nut on the wall anchor bolt beneath the sink
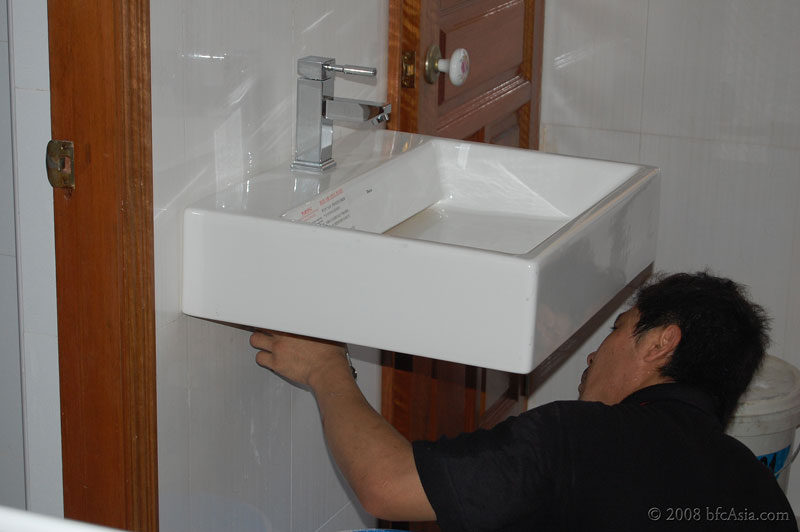
Wall-hung Deca Wash Basin Model L87S S$350 and Basin Tap E321 S$80, both before 7% GST, from Adamas Bathroom PL
Mistakes Made
The DECA Wash Basin Model L87S does not have the usual stainless steel pop-up waste trap. Instead, the sink has a sloping base that is slightly angled to allow water to flow out to an outlet hole hidden at the back of the basin.
Obviously the angled base in the basin meant the plumber had to be extra mindful and ensure that the sink is installed perpendicular to the wall. He was probably
When I turned on the basin tap, I found the sink does not discharge the water to the back completely, but left a small puddle behind.
Further, the basin came with 2 hidden fittings holes precut on each side of the main tap hole. A slight but sharp knock on the precut porcelain will open up the hole to allow fittings to be fixed. The plumber however did not open up the fitting hole. He said he was afraid he might damage the sink if he did not knock out the precut porcelain correctly.
Therefore I was left with a soap dispenser that is not fixed on the wash basin.
LESSON LEARNT:
It was easy to overlook that this wash basin has a slope base and should be installed using a spirit level to check the basin is fixed strictly perpendicular to the wall. Make sure your plumber is aware of that if you choose to buy such a basin.
After looking at the photos of the installation, I realized the downward angle of the basin could be corrected, simply by inserting small pieces of rubber disc at the bottom edge below each anchor screw, so that the basin is slightly angled upwards to correct and level the basin horizontally. The adjustment will maintain the base slope at the correct angle and allow water to be quickly and completed discharged from the wash basin.
The ID noted the suggestion and will ask the plumber to make the adjustment. Without the correct tools it would be impossible to do the adjustment myself.
Second, always get the sanitary ware dealer to deliver the purchased sink item with the fitting hole for additional fittings opened. This way the dealer is responsible if the basin or sink is damaged in the process of opening the fitting hole. Otherwise your plumber will refuse to open the precut fitting hole fearing he would have to bear the cost if he damages the sink.
1 Mistakes Made
2 Worktop-to-Hood Distance
3 Dish Drainer Cabinet
4 What Will We Do Differently?
5 Kitchen - Mistakes
6 Plumbing - Sinks


0 comments:
Post a Comment
Hi, thanks for your comments. While I will strive to answer all your queries please be patient as I am overwhelmed at work.
Thanks for your understanding,
GreenCoal