Rinnai Inner Flame Technology

Related Posts
1 Using the Rinnai Burner Hob
2 Rinnai Inner Flame Technology
3 Review:Rinnai 2-Burner Hob RB-2CG

Source: www.appliancedesign.com, October 28, 2003

Ignition/Burner Control: Whirly Burn

Rinnai gas cooktop (right) incorporates recessed, inner-flame burners into a Schott Ceran glass-ceramic panel to create an appliance that provides high-performance

cooking capabilities with convenience and an easy-to-clean surface. A vortex of flame (bottom) is created by angling the burner ports on the horizontal plane. The swirling flame aids combustion by helping to draw air. The unique flame also assists in distributing heat evenly across the bottom of the pan.

Inner-flame burner improves heat transfer efficiency.


Cutaway view of Rinnai’s inner-flame burner shows how the individual flames coalesce and rise toward the center. When the cone of flame hits the bottom of a pan, it flows outward across the bottom to ensure even heat distribution and efficient heat transfer.

o o o

Appliance-maker Rinnai Corp., Nagoya, Japan, has turned burner design completely around with its inner-flame burner. Instead of shooting flames outward from the burner perimeter, as with a conventional burner, Rinnai’s inner-flame burner is ported so that flames shoot inward toward the center.

The purpose of the unusual design is to create a coherent, unified flame that rises under the center of a pan, then flows outward, bathing the entire bottom of the pan in flame. This approach heats the pan with greater uniformity and improves the efficiency of heat transfer from the flame to pan.

In addition to aiming the ports inward, two other design factors assist in shaping the flame. One is that the burner sits slightly below the surface of the cooktop, helping the individual flames to coalesce toward the center as they rise through a hole in the cooktop surface. Secondly, and more importantly, the burner ports are angled slightly on the horizontal plane. (See top view in lower photo.)

The effect of the flames shooting out an angle is to create a fiery vortex. The swirling flame is meant to accomplish two things. One, it assists in driving the flame outward across the bottom of the pan, helping to evenly bathe the pan bottom with flame. Two, the vortex creates a pressure drop that assists in drawing air in for combustion.

The large version of the inner-flame burner has 24 ports and delivers a maximum output of 15,872 BTUs/hr. The burners are lit by direct-spark ignition.

Rinnai originally intended the inner-flame burner to be installed into a metal panel cooktop. Instead, Rinnai began working with Schott Corp. to find a way to implement the novel burner into a Ceran surface panel.

Schott’s technical support staff worked closely with Rinnai to address a number of issues. One of the biggest was concern over how to protect the burner and other

components from spills going down the hole. Another big concern was protecting the Ceran from direct exposure to excessive heat. Schott’s engineers devised a special burner sleeve to solve these potential problems. Schott also assisted with the design of the cooktop’s framing and a ventilation grid in the cooktop which serves two purposes: one, to provide primary air supply for the burners and, two, to vent exhaust from a fish griller beneath the cooktop.

Rinnai incorporated many of Schott’s design ideas in the final production model of the appliance.

The result was a unique appliance that successfully combines a novel, high-performance burner design and a convenient, easy-to-clean cooktop surface.

Schott says that the popularity of Ceran is growing in the Japanese market because the material’s cleanability is a big advantage in a region where cooking methods involve a lot of frying.

Rinnai says the cooktop with the inner-flame burners has been adopted by many Japanese cooking schools because the burner system is amenable to cooking different regional styles of meals, including Japanese, Chinese and French.

At this point in time, Rinnai has no plans to license the inner-flame burner technology to other appliance manufacturers. — R.J.B.

o o o


We found Fujioh Japan also makes gas hobs with inner flame burners. Is it the same as Rinnai's and did Rinnai license the technology to Fujioh?


Related Posts
1 Using the Rinnai Burner Hob
2 Rinnai Inner Flame Technology
3 Review:Rinnai 2-Burner Hob RB-2CG

Blanco Silgranit®

Extracted from Blanco website:

FEEL THE STRENGTH

BLANCO pioneered the concept of hard composite sinks in 1980, using some of the toughest materials available from Mother Nature. More than just a coated surface, solid material throughout the entire sink ensures consistent color and durability year after year.

The proprietary formula for Silgranit® has been perfected in our own high-tech factories, utilizing precision chemical laboratories and computer controlled mixing machinery to ensure uniform quality.

BLANCO’s Silgranit® sink facility has been awarded the coveted ISO 9001 designation from the Geneva, Switzerland based International Standards Organization for “quality assurance in design, development, production, installation and service.”

SILGRANIT® sinks feature the touch and feel of natural stone. Unlike cast iron and soft composite materials, SILGRANIT® combines the best performing ingredients to produce kitchen sinks that are durable, stain resistant, easy-to-clean, and available in a collection of dynamic designs including our popular BLANCODIAMOND™ Series.

SILGRANIT® contains 80% natural granite, mixed with acrylic resin, which gives the sink its resilience and ability to be molded into striking designs. Compare Silgranit® to cast iron and soft composite sinks:

* Heat resistant to 536°F.

* Resistant to extreme changes between hot and cold.

* Hard, durable surface is resistant to chipping.

* Unaffected by acids and alkalis typically used in the home.

* Moldable into an unusual variety of striking designs and functional features.

* Compare our innovative angles, large capacity, and extra deep bowls.

* Environmentally friendly, with recyclable raw materials.

* Resilient surface is less likely to break dinnerware and fine crystal.

* Extremely hygienic. Does not absorb odors or bacteria.

* Non-porous design resists most household stains, including coffee, tea, mustard, beet juice, red wine, hair dyes.

* Regular cleaning of BLANCO Silgranit® sinks is easy with a scrub pad such as Scotch Brite and any non-abrasive cleaner, including our own BLANCOCLEAN. Stubborn stains, caused by prolonged contact, can be removed with bleach and water, baking soda, or vinegar.

As tough and durable as they are good looking, all SILGRANIT® sinks are backed by our no-hassle, limited lifetime warranty. SILGRANIT® is the ideal solution for the most frequently used area in your kitchen.


INTRODUCING TRUE UNDERMOUNT DESIGNS

BLANCO Silgranit® sinks are now available for true undermount installations in 1-3/4 bowl, double bowl, and single bowl designs. Sink rims have been specially designed to allow for easy positioning and installation of the faucet, without sink interference, for a sleek, contemporary look.

o o o

IMPORTANT NOTE

When installing the sink, ensure that grout does not fall into the Silgranit sink. Seemed some people have experience a dull "haze" covering on the sink as a result, which is difficult to remove. However, the dull film coating can be successfully removed, as some have shared on forums:

RE: Blanco Silgranit Sink


* Posted by sundodger (My Page) on
Tue, Aug 22, 06 at 3:31

I'm a bit late on this follow-up, but I figured I'd share my experience. Story time, story time, gather 'round.

I have a black Silgranit sink, and recently grouted my tile backsplash. When it was all done, the backsplash looked good, the sink, not so much. I didn't know about how the grout can leave a haze on the Silgranit finish until after seeing it happen to my sink (and reading this thread to see it's a known issue).

I got in touch with the distributor, who told me that she had accompanied a Blanco rep on a "house call". To remove a similar haze, the rep had used CLR and a regular green Scotch-Brite scouring pad.

So it was now my turn. Bottle of CLR, and instead of the green "heavy duty" pad, I went with the blue "no scratch" pad. Poured some CLR into a glass container, dunked the pad, and scoured the sink rather lightly. About 2-3 minutes later, rinsed the sink and dried it. The haze was still there. Second try, this time I put some muscle into it, scouring in circles. Again, after about 2-3 minutes, rinsed and dried. This time, the haze was mostly gone. For grins, I did a final, third pass with the CLR, scrub, and rinse. After the rinse, I made sure all the CLR was gone by going over the sink with soap and water. It works!

Now, I don't know if it's fully recovered, but I think it's darn close. I also have a Silgranit bar sink that I never use, and that sink seems to be blacker, and the water pools better. That may just be a coat of oil or something left over from manufacturing (did I mention I never use my bar sink?). But it's definitely looking nice again. No more ugly haze.

Kitchen: Food Preparation & Cleaning Zone

Workmanship: Kitchen Works
1 Kitchen: Cooking & Food Storage Zone
2 Kitchen: Microwave Oven Cabinet
3 Kitchen: The Sink Unit
4 Kitchen: Food Preparation & Cleaning Zone
5 Kitchen: Worktop & Kitchen Sink
6 Kitchen: Splashback

The Cleaning Zone in my kitchen is basically the Dish Drainer Unit and the kitchen sink below it. Beneath the sink is storage space for dish cleaners, and a drying-cum-storage rack for woks, pots and pans. The Food Preparation Zone is the counter space below the Roller Shelf Unit, and includes pull-out deep drawer cabinets for storage of cutlery, plates, appliances and gadgets used in food preparation.

Preparing the Dish Drainer Unit

Fixing the Dish Drainer Unit

The Roller Shelving Unit

Corners cut for Electric Cables

Fixing the Roller Shelving Unit

Making final adjustments

Realigning the Dish Drainer Unit

Ensuring good alignment

Clamp before drilling screw holes

Completed Roller Shelf Unit & Dish Drainer Unit


Workmanship: Kitchen Works
1 Kitchen: Cooking & Food Storage Zone
2 Kitchen: Microwave Oven Cabinet
3 Kitchen: The Sink Unit
4 Kitchen: Food Preparation & Cleaning Zone
5 Kitchen: Worktop & Kitchen Sink
6 Kitchen: Splashback

The Sink Unit

Workmanship: Kitchen Works
1 Kitchen: Cooking & Food Storage Zone
2 Kitchen: Microwave Oven Cabinet
3 Kitchen: The Sink Unit
4 Kitchen: Food Preparation & Cleaning Zone
5 Kitchen: Worktop & Kitchen Sink
6 Kitchen: Kitchen Splashback

Completed Food Prep Unit & Sink Unit

Making the Cutout for the Sink

Closeup of Plywood Cutout for Sink

Sink fitted into plywood top

Making template for acrylic worktop

Closeup of template corner

Stapling template strips together

Finished templates now go to workshop


Workmanship: Kitchen Works
1 Kitchen: Cooking & Food Storage Zone
2 Kitchen: Microwave Oven Cabinet
3 Kitchen: The Sink Unit
4 Kitchen: Food Preparation & Cleaning Zone
5 Kitchen: Worktop & Kitchen Sink
6 Kitchen: Kitchen Splashback

Kitchen: Microwave Oven Cabinet

Workmanship: Kitchen Works
1 Kitchen: Cooking & Food Storage Zone
2 Kitchen: Microwave Oven Cabinet
3 Kitchen: The Sink Unit
4 Kitchen: Food Preparation & Cleaning Zone
5 Kitchen: Worktop & Kitchen Sink
6 Kitchen: Splashback

Microwave Oven Cabinet with Roller Door
The workmanship and finish of the Malaysian carpenters on the kitchen cabinets was surprisingly good, on par with designer kitchens displayed at posh showrooms in town.

An example is the microwave cabinet. Care and technical competence were displayed in the cabinetry work for the microwave oven. The Malaysians, probably on the ID's directions, had applied the same laminate to the cabinet interior as the exterior, to blend in with the overall design and look when the cabinet roller door is open.

Interior blends in aesthetically with the exterior:

Where the Malaysians fell short of was in the area of foresight and meticulous attention to detail. In other words, the workmanship was excellent but not perfect. For instance, after Koh had fixed the electrical switch for the microwave oven, I decided to place the oven into the cabinet to try the switch.

And we got stuck: we could slide in the microwave oven but could not plug in the microwave oven. The electrical plug was in the way. The carpenters had not made sufficient allowance for the oven's plug!

I then asked Koh to re-install the single socket rotated 90 deg, so that the plug would not get in the way of the oven. We were then able to slide the oven into the cabinet -- fortunately!

Tight allowance between socket and oven

Possibly the ID or the carpenters had forgotten the roller door would take up space inside the cabinet. The height of the cabinet should have been raised by 1-inch to provide clearance for the socket+plug combination.

The oversight happened because mine was a non-standard requirement: I had asked the ID to fix a roller door on the microwave oven compartment. That way we could use the compartment for storage if we need additional storage space in our small kitchen in future. We would then place the microwave oven on the worktop instead.

The roller door could remain open for easy access to the microwave oven, and closed if the compartment is used as a storage space. Neat dual function idea, isn't it?

Workmanship: Kitchen Works
1 Kitchen: Cooking & Food Storage Zone
2 Kitchen: Microwave Oven Cabinet
3 Kitchen: The Sink Unit
4 Kitchen: Food Preparation & Cleaning Zone
5 Kitchen: Worktop & Kitchen Sink
6 Kitchen: Splashback

How to Rid Smell in Toilet

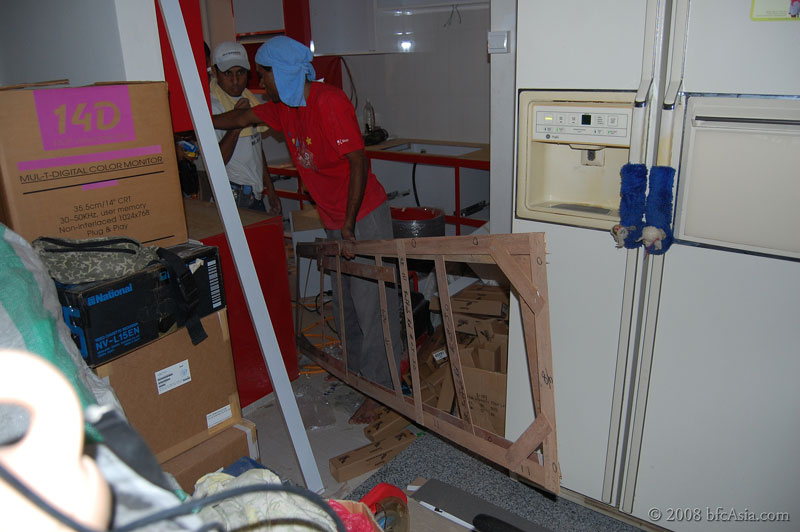
Today a new plumber came to re-install my toilet bowl.

I had complained of a stench coming from the toilet bowl, particularly from 7-8 AM and around 7-8 pm, coinciding with the time when most residents on the upper floors use their toilet.

Obviously something was very wrong with the installation.


When the first plumber came several weeks ago to install the toilet bowl, I had asked why he did not apply silicone sealant around the rim of the pan collar, before he set down the toilet bowl over the collar.

The pan collar is the piece of plastic that connects the toilet bowl to the sewage pipe on the toilet floor. I had felt that a silicone seal would ensure that no smell escapes from the sewage pipe into the toilet.

The plumber said nonchalantly "nobody does that". I left it at that. He is the plumber and should know better than a layman like me, I thought to myself. How I wished I had been more assertive!

After installation, the toilet smelled for several days. Seemed that each time someone on the upper floors flushed the toilet, the smell would escape into my toilet.

I brought the matter to my ID's attention, and requested another plumber to re-install the toilet bowl. I had lost confidence in the first plumber.

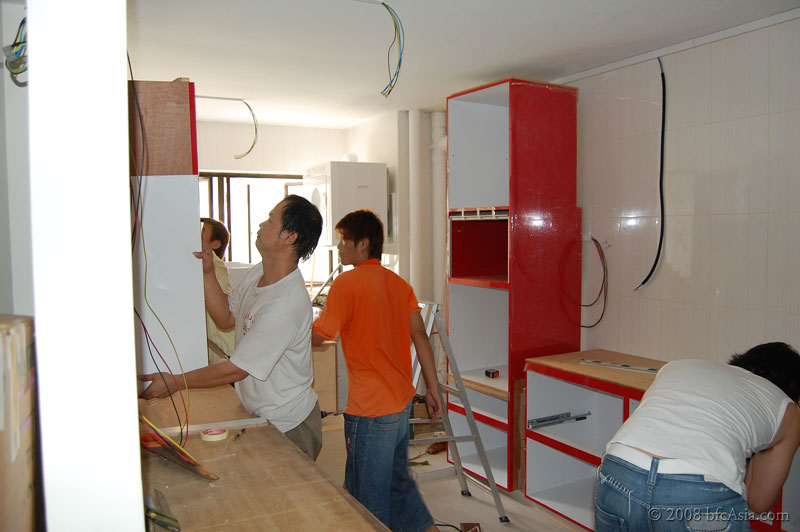
After a lapse of several weeks, the new plumber came.

He was concerned he might chip the spanking new toilet bowl in the removal process. That was the ID's concern, not his, I told him, and in any event I could not live with a smelly toilet! He only needed to exercise care not to cause any chipping, that was all.

I told him what I had suspected to be the cause of the smelly toilet: no silicone seal on the pan collar. He agreed as much, though he was aware some plumbers usually do not apply any silicone to the pan collar and no one had complained of any stench.

He noted I had my air vent pipe removed. He said he had read in the papers that some residents had also complained of a stench in their toilets after the apartment block had been upgraded, particularly where the cast iron sewage pipe had been replaced with a uPVC pipe, so probably the problem had something to do with the removal of the air vent pipe.

The logic escaped me, so I was not persuaded.

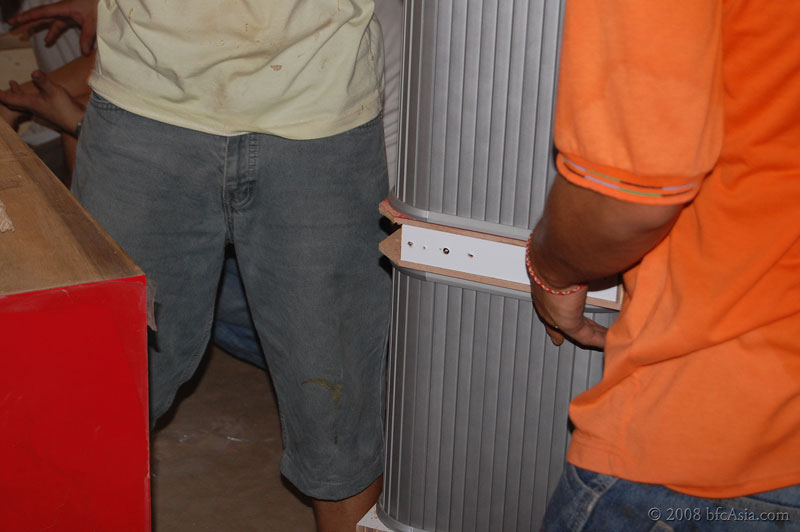
The plumber got down to work. He managed to unseat the toilet bowl without damaging it. Well done!

To our surprise we found that the toilet bowl had two rectangular openings measuring about 3-inches square on the back of the toilet bowl chamber.

Ah-ha, so that explained why there was a stench: as there was no silicone seal on the pan collar, the smell escaped from the sewage pipe into the toilet bowl chamber, then through the rectangular openings at the toilet bowl base into the toilet room itself.

....

This is what a pan collar looks like. This one has an 1-inch offset:

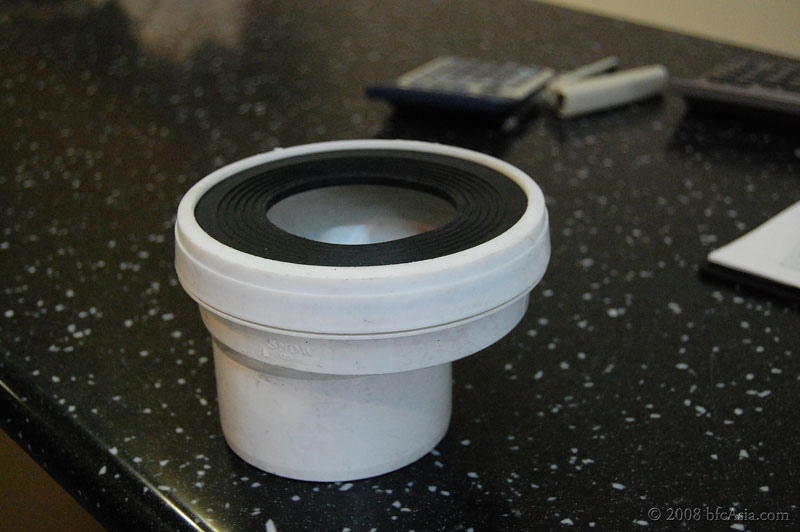
Sewage pipe outlet - bad odor if inserted pan collar is not sealed with silicone

Thirty minutes later, the toilet bowl was seated back onto the pan collar, now with silicone sealant applied around the rim, as well as on the rubber ring, as the plumber felt that perhaps the toilet bowl outlet pipe was a bit small, resulting in the rubber ring making a less-than-perfect seal around the outlet pipe.

The improvement was quite immediate: the smell was perceptively much reduced!

It would probably take a few more days to confirm that the smelly problem has indeed been solved.

ADDENDUM:

It worked!! I was delighted this morning because the toilet for the first time did not smell.


However, sometimes when someone flushes his toilet on the upper floors, pressure is created that can suck water from your toilet bowl into the sewage pipe. When that happens the water level in the bowl will drop so drastically that it leaves a gap in the "S" bend, allowing foul air from the sewage pipe to seep into your toilet.

So if your toilet smells bad, first check there is sufficient water in the toilet bowl. No, not in the cistern but in the toilet bowl itself. This water in the bowl acts as a barrier to foul air from the sewage pipe, and prevents any foul smell entering the toilet through the sewage pipe.

If the water level in the toilet bowl is high enough above the "S" bend, then you should suspect an unsealed pan collar as the culprit for the stink.

Now, what about the report that some people complained their toilets smelled after the HDB upgrading exercise?

I believe that had nothing to do with the replacement of the cast-iron sewage pipe nor with the removal of the air vent pipe. The reason for the stink was very likely due to the bad installation of their toilet bowl. It was likely cracks developed at the cement base of the toilet bowl when the sewage pipe was changed, and because the pan collar of the toilet was not properly sealed, foul air escaped from the sewage system into the toilet.

LESSON LEARNT:
Ensure your plumber applies a silicone seal around the pan collar when he first installs the toilet bowl. That is the proper and correct procedure to install the toilet bowl. In the west plumbers use a wax gasket to ensure an airtight seal between the toilet bowl and the sewage pipe.

Readers will recall that during the 2003 SARS epidermic, it was reported in Hongkong the virus spread from one floor to the floor below via the sewage pipe. Although details were not divulged in the press report, I suspect the leak was caused by improper toilet bowl installation.

When someone flushes his toilet on the upper floors, obviously the foul air carrying viruses and bacteria will be "flushed" into the toilet on the floor below through the unsealed pan collar. Hence the stink.

I would probably have remained ignorant today of how unsanitary my toilet installation was had I not experienced the stinky toilet bowl problem.

Now, even if you have a toilet bowl that is completely sealed so that no air could escape from the chamber once the toilet is cemented to the floor, it is still advisable to ask your plumber to apply silicone sealant to the pan collar. Otherwise you risk allowing viruses to enter your toilet each time someone on the upper floors flushes the toilet.

As we know, cement is porous and over time will develop cracks so that most people will find their toilets stink after some years, especially for those with unsealed pan collars. You can prevent the stink by getting your plumber to apply silicone sealant to the pan collar during the initial installation of the toilet bowl.

Why risk your family's health?

POSTSCRIPT: Public health was at risk so I posted the issue on a forum, see below:

A friend pm'ed me asking why apply silicone sealant when the plumber already used white cement to seal the toilet bowl to the floor?

Well, the silicone sealant is applied to the pan collar -- the piece that is connected to the sewage pipe hole. If the pan collar is not sealed, foul air (and soil too) will seep into yr toilet bowl chamber due to the air presure at work.

Like others, I did not ask my plumber to seal the pan collar when he first installed the bowl. After installation, my toilet smelled badly, particularly when someone on higher floors flushed the toilet.

My toilet was a 1-piece design, and had 2 rectangular holes at the back of the toilet bowl. Hence I could detect the foul smell. More importantly, I realized the risk I was putting my family to, breathing in bad air, particularly bacteria and viruses from sick neighbors upstairs after they had flushed the toilet.

If not for the toilet design I had chosen, I would not have detected the foul smell, and the problem probably would only surface several years later.

You don't get any foul smell if your toilet bowl has no openings and is fully sealed by the white cement onto the floor. But over time the cement will develop tiny cracks, that is when you begin to detect foul smell from the toilet bowl area. That happened to my old toilet (after 5 yrs), although at that time I did not know what caused the bad smell. Maybe the earthquakes from Indonesia over last 2 yrs was a contributory factor, causing tiny cracks in the cement to appear, thereby allowing foul air to seep into the toilet space?

Anyway, when my plumber told me he never applied silicone sealant to the pan collar I realized probably all plumbers in Singapore also install toilet bowls without applying silicone sealant!

That is very unhygienic. Ask yr plumber if that is true. Probably he will tell you he don't use silicone sealant for your toilet bowl's pan collar too.

With unsealed toilet bowls we are probably breathing in all sorts of viruses and bacteria discharged from sick neighbors in the block without knowing it.

The HK health authorities at first were mystified how the SARS virus were spreading in the same apartment block. Finally they traced the spread to faulty sewage pipe.


The authorities did not reveal what caused the leak (in order not to spread public panic) but the culprit was the unsealed toilet bowl that allowed foul air (carrying the virus) to spread from one upper flat to another lower down. If the toilet pipe had merely been leaking water, do you think the affected flat owner would not have noticed that and left the leak unattended? Of course not! So I believe SARS had spread via the unsealed toilet bowl pan collar!

Now that my toilet bowl has been re-installed, there is no more foul smell !

So, please remind yr plumber to apply silicone sealant to the pan collar.

Tiles as Wall Art

Seems large tile pieces have begun to appear locally. Some of the pieces are 30 x 90 cm in size, making them particularly appropriate as wall art. Leading tile manufacturers in Italy and Germany seem to be behind the trend, producing large beautiful pieces, some of which were commissioned to leading artists by the manufacturers.

I am positive the trend will catch on in Singapore.


I was sorely tempted to use the above copper-toned tile pieces, or the lovely "craggy" stone tile pieces below, for a feature wall. However, the existing beam in the living room -- whether left untiled or tiled will not blend in with the feature wall -- made me drop the idea subsequently.


Romantic Tiles


Installation & Placement of Air-con Units

Related Posts
1 Choosing an Air Conditioner
2 Energy Saving Tips for Air Conditioners
3 Installation & Placement of Air-con Units
4 Air Conditioner Cooling Algorithm

Insulation
Ever wondered why there is condensation on aircon trunking inside the home?

If the insulation material used to cover the copper pipe is not effective or thick enough, water will condense around the plastic trunking in the home as the climate here is very humid and hot all-year-round.

The dealer knows about the condensation problem. But instead of doing a proper aircon installation, some dealers provide inferior (read: cheaper) or inadequate insulation foam knowing the consumer will experience the condensation problem subsequently - hoping to entice the customer into paying more for the proper (read: specified or correct) insulation material.

This is outrageous!

Every consumer, I believe, has the right to expect an air con to be installed correctly and properly (read: as specified by the aircon manufacturer) to meet local environmental and climactic conditions. And that includes proper insulation so that water condensation problems do not occur on the trunking. If a dealer uses substandard materials during installation, and there is water condensation on the trunking, the dealer should rectify and correct the installation.

Far from it -- instead of admitting responsibility, the dealer is quick to lay the blame on the consumer.   The dealer will brazenly tell the consumer that because he did not agree to pay for thicker insulation material, inferior insulation material was used, resulting in condensation on the trunking. Outrageous!!

And so, in the absence of strong consumer protection laws here, consumers have no choice but to timidly pay up for the proper (and manufacturer specified) insulation foam.

What will dealers think of next to inflate profits?  Extended warranty?  Thicker copper piping? Leakage prevention?

Trunking for Pipes

So like everyone else, I paid up meekly for 1/2-inch Armaflex insulation foam because I know full well the consequences of  not having the proper insulation foam for my aircon trunking.  But not before I checked that I got what I paid good money for.

Quality Materials Used

As the materials used will be concealed inside the trunking, check the materials for quality and specifications, such as 1/2-inch Class 1 Armaflex insulator foam, before installation commences.  Armaflex is a registered trademark of Armacell, the world's largest and foremost insulation manufacturer.


Indeed, I found that Armaflex is the registered trademark of Armacell, the world's leading producer of insulation foam.  Armacell is the global market leader in foams technology. The company invented Armaflex®, the world's best known and most trusted trademark in elastomeric foam insulation. With more than 50 years of experience in foams, Armacell manufactures foams and expanded rubber products for automotive, industrial, sports, leisure and packaging industries -- in addition to mechanical insulation.

Class '1' Armaflex (Fire Performance, BS 476 Part 7 1997) is a dust free, fiber free CFC & HCFC free (ozone depletion potential of zero), flexible, black, closed cell, elastomeric nitrile rubber insulation providing a highly efficient method of controlling condensation and insulating against both heat loss and heat gain.

Placement of Air-con Units
Before you call in the aircon installers, you should study your apartment interior to decide where and how you want to run the trunking.  This is important particularly for those living in flats where the trunking is exposed and not concealed behind a partition board or wall.

Living Area: MSXY-GA26VA Starmex 26,000 BTU Inverter R410A Fancoil Unit

To minimize the risk of water flowing back into the fancoil unit and dripping onto the floor, I generally prefer to run the trunking along the bottom near the floor line.  You should also check that the installer uses a water or spirit level to ensure the proper gradient of the piping so that water flows properly to the drainage outlet in the bathroom.

To minimize heat gain, the fancoil units, where it is practical to do so, should be sited as near as possible to the compressor.

Finally, place the fancoil so that the blower fan blows directly into the area you wish to cool.  A central location along the wall near the ceiling is preferred to a corner location in this respect.

You don't need to locate the 15-amp socket near the compressor but you need to locate the 15-amp socket along the trunking so that the electrical wire could be concealed in the trunking.


Drainage pipe
Don't let the installer decide without seeking your direction on where and how to run the drainage discharge pipe.  You let them be, and they will simply install wherever and whichever is most convenient for them.  In my case, I specifically directed them to install the drainage pipe so that the water is discharged as near as possible to the bathroom drainage hole.  What they had wanted to do was to run the drainage pipe to the near end, instead of the far end, of the bathroom.  The near end meant less work for the installer, and the water would flow across the bathroom floor to the far end where the bathroom hole was located.

Drainage Pipe

The installer used a blow-torch to soften the plastic pipe (which was pointing upwards!) and bent it downwards so that water will flow smoothly out to the drainage hole.

Installation
Usually the location for the compressor is pre-determined for you if you live in a HDB flat. Such as a specially constructed air-con compressor ledge, usually located in the kitchen yard or on an external window ledge.

Installation - getting down to work

In my case, my flat was built in the early eighties when an aircon ledge was not provided for in the basic design of the apartment, and so I had to decide where to place the compressor.  I could place the compressor outside the MBR, for which HDB had provided a cut-out hole in the wall.

However, I decided to site the compressor below the window in the dining room.  That way we would not be disturbed by the sound of the compressor operating in the night outside the bedroom window.  Moreover, the dining room location was less exposed to direct sunlight and more "centrally" located to all the fancoil units.  This resulted in a shorter trunking (read: less heat loss, more effective cooling) between the fancoils and the compressor.

Some have advocated placing the fancoil so that the cool air does not blow directly on the occupant(s).  This is bad advice!  Very bad advice indeed. You know what? I site the fancoil so that the cold air blows directly onto the occupants who wanted cooling!

The purpose of installing an aircon is to cool down the room quickly and effectively, and then to maintain the room at an optimum and comfortable level i.e. neither too hot nor too cold.  If the air con doesn't blow directly at the space you want to cool, but instead blows the cold air somewhere else, it will take a longer time before the room becomes comfortably cold enough for you.

In the past, aircons did not have vanes that automatically direct the airflow around the room, so that once the room had cooled down, cold spots would develop as the aircon continued to blow directly at the same spot in the room.

Or even where the vane swung from side-to-side, the occupants would feel frigid and uncomfortable when the cold air continued to blow on them after the room had cooled down sufficiently.  This was because there was no mechanism to reduce the airflow automatically and to reset the room temperature automatically once the room has reached the desired (cold) temperature.

Today, however, air cons are designed with a host of new innovations: not only do aircons have vanes that swing left and right, they also rotate up and down.  And some are linked to fan motor speeds: to "push" out a higher or lower volume of cold air as the occasion warrants it.

I mounted the Starmex fancoil unit, for instance, directly above the MBR window, which was a short distance to the compressor. Now, with this placement, if I feel uncomfortably hot as I go to bed, I could turn on the aircon, and it will immediately shoot out a direct blast (because I set it so) of cold air to cool me down fast as I lie on the bed. Refreshing!

MBR: MSXY-GA10VA Starmex 9,000 BTU Inverter R410A Fancoil Unit

Few minutes later, after my body has cooled down, I will set the remote control to "I Feel.." auto operation mode.  That automatically sets the aircon to produce the optimum room condition for sleep with a one-touch operation.  And I could not hear any motor sound from the fancoil, only feel the cool air.  Amazing! I really love my Starmex !


Related Posts
1 Choosing an Air Conditioner
2 Energy Saving Tips for Air Conditioners
3 Installation & Placement of Air-con Units
4 Air Conditioner Cooling Algorithm
 

Copyright © 2008-2011 bfcAsia - All photos and contents are copyrighted material of shunFoto.com • All Rights Reserved