


Latest UPDATE: 5-Dec-11
You may wish to compare with this price quote from a reader.
QUOTE:
hi bluefly
need ur help for ur comments in the quote given to me for flooring for 3 bedrooms n living..
A) living room works
1) supply labour dismantle n dispose existing floor tile $900
2) supply n lay new floor tiles 600mm homo tiles $2600
B) 3 bedrooms
1) supply labour hack n dispose tiles skirting, include repair good for damage wall $100
2) supply n lay over existing with new clip on laminated 3 bedrooms $1960
C) Others
1) HDB permit $200
2) supply labour clean whole house flooring n wall tiles with chemical acids n general cleaning for window, window grill, kitchen cabinets n wardrode FOC
total $5760, after discount $5500
hi iseearainbow,
to be fair to you, i need to stress that i am unable to comment on the quote you got for yr reno.
that is bcoz it has been some 3 yrs (or 4 if you count the time before i started reno on my flat) since i was in the reno mkt as a consumer. therefore i am not up-to-date on the current mkt costs and pricing, etc.
you will get better info and advice if you seek opinions on renotalk from other forummers who are currently involved in renovating their own flat. they can thus provide you with a better assessment of yr reno quote and other costs.
sure, you made me feel happy to seek my opinion on yr quote. i can simply give my comment to inflate my ego, but that would be wrong as you'd be misled.
what i can say is, you should get a few quotes from different contractors so you get an idea of the present mkt pricing, and choose the best quote in terms of quality of materials, see the workmanship of the contractor in his other projects, and generally how the contractor relates to you. I have previously written this advice on my blog (click on the label 'contractor' on the right column for a list of my posts on this topic) and it is important you learn negotiation tactics and what could go wrong to prepare yourself for the work ahead.
so, do yrself a favor and ask other forummers who are currently doing renovation for their experience and quote, ok?
thank you,
bluefly aka greencoal
Laminated Floor Tile
Related Posts
1 Workmanship: Laminated Tiles
2 Laminated floor tiles
Sometimes I get queries on the Renotalk forum relating to renovation that would probably interest our blog readers. This query came from a reader with the nick 'iseearainbow'.
QUOTE:
Hi :
Can you share your knowledge and experience with Premier laminated floor? A renovation company i approached only carries this brand. I did google but can't find much info =((
Is this brand durable and gd quality? Hope to hear from u soon =)
Thanks
UNQUOTE
Hello iseearainbow:
You must be a romantic person, judging by your nick !
Well, the Premier brand is well-established locally and is quite popular as a floor lamination with flat owners. I chose it bcoz it was cheaper than other brands and the quality was good. But the most important factor - aside from its durability and quality - is whether the installer does a good job for you.
In my case I was lucky the 2 guys who came to install the flooring were experienced and skilful in measuring and laying the tiles. I decided to lay the tiles over the old ceramic flooring which had no signs of warping or any alignment problem, and after the installers had checked out the two rooms.
One thing to note - be careful in your choice of tile color in the showroom. I chose the tile color from the samples in the showroom. But when the tiles were subsequently laid out and installed in my bedrooms, the shade looked much darker than what I thought was the color I had originally selected! Maybe a single piece of showroom tile looks different from an entire floor? Unfortunately I forgot to note the color reference number. So to make sure the ID or installer (or you) don't make any mistake you should write down the color reference number of the color tile you select in the showroom.
I don't have any problem with the durability or quality - it is almost 3 years since the bedroom floor tiles were installed, and the floor tiles still look the same, no warping or any tile piece getting loose. You need to do your part, however in your maintenance of the flooring: no spilling of liquids onto the floor tile, any spillage should be cleaned up immediately, and clean with a mop that is squeezed almost dry so that the tiles dry quickly.
Oh, you also need to ensure the installer lay sound-proofing material (something like plastic foam sheet) under the laminated tiles, otherwise when you walk on the floor there may be a "hollow" sound due to some "air pockets" due to the unevenness in the original floor surface.
All the best!
GreenCoal aka Bluefly
QUOTE:
Hi bluefly,
thanks for the reply :)
saw ur comments at ur blog...
See u ard in renotalk soon.. And will update u on my flooring outcome:)
have u heard abt hatari brand btw?
[/QUOTE]
Hello iseearainbow,
sorry, i have not heard about hatari brand - probably a new one in the market? if i were you, i would go for established brands like pergo, premier, etc bcoz nowadays many new products are launched, some may be good but many are inferior products trying to cash in on the market demand as the property mkt is currently hot.
yr flat is a big investment and will be a source of pride for many years. so you shld consider carefully your choices. it is worth spending a bit more for peace of mind, knowing that what you spend is going to give you and yr family many years of enjoyment. Yes, price is a factor for me but even then i make sure the products and materials i selected were proven and established in the market, and that no one else has had bad experience with the product or the supplier, installer.
still, i've made bad choices in my renovation, and these are highlighted on my blog. usually the mistakes happened bcoz i overlooked practicality and was blinded either by beautiful design (e.g. Bellari soap dispenser) or smooth sales talk !! so, don't be taken in like i was, ok?
hope you'll show photos of yr renovation in due course.
take care,
bluefly aka greencoal
Related Posts
1 Workmanship: Laminated Tiles
2 Laminated floor tiles
1 Workmanship: Laminated Tiles
2 Laminated floor tiles
Sometimes I get queries on the Renotalk forum relating to renovation that would probably interest our blog readers. This query came from a reader with the nick 'iseearainbow'.
QUOTE:
Hi :
Can you share your knowledge and experience with Premier laminated floor? A renovation company i approached only carries this brand. I did google but can't find much info =((
Is this brand durable and gd quality? Hope to hear from u soon =)
Thanks
UNQUOTE
Hello iseearainbow:
You must be a romantic person, judging by your nick !
Well, the Premier brand is well-established locally and is quite popular as a floor lamination with flat owners. I chose it bcoz it was cheaper than other brands and the quality was good. But the most important factor - aside from its durability and quality - is whether the installer does a good job for you.
In my case I was lucky the 2 guys who came to install the flooring were experienced and skilful in measuring and laying the tiles. I decided to lay the tiles over the old ceramic flooring which had no signs of warping or any alignment problem, and after the installers had checked out the two rooms.
One thing to note - be careful in your choice of tile color in the showroom. I chose the tile color from the samples in the showroom. But when the tiles were subsequently laid out and installed in my bedrooms, the shade looked much darker than what I thought was the color I had originally selected! Maybe a single piece of showroom tile looks different from an entire floor? Unfortunately I forgot to note the color reference number. So to make sure the ID or installer (or you) don't make any mistake you should write down the color reference number of the color tile you select in the showroom.
I don't have any problem with the durability or quality - it is almost 3 years since the bedroom floor tiles were installed, and the floor tiles still look the same, no warping or any tile piece getting loose. You need to do your part, however in your maintenance of the flooring: no spilling of liquids onto the floor tile, any spillage should be cleaned up immediately, and clean with a mop that is squeezed almost dry so that the tiles dry quickly.
Oh, you also need to ensure the installer lay sound-proofing material (something like plastic foam sheet) under the laminated tiles, otherwise when you walk on the floor there may be a "hollow" sound due to some "air pockets" due to the unevenness in the original floor surface.
All the best!
GreenCoal aka Bluefly
UPDATE [11-Dec-10]:
QUOTE:
Hi bluefly,
thanks for the reply :)
saw ur comments at ur blog...
See u ard in renotalk soon.. And will update u on my flooring outcome:)
have u heard abt hatari brand btw?
[/QUOTE]
Hello iseearainbow,
sorry, i have not heard about hatari brand - probably a new one in the market? if i were you, i would go for established brands like pergo, premier, etc bcoz nowadays many new products are launched, some may be good but many are inferior products trying to cash in on the market demand as the property mkt is currently hot.
yr flat is a big investment and will be a source of pride for many years. so you shld consider carefully your choices. it is worth spending a bit more for peace of mind, knowing that what you spend is going to give you and yr family many years of enjoyment. Yes, price is a factor for me but even then i make sure the products and materials i selected were proven and established in the market, and that no one else has had bad experience with the product or the supplier, installer.
still, i've made bad choices in my renovation, and these are highlighted on my blog. usually the mistakes happened bcoz i overlooked practicality and was blinded either by beautiful design (e.g. Bellari soap dispenser) or smooth sales talk !! so, don't be taken in like i was, ok?
hope you'll show photos of yr renovation in due course.
take care,
bluefly aka greencoal
Related Posts
1 Workmanship: Laminated Tiles
2 Laminated floor tiles
Beautiful Home 9
Next
It is always a challenge for architects or interior designers to design a beautiful interior or home that is compelling and appeals to the senses. Because good design is not articulated but seen and felt. Wham! The design hits you and you are lost for words! You know when you see it. It's so visceral !
That's the motivation behind this series. Photos of beautiful interiors and homes inspired me when I renovated my home. And helped my ID to have a better idea and picture of what I wanted. Hope you find the photo inspiring and useful too.
Lighting Design Guide
The photo came from real estate agents marketing the property. You'll be surprised how affordable some of these are compared to properties here! Oh, and if you are the copyright owner of the photo and want me to take it down, please email me.
Readers' Email on Backsplash cost
Some readers have emailed me on the cost of the blacksplash installed in my kitchen. My answer is the same as the following to
Saleema aka siddeeqa *happy*
---
Hi, how u doing ?
Ya I read ur blog abt ur blacksplash story... Lucky u spotted it before they fix the 3 pieces. If I were u, I might have only noticed after they fix it.
Anyway how can they push the charge to u for the mistake they did. It's so ridiculous.. I think i shall look for some other company.
Thanks for explaining...
Regards
Saleema
Sent from my Cool Gadget!
Sent from my Cool Gadget!
On 10-May-2010, at 14:04, Greencoal wrote:
dear Saleema
I recalled querying the id why the backsplash cost so much. His answer was: bcoz I wanted the backsplash to cover the entire back area, I wanted it in ONE piece, not 3 smaller pieces glued together, spray-painted black, and using tempered glass.
Now I understand why the id provided no breakdown in my final kitchen cab bill. Probably the passed the cost of their mistake to me - the contractor delivered 3 smaller pieces, but I stopped them as I had asked the id to ensure the back splash was in one single piece.
No wonder my total kitchen cabinet cost came to 7k !!
Thanks for yr info.
cheers
--- On Tue, 4/5/10, Saleema Siddeeqa <ssideqa@yahoo.com> wrote:
From: Saleema Siddeeqa <ssideqa@yahoo.com>
Subject: Re: [Design Challenges & Solution] New comment on Kitchen - Glass SplashBack.
Date: Tuesday, 4 May, 2010, 10:45 AM
--- On Sat, 5/1/10, Greencoal wrote:
Subject: Re: [Design Challenges & Solution] New comment on Kitchen - Glass SplashBack.
To: ssideqa@yahoo.com
Date: Saturday, May 1, 2010, 12:57 AM
Hi !
As far as I could recall, my ID verbally quoted S$1.5k at the time I was contemplating whether or not to install the backsplash.
However, when I got the bill months later - after the job was completed - no breakdowns were provided. So I am sorry I cannot confirm the exact cost for the backsplash.
Actually I preferred a white tile background, except that for easy cleaning - esp after a day of greasy cooking - I went along with a glass backsplash. I had considered using a transparent tempered glass instead of having it spray-painted black, but the see-through tile pattern behind the glass made the backsplash look somewhat weird, isn't it?
Well, enjoy yr kitchen - you probably spend more time in it than you realize.
Cheers
--- On Thu, 29/4/10, Anonymous <noreply-comment@blogger.com> wrote:
Subject: [Design Challenges & Solution] New comment on Kitchen - Glass SplashBack.
To: bfcasia@yahoo.com.sg
Date: Thursday, 29 April, 2010, 5:24 PM
Anonymous has left a new comment on your post "Kitchen - Glass SplashBack":
Hi, how much you spend just for the backsplash?
cos my new house also have tiles.. and i want to put backsplash just like yours.
please email me the detail.. thank you
ssideqa@yahoo.com
thank you in advance
from siddeeqa
Review: Asuka Acrylic Worktop
Review Series
1: Blanco Sink - 3 stars
2: Rinnai Gas Heater - Not Rated
3: Fujioh hood FX-900 - 5 stars
4: Rinnai Tumble Dryer RDT-600CG - 5 stars
5: Rinnai Oven RBO-7MSO - 3 stars
6: Bellari Liquid Dispenser - 1 star
7: Rinnai 2-Burner Hob RB-2CG - 5 stars
8: TOTO Omni Toilet Bowl- 5 stars
9: Asuka Acrylic Worktop - 2 stars
10: Premier laminated floor tiles
Related Posts
1 How to Choose: Kitchen Worktop
2 My Acrylic Worktop
3 Verdict: My Asuka Acrylic Worktop
4 DIY: Worktop Protector
5 Further Reference
6 Silestone FAQ
7 Maintenance: Granite Worktop
A word about the Review
Our Review is different from other reviews that you read on the Net: we're not armchair reviewers. We bought and installed the product for our own use. No one sponsored us to endorse the product. And we only gave our verdict after at least one year's usage. Obviously, we'd tell you sooner if a product didn't work or performed poorly soon after purchase.
We invite you - if you have bought, installed and used the product to tell us your user experience, particularly after using the product for at least a year. Whether positive or negative, please give us your feedback. Oh, don't forget to provide your local forum (Renotalk.com, myHomeTown.com.sg, Sengkang.com, or Punggol.org) user ID and photos of your kitchen so we could verify you're a bonafide user of the product.
Verdict: 2 out of 5 stars - Not Recommended
This post is in response to a reader "Jaz" who sent an email that I somehow overlooked as I was extremely busy and preoccupied recently.
Thanks Jaz for your support of my blog !! My apologies for this belated post!
FYI, it has been some 2 yrs of worktop usage (or abusage) so I now know my Asuka worktop better.
In a word: don't install anything that your ID or contractor recommends! My Asuka acrylic worktop stains easily -- too easily for a so-called acrylic
worktop that I am not even sure if it is really acrylic that was installed in my kitchen.
I began to suspect something was not right with my worktop when I went to Ikea Alexandra recently and handled and inspected the acrylic worktops displayed there. The tactile sensation was different - the Ikea acrylic worktop somewhat felt different from my acrylic worktop - in a way I was not sure.
Call me pig-headed, nit-picking, or simply prejudiced now with my Asuka worktop, but my acrylic worktop stains too easily to be acrylic. Maybe it was made of a different plastic / resin combination (read: cheaper materials) and the ID chose to install that instead of the real stuff in my kitchen? My previous worktop was also acrylic, but it was quite stain resistant.
But this one - forget to wipe any dripping from a soiled plate placed on the worktop, come back one hour later and you find the drip has stained the worktop! Or place a Fairprice plastic bag full of grocery on the worktop, and when you have taken out the grocery you find the worktop stained with the blue ink from the grocery bag print !! And the ink stain was a real pain to remove.
I scratched my head... what went wrong?
Then I realized factories can combine resin with any plastic compound under heat and pressure to produce solid surfaces that can be used to fabricate
kitchen worktops, wash basins, etc. You can see plastic-based wash basins at showrooms produced locally. Even toilet bowls are also fashioned from plastic resins!
So how do consumers know that the solid surface top supplied for his worktop is really acrylic? The specifications, the brand or the factory, is not printed anywhere on the material supplied. Is my Asuka worktop really made of acrylic? Now, make no mistake - I am not suggesting my ID / Contractor or Asuka was dishonest.. or that my Asuka worktop is not made of acrylic. All this is simply conjecture on my part.
Verdict: 2 out of 5 stars - Not Recommended
What I know however is that my Asuka acrylic worktop stains too easily. Maintenance is a pain. But I can live with it, it still functions as a worktop. So that is enough to merit 2 out of 5 stars! But I would not recommend the Asuka brand at all.
I will not simply trust the ID / Contractor too readily in future for products that are not subject to any official checks or standards in the same way that for instance, electric sockets, appliances are subject to (safety and health standard - plastic that will not melt easily or give off poisonous fumes when burning, etc).
I know industry self-regulation is essential, and although factories may be truthful about their products' specs, that will not stop unscrupulous IDs and contractors from "passing-off." What should the consumer do in such a situation?
Lesson Learnt
If I renovate my kitchen in future, I will buy from a reputable outlet like Ikea or ask my ID to use Corian or Formica or products from well-established companies that have been in business for many years and have built up a reputation in the market for their products.
Or use natural stone - which no one can fake. Granite - polished and sealed - would be considered. Or solid wood worktops from Ikea.
If you must use acrylic for cost reasons then go for established brands like Corian, etc. Or use Acryliss Solid from Formica Singapore. Although I have no experience using Acryliss, I know Formica Singapore is a well-established company since my childhood years! Buying from Formica directly allows you to talk with its staff on questions such as the product's stain & heat-resistance quality and standard, as well as maintenance and durabilty issues. Buy only if you are satisfied and convinced with the answer. Ask if they provide a written guarantee for the material supplied and warranties too.
Related Posts
1 How to Choose: Kitchen Worktop
2 My Acrylic Worktop
3 Verdict: My Asuka Acrylic Worktop
4 DIY: Worktop Protector
5 Further Reference
6 Silestone FAQ
7 Maintenance: Granite Worktop
Review Series
1: Blanco Sink - 3 stars
2: Rinnai Gas Heater - Not Rated
3: Fujioh hood FX-900 - 5 stars
4: Rinnai Tumble Dryer RDT-600CG - 5 stars
5: Rinnai Oven RBO-7MSO - 3 stars
6: Bellari Liquid Dispenser - 1 star
7: Rinnai 2-Burner Hob RB-2CG - 5 stars
8: TOTO Omni Toilet Bowl- 5 stars
9: Asuka Acrylic Worktop - 2 stars
10: Premier laminated floor tiles
Related Posts
1 How to Choose: Kitchen Worktop
2 My Acrylic Worktop
3 Verdict: My Asuka Acrylic Worktop
4 DIY: Worktop Protector
5 Further Reference
6 Silestone FAQ
7 Maintenance: Granite Worktop
A word about the Review
Our Review is different from other reviews that you read on the Net: we're not armchair reviewers. We bought and installed the product for our own use. No one sponsored us to endorse the product. And we only gave our verdict after at least one year's usage. Obviously, we'd tell you sooner if a product didn't work or performed poorly soon after purchase.
We invite you - if you have bought, installed and used the product to tell us your user experience, particularly after using the product for at least a year. Whether positive or negative, please give us your feedback. Oh, don't forget to provide your local forum (Renotalk.com, myHomeTown.com.sg, Sengkang.com, or Punggol.org) user ID and photos of your kitchen so we could verify you're a bonafide user of the product.
Verdict: 2 out of 5 stars - Not Recommended
This post is in response to a reader "Jaz" who sent an email that I somehow overlooked as I was extremely busy and preoccupied recently.
Thanks Jaz for your support of my blog !! My apologies for this belated post!
FYI, it has been some 2 yrs of worktop usage (or abusage) so I now know my Asuka worktop better.
In a word: don't install anything that your ID or contractor recommends! My Asuka acrylic worktop stains easily -- too easily for a so-called acrylic
I began to suspect something was not right with my worktop when I went to Ikea Alexandra recently and handled and inspected the acrylic worktops displayed there. The tactile sensation was different - the Ikea acrylic worktop somewhat felt different from my acrylic worktop - in a way I was not sure.
Call me pig-headed, nit-picking, or simply prejudiced now with my Asuka worktop, but my acrylic worktop stains too easily to be acrylic. Maybe it was made of a different plastic / resin combination (read: cheaper materials) and the ID chose to install that instead of the real stuff in my kitchen? My previous worktop was also acrylic, but it was quite stain resistant.
But this one - forget to wipe any dripping from a soiled plate placed on the worktop, come back one hour later and you find the drip has stained the worktop! Or place a Fairprice plastic bag full of grocery on the worktop, and when you have taken out the grocery you find the worktop stained with the blue ink from the grocery bag print !! And the ink stain was a real pain to remove.
I scratched my head... what went wrong?
Then I realized factories can combine resin with any plastic compound under heat and pressure to produce solid surfaces that can be used to fabricate
So how do consumers know that the solid surface top supplied for his worktop is really acrylic? The specifications, the brand or the factory, is not printed anywhere on the material supplied. Is my Asuka worktop really made of acrylic? Now, make no mistake - I am not suggesting my ID / Contractor or Asuka was dishonest.. or that my Asuka worktop is not made of acrylic. All this is simply conjecture on my part.
Verdict: 2 out of 5 stars - Not Recommended
What I know however is that my Asuka acrylic worktop stains too easily. Maintenance is a pain. But I can live with it, it still functions as a worktop. So that is enough to merit 2 out of 5 stars! But I would not recommend the Asuka brand at all.
I will not simply trust the ID / Contractor too readily in future for products that are not subject to any official checks or standards in the same way that for instance, electric sockets, appliances are subject to (safety and health standard - plastic that will not melt easily or give off poisonous fumes when burning, etc).
I know industry self-regulation is essential, and although factories may be truthful about their products' specs, that will not stop unscrupulous IDs and contractors from "passing-off." What should the consumer do in such a situation?
Lesson Learnt
If I renovate my kitchen in future, I will buy from a reputable outlet like Ikea or ask my ID to use Corian or Formica or products from well-established companies that have been in business for many years and have built up a reputation in the market for their products.
Or use natural stone - which no one can fake. Granite - polished and sealed - would be considered. Or solid wood worktops from Ikea.
If you must use acrylic for cost reasons then go for established brands like Corian, etc. Or use Acryliss Solid from Formica Singapore. Although I have no experience using Acryliss, I know Formica Singapore is a well-established company since my childhood years! Buying from Formica directly allows you to talk with its staff on questions such as the product's stain & heat-resistance quality and standard, as well as maintenance and durabilty issues. Buy only if you are satisfied and convinced with the answer. Ask if they provide a written guarantee for the material supplied and warranties too.
Related Posts
1 How to Choose: Kitchen Worktop
2 My Acrylic Worktop
3 Verdict: My Asuka Acrylic Worktop
4 DIY: Worktop Protector
5 Further Reference
6 Silestone FAQ
7 Maintenance: Granite Worktop
Review Series
1: Blanco Sink - 3 stars
2: Rinnai Gas Heater - Not Rated
3: Fujioh hood FX-900 - 5 stars
4: Rinnai Tumble Dryer RDT-600CG - 5 stars
5: Rinnai Oven RBO-7MSO - 3 stars
6: Bellari Liquid Dispenser - 1 star
7: Rinnai 2-Burner Hob RB-2CG - 5 stars
8: TOTO Omni Toilet Bowl- 5 stars
9: Asuka Acrylic Worktop - 2 stars
10: Premier laminated floor tiles
Review: Rinnai Tumble Dryer RDT-600CG
Review Series
1: Blanco Sink - 3 stars
2: Rinnai Gas Heater - Not Rated
3: Fujioh hood FX-900 - 5 stars
4: Rinnai Tumble Dryer RDT-600CG - 5 stars
5: Rinnai Oven RBO-7MSO - 3 stars
6: Bellari Liquid Dispenser - 1 star
7: Rinnai 2-Burner Hob RB-2CG - 5 stars
8: TOTO Omni Toilet Bowl- 5 stars
9: Asuka Acrylic Worktop - 2 stars
10: Premier laminated floor tiles
A word about the Review
Our Review is different from other reviews that you read on the Net: we're not armchair reviewers. We bought and installed the product for our own use. No one sponsored us to endorse the product. And we only gave our verdict after at least one year's usage. Obviously, we'd tell you sooner if a product didn't work or performed poorly soon after purchase.
We invite you - if you have bought, installed and used the product to tell us what your experience has been, particularly after usage for at least a year. Whether positive or negative, please give us your feedback. Oh, don't forget to provide your Renotalk user ID and photos of your kitchen so we could verify you're a bonafide user of the product.
***
Our verdict: 5 out of 5 stars - Highly Recommended.
Rinnai clothes dryer runs on town gas
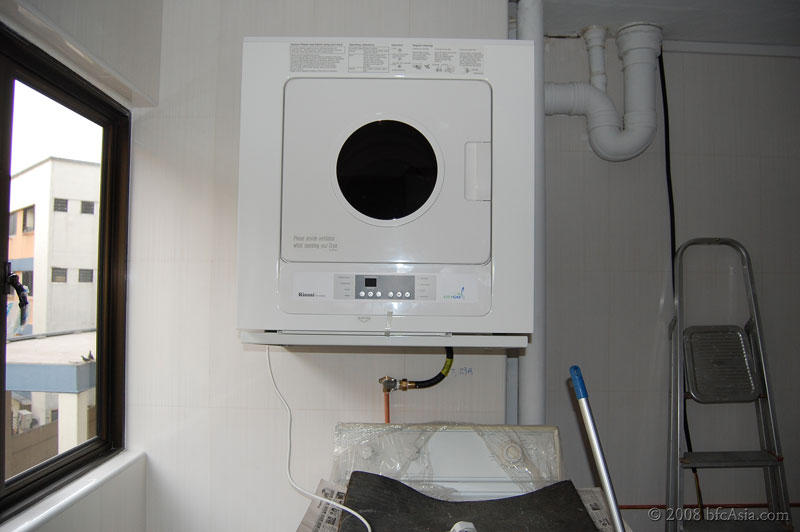
The Rinnai tumble dryer Model:RDT-600-CG worked as expected. We've had no issues at all over the past 3 years. We simply dumped freshly washed clothes into the dryer, pressed the power button and set the auto program mode, and that's it. No need to set the time. The dryer stopped automatically after the clothes are dry enough. When it beeps, that's to remind us to clean the removable filter, if we forget to clear it of lint each time after drying the clothes.
Clothes after washing produce a lot of lint that is not obvious until you use the dryer. The lint is collected by a fine filter sieve inside the dryer and will build up slowly when you use the dryer each time. Finally, when the filter is blocked, the dryer will emit a sound. That is the alert to remove the lint from the filter, an easy procedure. Cleaning the lint filter is no hassle at all.
In short, the dryer worked flawlessly.
NOTE: The Rinnai clothes dryer RDT-600-CG was bought at Citygas showroom at the former PUB Building at Somerset Road. Price $600.00 after GST plus another $80 for installation.
Submit a comment if you don't know how to remove the lint.
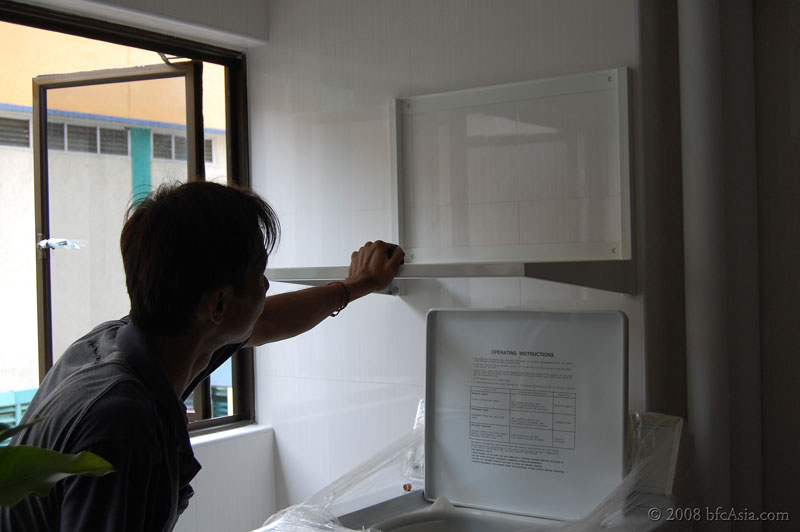
Checking dryer bracket placement
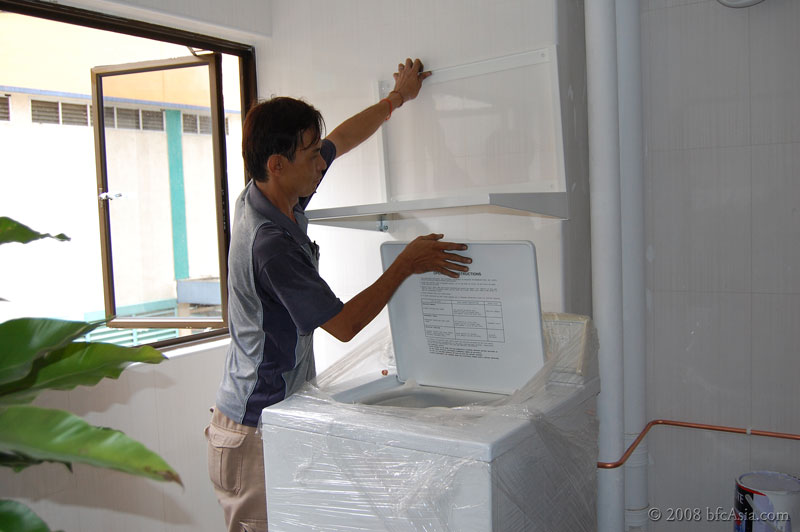
Ensuring Maytag washer lid can open freely
Review Series
1: Blanco Sink - 3 stars
2: Rinnai Gas Heater - Not Rated
3: Fujioh hood FX-900 - 5 stars
4: Rinnai Tumble Dryer RDT-600CG - 5 stars
5: Rinnai Oven RBO-7MSO - 3 stars
6: Bellari Liquid Dispenser - 1 star
7: Rinnai 2-Burner Hob RB-2CG - 5 stars
8: TOTO Omni Toilet Bowl- 5 stars
9: Asuka Acrylic Worktop - 2 stars
10: Premier laminated floor tiles
A word about the Review
Our Review is different from other reviews that you read on the Net: we're not armchair reviewers. We bought and installed the product for our own use. No one sponsored us to endorse the product. And we only gave our verdict after at least one year's usage. Obviously, we'd tell you sooner if a product didn't work or performed poorly soon after purchase.
We invite you - if you have bought, installed and used the product to tell us what your experience has been, particularly after usage for at least a year. Whether positive or negative, please give us your feedback. Oh, don't forget to provide your Renotalk user ID and photos of your kitchen so we could verify you're a bonafide user of the product.
***
Rinnai Tumble Dryer RD-600CG
Our verdict: 5 out of 5 stars - Highly Recommended.
Rinnai clothes dryer runs on town gas
Clothes after washing produce a lot of lint that is not obvious until you use the dryer. The lint is collected by a fine filter sieve inside the dryer and will build up slowly when you use the dryer each time. Finally, when the filter is blocked, the dryer will emit a sound. That is the alert to remove the lint from the filter, an easy procedure. Cleaning the lint filter is no hassle at all.
In short, the dryer worked flawlessly.
Submit a comment if you don't know how to remove the lint.
Checking dryer bracket placement
Ensuring Maytag washer lid can open freely
Review Series
1: Blanco Sink - 3 stars
2: Rinnai Gas Heater - Not Rated
3: Fujioh hood FX-900 - 5 stars
4: Rinnai Tumble Dryer RDT-600CG - 5 stars
5: Rinnai Oven RBO-7MSO - 3 stars
6: Bellari Liquid Dispenser - 1 star
7: Rinnai 2-Burner Hob RB-2CG - 5 stars
8: TOTO Omni Toilet Bowl- 5 stars
9: Asuka Acrylic Worktop - 2 stars
10: Premier laminated floor tiles
Kitchen Flooding !
Water began to flow into kitchen..*sob*

...after 45 minutes.. *wring hand*

...next morning, after blockage was cleared... *wrinkle nose*
Our lovely kitchen was flooded some time ago.*heartache*
Many of us will encounter that situation at one time or another. In this article we shared what we did to solve our drainage problem, in the hope our experience will be useful to you.
***
So, what would you do when you encounter a drainage problem? Should you call the hdb town council? Or managing agent if you live in a private apartment? Or your own plumber?
You call the town council if the hdb common service pipe is chocked. But you call your own plumber if the blockage is in your internal kitchen pipe. Knowing whom to call will save you time, heartache and money.
Here was what we did:
We began by investigating the cause of the flooding. We recalled the last time we flushed water down our kitchen sink was barely 40 minutes ago; the water had drained from the sink without any problem. We were therefore certain no waste matter clogged our kitchen drainage pipe.
Drawing of common drainage pipe:

Take a look at the drainage pipe drawing. If blockage had occurred in the common drainage pipe, the water level discharged from all flat units above our unit level would rise and flow into our unit. That won't occur if the blockage occurred in our kitchen pipe - the water would simply stagnate until the blockage was cleared. Luckily we recalled that we last used the kitchen sink about 40 minutes prior to the flooding, which meant the common drainage pipe was blocked and caused our kitchen to be flooded!
That must be the reason, we concluded! We called the town council.
* * *
Note: We also regularly maintained our drainage piping system. You should too - find out how in a related post.
Also note that the kitchen drainage system is separate and distinct from the bathroom / toilet drainage system. Therefore you can rule out your toilet drainage pipe if only your kitchen is flooded.
* * *
Our town council ("TC") responded quite swiftly to our call. The TC maintenance supervisor and the area manager visited our premises to check on the flooding situation. After listening to our explanation and doing some tests of their own, they agreed with our assessment. It was late in the evening,
Next morning a plumber and his assistant came. They asked to view the common drainage pipe. Luckily - although we had concealed the common drainage pipe behind a partition wall - we could open the partition doors once the fridge was moved away. See how our kitchen drainage system was concealed behind a partition.
Flexible pipe to probe for obstacle

After gaining access to the common drainage pipe, the plumber used a long flexible "stick" to probe / clear any waste matter that may have caused the blockage. He confirmed there was indeed a blockage, and that the blockage was in the common drainage pipe!
Inspecting the flat unit below

Next, he went to inspect the unit below our flat. The unit was tenanted to a foreign family.
True enough, the ceiling in the unit below had flooded copiously the night before. The tenant told us he had called the landlord owner but the owner had told him to solve his own problem!!
The plumber got down to work. He decided to cut the common drainage pipe under the kitchen sink after ascertaining the location of the blockage.
After the pipe was cut, he extracted a piece of clothing from the grimy mess. That was the cause of the blockage!
Urrggh..so gross, the cause of the blockage!!

Less than 30 min later, the blockage was cleared. Hooray!

What a mess

How in the world could clothing end up in the common drainage pipe ???!!!
...after 45 minutes.. *wring hand*
...next morning, after blockage was cleared... *wrinkle nose*
Our lovely kitchen was flooded some time ago.*heartache*
Many of us will encounter that situation at one time or another. In this article we shared what we did to solve our drainage problem, in the hope our experience will be useful to you.
***
So, what would you do when you encounter a drainage problem? Should you call the hdb town council? Or managing agent if you live in a private apartment? Or your own plumber?
You call the town council if the hdb common service pipe is chocked. But you call your own plumber if the blockage is in your internal kitchen pipe. Knowing whom to call will save you time, heartache and money.
Here was what we did:
We began by investigating the cause of the flooding. We recalled the last time we flushed water down our kitchen sink was barely 40 minutes ago; the water had drained from the sink without any problem. We were therefore certain no waste matter clogged our kitchen drainage pipe.
Drawing of common drainage pipe:
Take a look at the drainage pipe drawing. If blockage had occurred in the common drainage pipe, the water level discharged from all flat units above our unit level would rise and flow into our unit. That won't occur if the blockage occurred in our kitchen pipe - the water would simply stagnate until the blockage was cleared. Luckily we recalled that we last used the kitchen sink about 40 minutes prior to the flooding, which meant the common drainage pipe was blocked and caused our kitchen to be flooded!
That must be the reason, we concluded! We called the town council.
* * *
Note: We also regularly maintained our drainage piping system. You should too - find out how in a related post.
Also note that the kitchen drainage system is separate and distinct from the bathroom / toilet drainage system. Therefore you can rule out your toilet drainage pipe if only your kitchen is flooded.
* * *
Our town council ("TC") responded quite swiftly to our call. The TC maintenance supervisor and the area manager visited our premises to check on the flooding situation. After listening to our explanation and doing some tests of their own, they agreed with our assessment. It was late in the evening,
Next morning a plumber and his assistant came. They asked to view the common drainage pipe. Luckily - although we had concealed the common drainage pipe behind a partition wall - we could open the partition doors once the fridge was moved away. See how our kitchen drainage system was concealed behind a partition.
Flexible pipe to probe for obstacle
After gaining access to the common drainage pipe, the plumber used a long flexible "stick" to probe / clear any waste matter that may have caused the blockage. He confirmed there was indeed a blockage, and that the blockage was in the common drainage pipe!
Inspecting the flat unit below
Next, he went to inspect the unit below our flat. The unit was tenanted to a foreign family.
True enough, the ceiling in the unit below had flooded copiously the night before. The tenant told us he had called the landlord owner but the owner had told him to solve his own problem!!
The plumber got down to work. He decided to cut the common drainage pipe under the kitchen sink after ascertaining the location of the blockage.
After the pipe was cut, he extracted a piece of clothing from the grimy mess. That was the cause of the blockage!
Urrggh..so gross, the cause of the blockage!!
Less than 30 min later, the blockage was cleared. Hooray!
What a mess
How in the world could clothing end up in the common drainage pipe ???!!!
Maintain Your Drainage Pipe System

An organized and functional kitchen - whether ours or friends' - always gives us pleasure to prepare and cook wholesome, nutritious meals for family and friends.

To ensure we derive maximum utility from our kitchen (or bathroom or toilet), we regular maintain the drainage piping system in our flat.
Here's what we did:
Check and clear floor traps
You should check there is always a floor trap in the kitchen, bathroom or toilet. And the floor trap should be seen, not hidden behind a partition in your bathroom or beneath a raised kitchen floor.
We should know - our contractor / ID did not heed our instruction and concealed the floor trap behind the partition wall, making access difficult, if not practically impossible.
The floor trap serves a dual purpose: 1 - prevents pests like cockroaches from entering your flat from the drainage pipe, and 2 - traps dirt such as hair - yes, each family member sheds a lot of hair during a shower!) from clogging the drainage pipe.
Clear your drainage pipe regularly with boiling / hot water
Regularly maintain your kitchen plumbing system by pouring a full kettle of boiling water down the sink once or twice a week. Or after we did a lot of cooking and washing, such as on festive occasions.
The hot water will melt and clear cooking grease, fats and oils that may have accumulated in the drainage pipe.
CAUTION: Some sinks and wash basins have plastic discharge pipes that may buckle under boiling or very hot water. If your sink is fitted with such pipes, avoid using boiling water. Use a proprietary cleaner like Kleen Drain, or similar products.
Use paper towel to clean off grease, oil and fat
Better still - we use a paper towel to wipe off excess oils and grease in our woks and pans and throw the soiled paper towel into the waste bin. Then we use dishwashing liquid to wash and clean the utensil.
That way we reduce the likelihood of cooking oil and grease choking our kitchen drain pipe.
Toilet bowls can get choked by too much tissue.
Not all toilet rolls are the same. Some rolls have thicker 2, 3 or more ply of tissue, while others are too thin and tear easily.
Likewise, not all toilet bowls are the same. Depending on the design, some bowls have a narrow discharge pipe. Which can become choked by too much toilet paper.
Therefore, be judicious in your usage of the toilet roll. If you must use a lot of toilet tissue, flush the cistern each time after using 3-4 tissue paper - just to ensure your toilet bowl is not choked.
Time the toilet bowl's discharge of the content
Each time you flush the toilet you should check that the water takes a reasonable time to be fully discharged from the toilet bowl.
If it takes longer than usual, it may be an indication some tissue - trapped in the neck of the toilet bowl - is hindering the water movement. When that happens, we flush the bowl another one or more times, until we are satisfied the water is discharged within the usual time. That usually dislodges any toilet tissue that may be trapped within the bowl neck.
Don't assume your maid knows
Don't forget to tell your maid never to flush girl's sanitary pads or baby's sanitary napkins (e.g. Pampers) into the toilet bowl.
Foreign maids - especially those from poorer countries - usually clean themselves with water and thus may not be acquainted with the use of toilet paper or sanitary pads. *grin*
They therefore need to be properly instructed. Our plumber tells us that's a very common cause of toilet choke - maids flushed Pampers down the toilet bowl!
The Lighting Plan - How We Did It
Related Posts
1 The Challenge: Warm & Cosy Ambience
2 The Lighting Plan: How We Did It
3 Showcase: Lights
4 More Lights
I was surprised this blog attracts readers from local renovation forums such as MyHomeTown.sg, Renotalk.com, and Punggol.org.
Lighting Plan - Warm & Cosy

After we posted the above photo of our living area, some of you wanted to know how we did the lighting. Well, here's the lighting plan for our living area: how we did it!
The Plan
We wanted our living area to serve two functions: first, to provide a cosy, warm space to entertain guests and for the family to spend quality time together. Such as enjoying a movie on the home theater or watching TV together.
However, on occasions we may need the living space to be generally well-lit, particularly during festive occasions when many guests arrive at the same time.
That meant the light fixtures we buy must provide (1) general lighting and (2) mood lighting - providing a soft, cosy ambiance that is conducive for conversation in a relaxed setting.
Ceiling Light: Nothing fanciful, simple E27 Bulb for LED in future

To achieve general lighting for the living space, we settled on two energy-saving fluorescent bulbs rated at 36 watts each, each giving a brightness equivalent to a 150W incandescent bulb. These energy-savers would be our main ceiling light to provide general lighting for the living space.
We also wanted the ceiling light fixture to be future-proof, as we wished to replace the energy-saving fluorescent bulbs with LED bulbs
in future. That meant we had to settle for the standard E27 bulb socket instead of buying light fixtures - most of which come with proprietary sockets - that would become dated and obsolete when LEDs become the rage in a few years' time. The high-quality 6W Cree LED Light Bulb with E27 socket shown on the left, for instance, supposedly replaces a 60W incandescent bulb! However, we would need several of these LED bulbs to provide sufficient illumination over a large living space. These bulbs generally last 5 to 15 years, consume very little electricity, hence pay for themselves within a short period of time.
Two parallel ceiling strips with E27 CFC Bulbs for future LEDs

We foresee LED bulbs will become mainstream products within the next 5 years, if not sooner. At present we could only get LEDs for wall lights and spot lights locally, not for ceiling lights. Lightcraft stocks several of these LEDs, but prices are generally steep. Perhaps as LED technology matures and consumer demand for home LED lighting grows, prices will drop to more acceptable levels in future.
To supplement the ceiling lights, we installed two Zen-inspired wall lamps - again a minimalist design - from Lightcraft. The wall lamps used 100W halogen bulbs that gave a bright, bluish-while light.
Our Investment Piece: Wall Lamp, Simple yet Beautiful, a classic design!

Zen-inspired Wall Lamps from Japan

Now for the important ambient lighting scheme.
1 The Challenge: Warm & Cosy Ambience
2 The Lighting Plan: How We Did It
3 Showcase: Lights
4 More Lights
I was surprised this blog attracts readers from local renovation forums such as MyHomeTown.sg, Renotalk.com, and Punggol.org.
Lighting Plan - Warm & Cosy
After we posted the above photo of our living area, some of you wanted to know how we did the lighting. Well, here's the lighting plan for our living area: how we did it!
The Plan
We wanted our living area to serve two functions: first, to provide a cosy, warm space to entertain guests and for the family to spend quality time together. Such as enjoying a movie on the home theater or watching TV together.
However, on occasions we may need the living space to be generally well-lit, particularly during festive occasions when many guests arrive at the same time.
That meant the light fixtures we buy must provide (1) general lighting and (2) mood lighting - providing a soft, cosy ambiance that is conducive for conversation in a relaxed setting.
Ceiling Light: Nothing fanciful, simple E27 Bulb for LED in future
To achieve general lighting for the living space, we settled on two energy-saving fluorescent bulbs rated at 36 watts each, each giving a brightness equivalent to a 150W incandescent bulb. These energy-savers would be our main ceiling light to provide general lighting for the living space.
We also wanted the ceiling light fixture to be future-proof, as we wished to replace the energy-saving fluorescent bulbs with LED bulbs
Two parallel ceiling strips with E27 CFC Bulbs for future LEDs
We foresee LED bulbs will become mainstream products within the next 5 years, if not sooner. At present we could only get LEDs for wall lights and spot lights locally, not for ceiling lights. Lightcraft stocks several of these LEDs, but prices are generally steep. Perhaps as LED technology matures and consumer demand for home LED lighting grows, prices will drop to more acceptable levels in future.
To supplement the ceiling lights, we installed two Zen-inspired wall lamps - again a minimalist design - from Lightcraft. The wall lamps used 100W halogen bulbs that gave a bright, bluish-while light.
Our Investment Piece: Wall Lamp, Simple yet Beautiful, a classic design!
Zen-inspired Wall Lamps from Japan
Now for the important ambient lighting scheme.
Review: Bellari Liquid Dispenser
Verdict: 1 out of 5 stars.

After looking at soap dispensers from several different outlets, we finally picked the Bellari Liquid Dispenser - available at the Bellari Shop along Jln Besar Road.
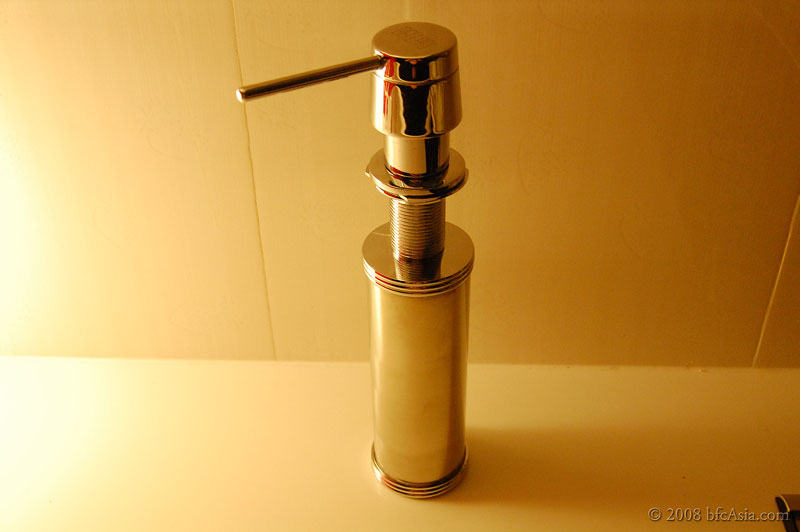
The Bellari Dispenser looked elegant and well-built. The dispensing mechanism -- without any liquid soap in the unit - seemed to work well.
Without hesitation, we immediately bought 2 units.
That was a silly mistake! Never assume a product will work well without actual home use i.e. filled to the brim with liquid soap. Merely testing the mechanical spring action of the dispenser unit at the shop was useless. We should have negotiated with the Bellari sales staff, both of whom were nice people, that we would return the product for a cash refund if it didn't work or meet our expectation after installing the dispenser in our kitchen sink.
Back home, we installed one unit on the kitchen sink; we will install the other unit on the wash basin if the kitchen sink unit worked well.
After looking at soap dispensers
The Bellari Dispenser looked elegant and well-built. The dispensing mechanism -- without any liquid soap in the unit - seemed to work well.
Without hesitation, we immediately bought 2 units.
That was a silly mistake! Never assume a product will work well without actual home use i.e. filled to the brim with liquid soap. Merely testing the mechanical spring action of the dispenser unit at the shop was useless. We should have negotiated with the Bellari sales staff, both of whom were nice people, that we would return the product for a cash refund if it didn't work or meet our expectation after installing the dispenser in our kitchen sink.
Back home, we installed one unit on the kitchen sink; we will install the other unit on the wash basin if the kitchen sink unit worked well.
The Challenge: Warm & Cosy Ambience
Related Posts
1 The Challenge: Warm & Cosy Ambience
2 The Lighting Plan: How We Did It
3 Showcase: Lights
4 More Lights
Preamble
"How to light living spaces" is a topic rarely, if ever, talked about on the Net. Oh yes, we found plentiful advice on light fixtures e.g. ceiling lights, wall lights, table lamps, etc and topics like task lighting, kitchen lighting, etc. But not what we were looking for: how to create a cozy and warm feeling for our living spaces. In other words - a lighting plan.
The Challenge
We always love to meet friends for a chat and drinks at hotel lounges. Simply because the cozy lounge projects an ambiance and atmosphere that is soooo relaxing and refreshing!
So when we did the lighting for our living space, we decided we must duplicate the relaxing ambiance found in our favorite lounge in Jakarta: Hotel Borobudur.
Question is - how do they light up the space to produce an ambiance that is so relaxing, cozy and warm?
To find the answer, we surfed the web, we visited the National Library, we browsed local bookstores.
We got a few ideas. But by and large we were unable to find any specifics on the lighting plan that will produce the ambiance we were looking for.
Thus, the only way was to experiment. We bought light fixtures and different bulb types from Ikea. Ikea allowed 30-day returns, so we took advantage of that. *grin*
After several trials and errors - during which we experimented with different bulb types and fixtures - we finally came up with the lighting plan in the photo. Not ideal but close to the ambient lighting we have in mind.
Our Solution

Well, what do you think?
Related Posts
1 The Challenge: Warm & Cosy Ambience
2 The Lighting Plan: How We Did It
3 Showcase: Lights
4 More Lights
1 The Challenge: Warm & Cosy Ambience
2 The Lighting Plan: How We Did It
3 Showcase: Lights
4 More Lights
Preamble
"How to light living spaces" is a topic rarely, if ever, talked about on the Net. Oh yes, we found plentiful advice on light fixtures e.g. ceiling lights, wall lights, table lamps, etc and topics like task lighting, kitchen lighting, etc. But not what we were looking for: how to create a cozy and warm feeling for our living spaces. In other words - a lighting plan.
The Challenge
We always love to meet friends for a chat and drinks at hotel lounges. Simply because the cozy lounge projects an ambiance and atmosphere that is soooo relaxing and refreshing!
So when we did the lighting for our living space, we decided we must duplicate the relaxing ambiance found in our favorite lounge in Jakarta: Hotel Borobudur.
Question is - how do they light up the space to produce an ambiance that is so relaxing, cozy and warm?
To find the answer, we surfed the web, we visited the National Library, we browsed local bookstores.
We got a few ideas. But by and large we were unable to find any specifics on the lighting plan that will produce the ambiance we were looking for.
Thus, the only way was to experiment. We bought light fixtures and different bulb types from Ikea. Ikea allowed 30-day returns, so we took advantage of that. *grin*
After several trials and errors - during which we experimented with different bulb types and fixtures - we finally came up with the lighting plan in the photo. Not ideal but close to the ambient lighting we have in mind.
Our Solution
Well, what do you think?
Related Posts
1 The Challenge: Warm & Cosy Ambience
2 The Lighting Plan: How We Did It
3 Showcase: Lights
4 More Lights
Review: Rinnai 2-Burner Hob RB-2CG
Review Series
1: Blanco Sink - 3 stars
2: Rinnai Gas Heater - Not Rated
3: Fujioh hood FX-900 - 5 stars
4: Rinnai Tumble Dryer RDT-600CG - 5 stars
5: Rinnai Oven RBO-7MSO - 3 stars
6: Bellari Liquid Dispenser - 1 star
7: Rinnai 2-Burner Hob RB-2CG - 5 stars
8: TOTO Omni Toilet Bowl- 5 stars
9: Asuka Acrylic Worktop - 2 stars
10: Premier laminated floor tiles
Related Posts
1 Using the Rinnai Burner Hob
2 Rinnai Inner Flame Technology
3 Review:Rinnai 2-Burner Hob RB-2CG
Preamble
In appreciation of your support, we now provide a series of updates giving our verdict and recommendation on which appliances and equipment we had bought that turned out to be very good buys. Or bad buys. We won't hesitate to give zero or 1-star for products that don't work as expected.
A word about the Review
Our Review is different from other reviews that you read on the Net: we're not armchair reviewers. We bought and installed the product for our own use. No one sponsored us to endorse the product. And we only gave our verdict after at least one year's usage. Obviously, we'd tell you sooner if a product didn't work or performed poorly soon after purchase.
We invite you - if you have bought, installed and used the product to tell us your user experience, particularly after using the product for at least a year. Whether positive or negative, please give us your feedback. Oh, don't forget to provide your Renotalk user ID and photos of your kitchen so we could verify you're a bonafide user of the product.
To kick off the series, we start with the Rinnai 2-burner hob with the Schott ceran glass top.
Verdict: 5 out of 5 stars - Highly Recommended

Having used the hob on a daily basis over the past 20 months, we must say we're really really impressed with this hob! Our reasons are as follows:
glasstop very easy to clean. The burners are mounted below the glasstop, giving a flat surface over the entire cooktop once the small but robust trivets are removed.
Also, the round trivets are only a bit larger than the burners. After cooking at the end of the day, we simply chuck the 2 small trivets into the sink, pour hot water over them, and viola! the trivets are cleaned! That simple - because each burner has its own trivet and the small size of the trivet makes handling and cleaning them a breeze.
Next, we used a soapy dish towel to wipe the entire glasstop surface, removing all cooking splashes, oil and grease on the cooktop. Took us less than 30 seconds.
If need be, we pulled or plucked up the control knobs, exposing the areas beneath the knobs for cleaning.
All very quick and simple to do.
Rinnai 2-Burner Hob

The Insides

most of the time, we cooked with only 1 burner, and seldom went beyond two.
The Elba hob came with 3 trivets. Two large trivets, each spanning two burners, and a smaller trivet (No: 3) that covered the area between the two large trivets, providing a small space to rest hot pots and sauce pans.
We had a hard time cleaning the Elba hob. First, the 4 burners (and hotplate) were mounted on top of the hob surface, and each burner had a sunken rectangular area to catch spills, making for an uneven surface. Cleaning such a surface - obstructed by the top-mounted burners and separate sunken areas - together with the 3 large and clumsy trivets, took a lot of time and effort, and was a real pain. Thus what should have been a daily event became a weekly chore as we put off cleaning the hob daily.
As you can imagine, we chose a 2-burner model for our Rinnai hob.
That cuts down tremendously on the cleaning required, and also provides more cooking space as the burners are spaced out. Aesthetically, the hob looks minimalist and elegant with only two burners, in our opinion.
The flame burns hot, really very hot! Golly, we could even feel the heat at quite a distance from the hob. The very hot fire meant cooking dishes that required wok hei or umami was not a problem for us.
In fact, the burner was so very hot that we burnt more than a couple of stews and soups when we left the stew unattended. We then had to use a lot of elbow grease and effort to scour and clean the blackened pot or pan.
So if you must use the highest flame setting on the Rinnai, do not leave the stew (as we did) to do something else! Or before you know it, the Rinnai burner will burn the stew to a crispy / crusty black mass!!
The fire is still very hot when you use a medium-low setting. So that's the setting we now use to cook our meals.
To see how hot the fire was, we once turned down the flame so low you could hardly see the flame. Yet a stew we were cooking on the stove continued to simmer merrily. We couldn't do that with our previous Elba (and more ex-) hob.
As the burners are mounted below the glasstop and the jet of burning gas gets directed inwards in a fierce spiral - a very hot and intense vortex of flame is created that is not easily extinguished nor affected by wind on a rainy day. Wonderful!
We had no issue, however, to turn off and shut down the flame after we had succeeded in turning on the burner.
Later, we discovered how to turn on the burner flame effortlessly! It was simple, really!
To turn on the flame, you need to turn anti-clockwise (follow the printed arrow) while pressing the knob down until you hit resistance, at which point the gas ignites and the fire comes on. But don't let go of the knob yet! You continue to press down the knob and turn against the resistance - using minimal and gentle force - until you hear a click. You then turn back the knob slightly - actually it springs back to the initial point of resistance. At that point you release the knob - and the burner will continue to burn.
It takes some practice, but you will get the knack of it in no time.
Obviously, Rinnai's method to turn on the flame is ingenious. Because that will prevent any inquisitive child to accidentally
turn on the fire, perhaps getting burnt in the process.
Incidentally - the battery that came with the hob still works flawlessly to ignite the gas, some 20 months after the initial installation. In time the battery will need to be replaced. Also, the special ignition element built into the burner ring will fail one day - we were told by the sales staff that would happen after the hob has been in daily use for some years.
To conclude, we certainly made a wise choice with the Rinnai RB-2CG model - Highly Recommended.
Update: 20-Nov-2011
Yesterday I succesully cooked biryani chicken in a heavy-bottomed pot (WMF 20cm High Casserole) on the hob's lowest flame setting. The chicken pieces were covered with drained basmati rice that was 50% pre-cooked in boiling water. As I did not add water to the pot, I needed to set the fire to a very, very low level to cook slow-cook the meat and rice in a closed environment of water vapor emitted from the heated rice grains. I discovered to my surprise the Rinnai hob was able to set and maintain the flame at a very very low level it was barely visible, without the wind blowing it out! The flame continued to burn hot and strong, wind or no wind. And my biryani chicken turned out perfectly. Everyone exclaimed my biryan chicken was so delish!
My point is - if you set burners without the Rinnai inner-flame technology to a low fire , it will be snuffed out by wind sooner or later. Set to a very low level? Forget it - those burners simply aren't capable of that, if my experience with my Elba burner is enough to go by.
Oh, if you are interested in cooking biryani chicken, follow the full recipe on my blog here. Aside from photography, cooking is my other passion!
Related Posts
1 Using the Rinnai Burner Hob
2 Rinnai Inner Flame Technology
3 Review:Rinnai 2-Burner Hob RB-2CG
Review Series
1: Blanco Sink - 3 stars
2: Rinnai Gas Heater - Not Rated
3: Fujioh hood FX-900 - 5 stars
4: Rinnai Tumble Dryer RDT-600CG - 5 stars
5: Rinnai Oven RBO-7MSO - 3 stars
6: Bellari Liquid Dispenser - 1 star
7: Rinnai 2-Burner Hob RB-2CG - 5 stars
8: TOTO Omni Toilet Bowl- 5 stars
9: Asuka Acrylic Worktop - 2 stars
10: Premier laminated floor tiles
Related Posts
1 Using the Rinnai Burner Hob
2 Rinnai Inner Flame Technology
3 Review:Rinnai 2-Burner Hob RB-2CG
Preamble
In appreciation of your support, we now provide a series of updates giving our verdict and recommendation on which appliances and equipment we had bought that turned out to be very good buys. Or bad buys. We won't hesitate to give zero or 1-star for products that don't work as expected.
A word about the Review
Our Review is different from other reviews that you read on the Net: we're not armchair reviewers. We bought and installed the product for our own use. No one sponsored us to endorse the product. And we only gave our verdict after at least one year's usage. Obviously, we'd tell you sooner if a product didn't work or performed poorly soon after purchase.
We invite you - if you have bought, installed and used the product to tell us your user experience, particularly after using the product for at least a year. Whether positive or negative, please give us your feedback. Oh, don't forget to provide your Renotalk user ID and photos of your kitchen so we could verify you're a bonafide user of the product.
To kick off the series, we start with the Rinnai 2-burner hob with the Schott ceran glass top.
Rinnai 2-Burner Hob, Model RB-2CG
Verdict: 5 out of 5 stars - Highly Recommended
Having used the hob on a daily basis over the past 20 months, we must say we're really really impressed with this hob! Our reasons are as follows:
Easy and quick to clean
Asian cooking - like ours - tends to be very greasy, and we found the RinnaiAlso, the round trivets are only a bit larger than the burners. After cooking at the end of the day, we simply chuck the 2 small trivets into the sink, pour hot water over them, and viola! the trivets are cleaned! That simple - because each burner has its own trivet and the small size of the trivet makes handling and cleaning them a breeze.
Next, we used a soapy dish towel to wipe the entire glasstop surface, removing all cooking splashes, oil and grease on the cooktop. Took us less than 30 seconds.
If need be, we pulled or plucked up the control knobs, exposing the areas beneath the knobs for cleaning.
All very quick and simple to do.
Rinnai 2-Burner Hob
The Insides
Why two burners?
Our previous Elba hob had 4 gas burners and 1 hotplate that ran on electricity. The hob looked impressive, but functionally, we made a bad choice. We found that The Elba hob came with 3 trivets. Two large trivets, each spanning two burners, and a smaller trivet (No: 3) that covered the area between the two large trivets, providing a small space to rest hot pots and sauce pans.
We had a hard time cleaning the Elba hob. First, the 4 burners (and hotplate) were mounted on top of the hob surface, and each burner had a sunken rectangular area to catch spills, making for an uneven surface. Cleaning such a surface - obstructed by the top-mounted burners and separate sunken areas - together with the 3 large and clumsy trivets, took a lot of time and effort, and was a real pain. Thus what should have been a daily event became a weekly chore as we put off cleaning the hob daily.
As you can imagine, we chose a 2-burner model for our Rinnai hob.
That cuts down tremendously on the cleaning required, and also provides more cooking space as the burners are spaced out. Aesthetically, the hob looks minimalist and elegant with only two burners, in our opinion.
The Flame
Rinnai's inner flame technology really works! You can read about it here.The flame burns hot, really very hot! Golly, we could even feel the heat at quite a distance from the hob. The very hot fire meant cooking dishes that required wok hei or umami was not a problem for us.
In fact, the burner was so very hot that we burnt more than a couple of stews and soups when we left the stew unattended. We then had to use a lot of elbow grease and effort to scour and clean the blackened pot or pan.
So if you must use the highest flame setting on the Rinnai, do not leave the stew (as we did) to do something else! Or before you know it, the Rinnai burner will burn the stew to a crispy / crusty black mass!!
The fire is still very hot when you use a medium-low setting. So that's the setting we now use to cook our meals.
To see how hot the fire was, we once turned down the flame so low you could hardly see the flame. Yet a stew we were cooking on the stove continued to simmer merrily. We couldn't do that with our previous Elba (and more ex-) hob.
As the burners are mounted below the glasstop and the jet of burning gas gets directed inwards in a fierce spiral - a very hot and intense vortex of flame is created that is not easily extinguished nor affected by wind on a rainy day. Wonderful!
The Control Knobs
We had initial problems firing up the burner. Rinnai did not provide any instruction on the control of the knobs. So we had difficulty to ignite the burner flame.We had no issue, however, to turn off and shut down the flame after we had succeeded in turning on the burner.
Later, we discovered how to turn on the burner flame effortlessly! It was simple, really!
To turn on the flame, you need to turn anti-clockwise (follow the printed arrow) while pressing the knob down until you hit resistance, at which point the gas ignites and the fire comes on. But don't let go of the knob yet! You continue to press down the knob and turn against the resistance - using minimal and gentle force - until you hear a click. You then turn back the knob slightly - actually it springs back to the initial point of resistance. At that point you release the knob - and the burner will continue to burn.
It takes some practice, but you will get the knack of it in no time.
Obviously, Rinnai's method to turn on the flame is ingenious. Because that will prevent any inquisitive child to accidentally
Incidentally - the battery that came with the hob still works flawlessly to ignite the gas, some 20 months after the initial installation. In time the battery will need to be replaced. Also, the special ignition element built into the burner ring will fail one day - we were told by the sales staff that would happen after the hob has been in daily use for some years.
To conclude, we certainly made a wise choice with the Rinnai RB-2CG model - Highly Recommended.
Update: 20-Nov-2011
Yesterday I succesully cooked biryani chicken in a heavy-bottomed pot (WMF 20cm High Casserole) on the hob's lowest flame setting. The chicken pieces were covered with drained basmati rice that was 50% pre-cooked in boiling water. As I did not add water to the pot, I needed to set the fire to a very, very low level to cook slow-cook the meat and rice in a closed environment of water vapor emitted from the heated rice grains. I discovered to my surprise the Rinnai hob was able to set and maintain the flame at a very very low level it was barely visible, without the wind blowing it out! The flame continued to burn hot and strong, wind or no wind. And my biryani chicken turned out perfectly. Everyone exclaimed my biryan chicken was so delish!
My point is - if you set burners without the Rinnai inner-flame technology to a low fire , it will be snuffed out by wind sooner or later. Set to a very low level? Forget it - those burners simply aren't capable of that, if my experience with my Elba burner is enough to go by.
Oh, if you are interested in cooking biryani chicken, follow the full recipe on my blog here. Aside from photography, cooking is my other passion!
Related Posts
1 Using the Rinnai Burner Hob
2 Rinnai Inner Flame Technology
3 Review:Rinnai 2-Burner Hob RB-2CG
Review Series
1: Blanco Sink - 3 stars
2: Rinnai Gas Heater - Not Rated
3: Fujioh hood FX-900 - 5 stars
4: Rinnai Tumble Dryer RDT-600CG - 5 stars
5: Rinnai Oven RBO-7MSO - 3 stars
6: Bellari Liquid Dispenser - 1 star
7: Rinnai 2-Burner Hob RB-2CG - 5 stars
8: TOTO Omni Toilet Bowl- 5 stars
9: Asuka Acrylic Worktop - 2 stars
10: Premier laminated floor tiles
Beautiful Home: 10
Next

It is always a challenge for architects or interior designers to design a beautiful interior or home that is compelling and appeals to the senses. Because good design is not articulated but seen and felt. Wham! The design hits you and you are lost for words! You know when you see it. It's so visceral !
That's the motivation behind this series. Photos of beautiful interiors and homes inspired me when I renovated my home. And helped my ID to have a better idea and picture of what I wanted. Hope you find the photo inspiring and useful too.
Living Room Lighting Guide
The photo came from real estate agents marketing the property. You'll be surprised how affordable some of these are compared to properties here! Oh, and if you are the copyright owner of the photo and want me to take it down, please email me.
Subscribe to:
Comments (Atom)

