Showing posts with label sink. Show all posts

Workmanship: Worktop & Kitchen Sink

Related Posts
1 Kitchen: Cooking & Food Storage Zone
2 Kitchen: Microwave Oven Cabinet
3 Kitchen: The Sink Unit
4 Kitchen: Food Preparation & Cleaning Zone
5 Kitchen: Worktop & Kitchen Sink
6 Kitchen: Splashback

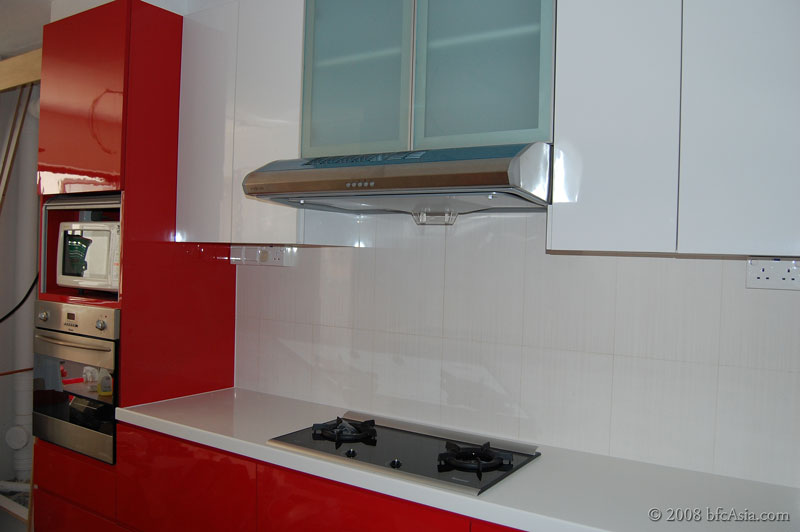
The guys from Asuka delivered two completed acrylic worktop pieces on Thursday 24-Apr-08, one for the hob area, the other for the sink area. Only the hob worktop piece was installed. As this worktop will have its own glass backsplash to be fitted later on, the hob worktop piece was made without a backsplash.

Hob worktop without backsplash

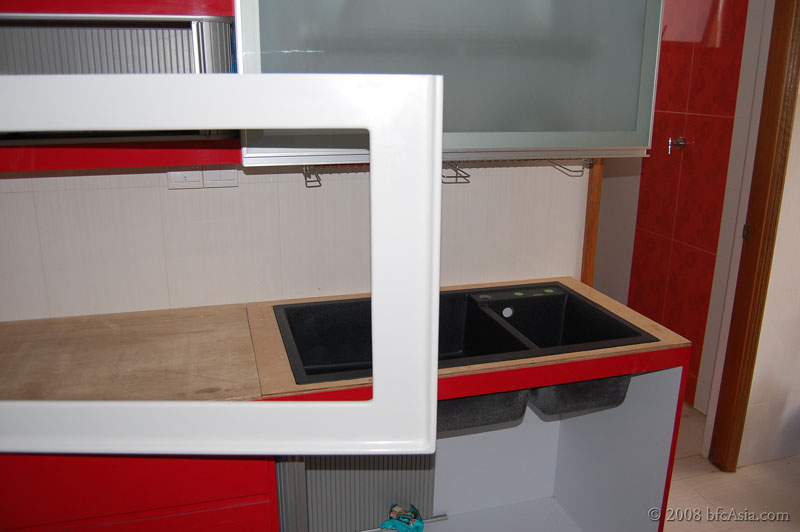
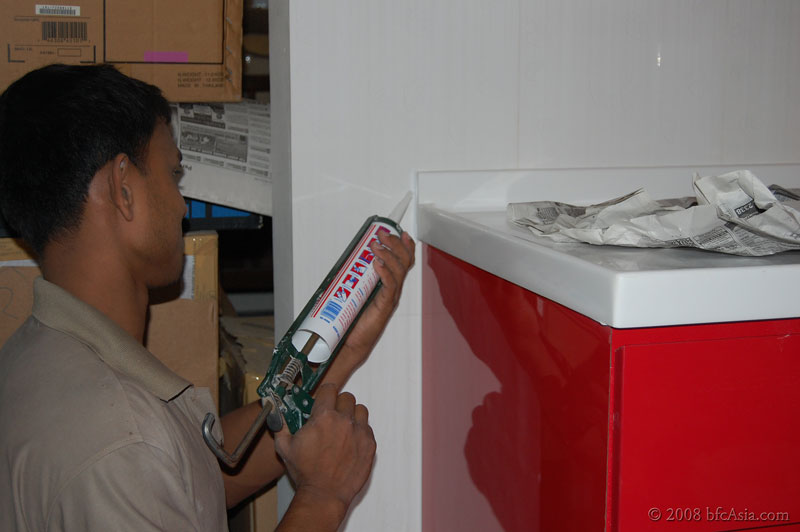
The other piece also had no backsplash. So it had to go back to the workshop to add the 5-cm (2-inches) backsplash. The sink worktop will use the white wall tiles (instead of glass panel) as a backdrop, to add contrast to the opposite side of the galley kitchen. Hence the acrylic top needed a backsplash.

Sink worktop piece with cut-out

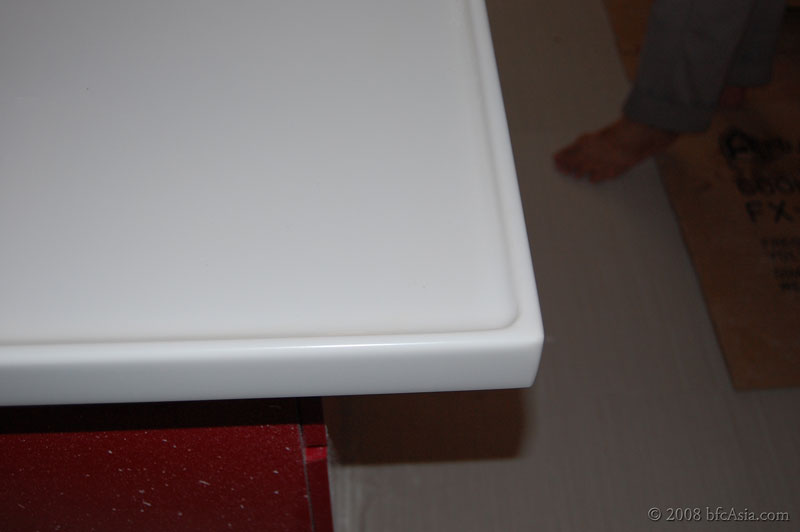
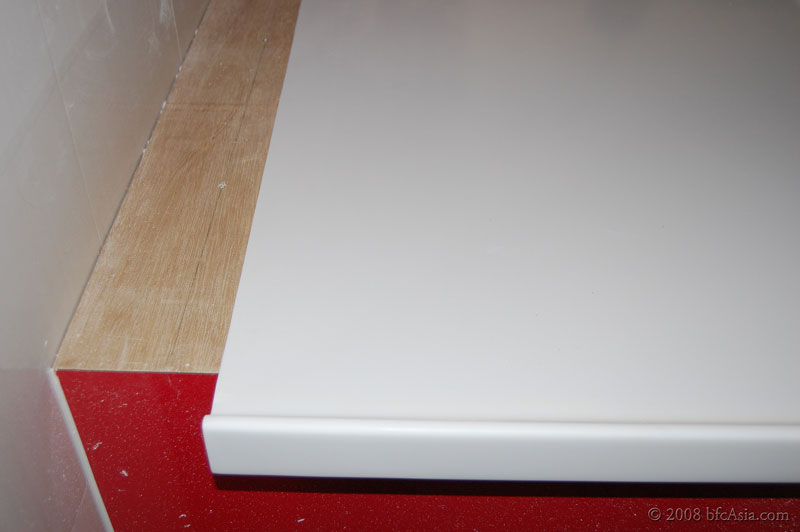
Spill-proof edging design

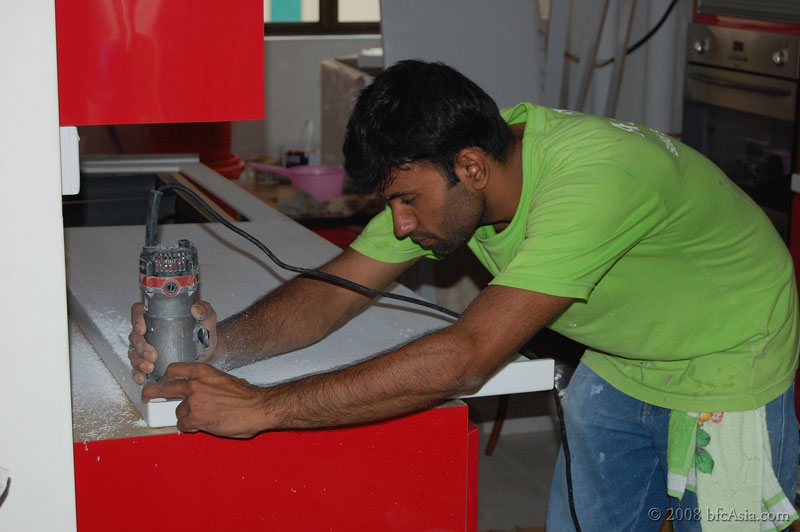
Working the surface

Worktop had to return to workshop because backsplash was missing

Sealing worktop edges, now with 2-inch backsplash

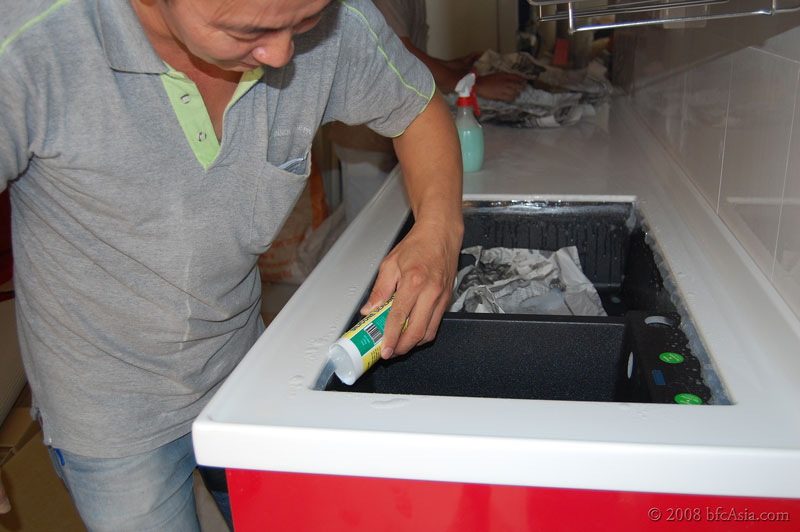
Sealing the rim with silicone

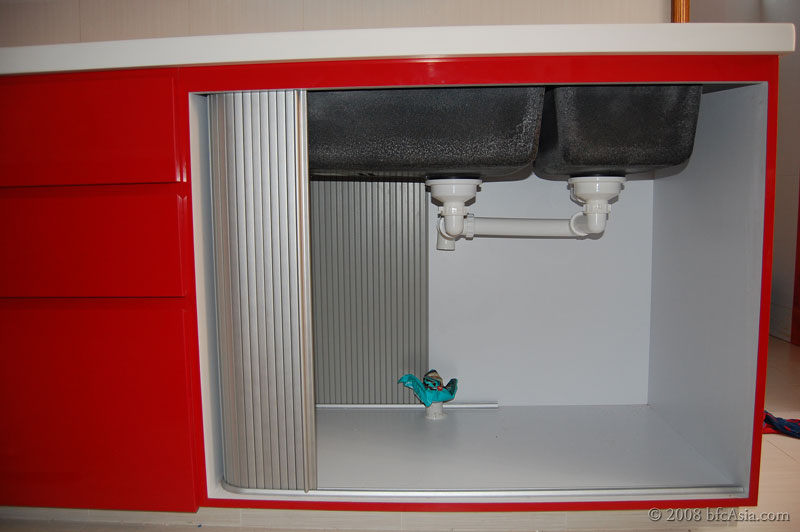
Under-mounted sink before finishing touches

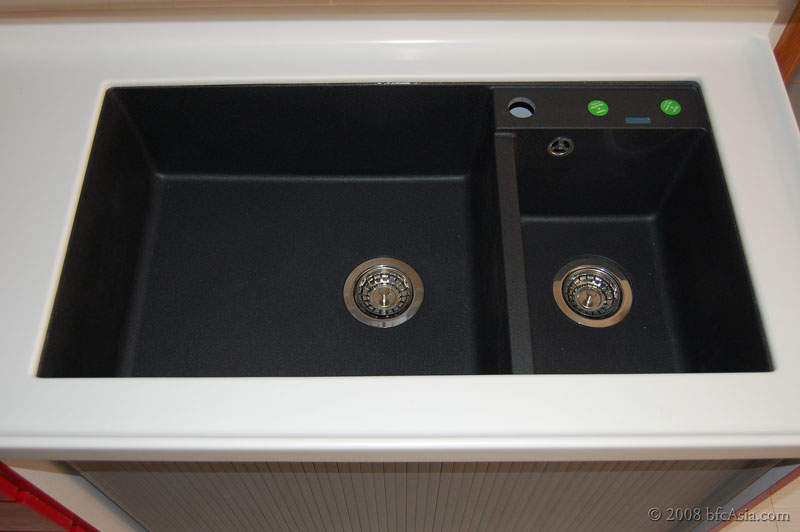
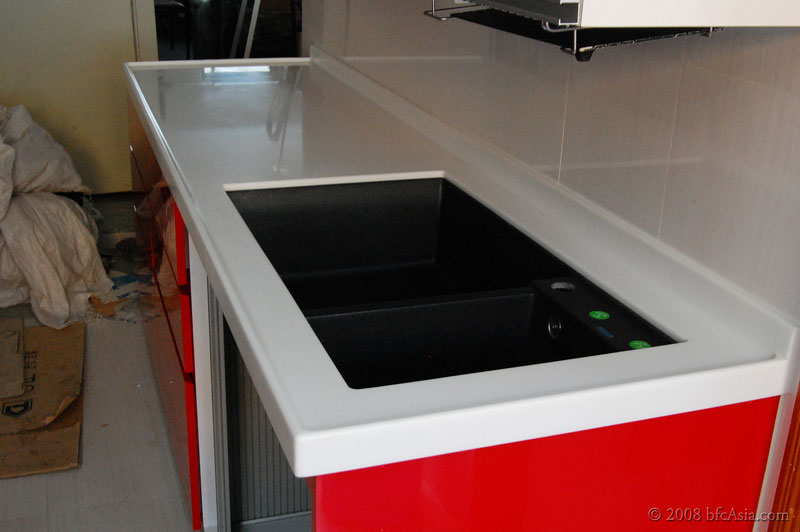
Completed worktop with under-mounted sink

NOTE that the acrylic worktop piece is simply laid onto the plywood base. No glue was used as the acrylic piece was made-to-fit the plywood base. The worker used silicone to seal the edges and the sink rim.

That means if we have to replace the sink or worktop in future, it would be a relatively easy and simple job. Just use a knife to slice through the silicone seam and lift up the acrylic worktop piece. The sink can similarly be lifted up and replaced once the silicone seam has been sliced through.

TEST: I tried to shake and move the acrylic worktop. It did not budge and the feel was solid. The supervisor smiled and assured me I had no worries because the acrylic worktop was (1) heavy and (2) the fitting was exact, owing to the templating production process.

These two factors result in a stable, solid worktop, despite no glue being applied to install the worktop.

Related Posts: Kitchen Works
1 Kitchen: Cooking & Food Storage Zone
2 Kitchen: Microwave Oven Cabinet
3 Kitchen: The Sink Unit
4 Kitchen: Food Preparation & Cleaning Zone
5 Kitchen: Worktop & Kitchen Sink
6 Kitchen: Splashback

Review: Blanco Sink

Review Series
1: Blanco Sink - 3 stars
2: Rinnai Gas Heater - Not Rated
3: Fujioh hood FX-900 - 5 stars
4: Rinnai Tumble Dryer RDT-600CG - 5 stars
5: Rinnai Oven RBO-7MSO - 3 stars
6: Bellari Liquid Dispenser - 1 star
7: Rinnai 2-Burner Hob RB-2CG - 5 stars
8: TOTO Omni Toilet Bowl- 5 stars
9: Asuka Acrylic Worktop - 2 stars
10: Premier laminated floor tiles

Related Posts
1 Review: Blanco sink
2 Blanco Silgranit

A word about the Review
Our Review is different from other reviews that you read on the Net: we're not armchair reviewers. We bought and installed the product for our own use. No one sponsored us to endorse the product. And we only gave our verdict after at least one year's usage. Obviously, we'd tell you sooner if a product didn't work or performed poorly soon after purchase.

We invite you - if you have bought, installed and used the product to tell us your user experience, particularly after using the product for at least a year.


Whether positive or negative, please give us your feedback. Oh, don't forget to provide your local forum (Renotalk.com, myHomeTown.com.sg, Sengkang.com or Punggol.org) user ID and photos of your kitchen so we could verify you're a bonafide user of the product.


Blanco Sink

We bought the Blanco sink from Hoe Kee

We installed the sink in our kitchen in 2008.

The completed sink sits beneath the dish drainer cabinet

What an elegant-looking sink!

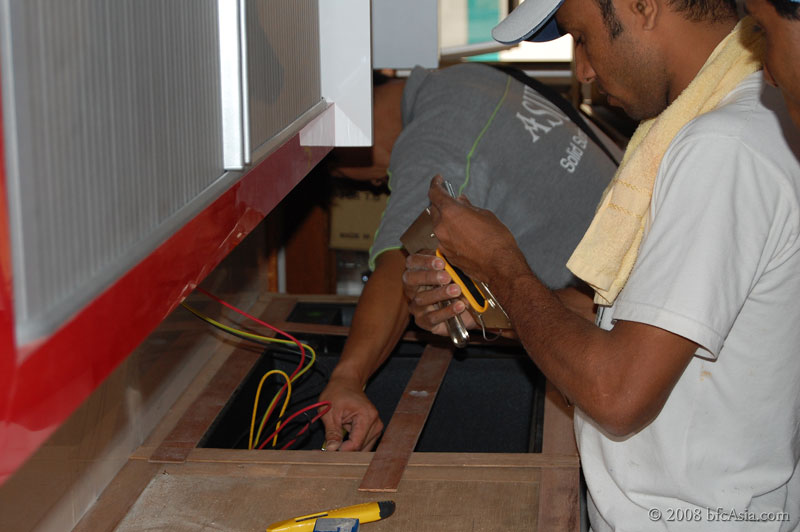
Ready for plumbing..

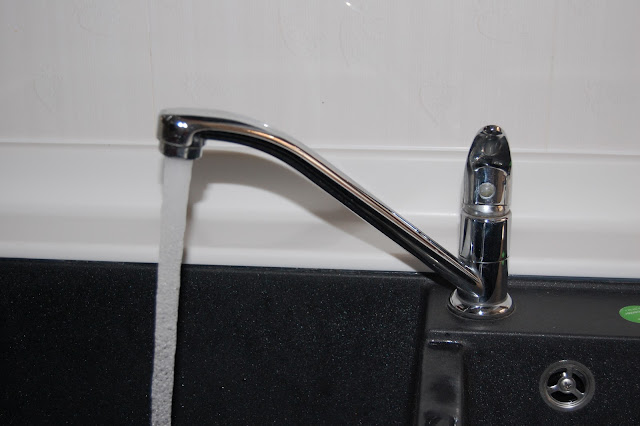
Finally - the sink is ready for use!

In the first few months, we loved everything about the sink: its design, its shape, ts color, its obvious construction quality. After all, it's made of Silgranite, a type of granite material! We smiled with contentment as we quietly admired the completed sink unit.

Now, three years later - after using the sink daily, we decided to give our Blanco sink 3 stars: maintaining the sink, keeping it clean and tidy daily, was simply too tiresome!

Verdict: 3 out of 5 stars

Two issues about the Blanco sink stood out:

One - A "cloudy" haze along the 4 sink sides made its appearance every few days after we cleaned the sink. Flushing water on the sides didin't make the "haze"

disappear. And applying the usual cleaners e.g. CIF, VIM, etc only made matters worse. We found the best solution was to scrub the vertical sides with a stiff plastic or bristle brush - vigorously. And we had to scrub ever so often, until it became a chore. Oww..we didn't have to scrub our previous sink to keep it nice and clean, we groused as we scrubbed and scrubbed.

Two - Worse, after washing soiled plates and crockery, the debris remained spread all over the sink bottom. Flushing and sprinkling the water to "coax" the debris to the sink outlet took some minutes. Time that was better spent doing other chores, we thought to ourselves.

We think you'll come to the same conclusion and verdict as us after you've had used the sink for some time.

One final advice
If you plan to replace your sink at some time in future, you should not under-mount it as we did. In our case, if we replace the sink we'd have to call in the worktop guy to 1) unseat the worktop, 2) dismount the sink, 3) put in the new sink, then 4) seal the worktop again. Had we mounted the sink atop the counter top, we could replace the sink ourselves as the plumbing part is easy. Actually.. heck - we still love under-mounting our sink! In spite of the hassle when we replace it in future.


Maybe it's time to search for another sink? We'll look for sinks with a sloping bottom, preferably a stainless steel or porcelain one. A sink with water that flows automatically to the sink outlet as plates are being washed. Like my mom's kitchen sink: waste debris always flowed to the sink outlet so ubiquitously we thought that's the way all sinks behaved!! Until the Blanco Sink opened our eyes. Now we know better.

Hit the Shout Box if you've got one to recommend!

Related Posts
1 Review: Blanco sink
2 Blanco Silgranit

Review Series
1: Blanco Sink - 3 stars
2: Rinnai Gas Heater - Not Rated
3: Fujioh hood FX-900 - 5 stars
4: Rinnai Tumble Dryer RDT-600CG - 5 stars
5: Rinnai Oven RBO-7MSO - 3 stars
6: Bellari Liquid Dispenser - 1 star
7: Rinnai 2-Burner Hob RB-2CG - 5 stars
8: TOTO Omni Toilet Bowl- 5 stars
9: Asuka Acrylic Worktop - 2 stars
10: Premier laminated floor tiles


Kitchen Flooding !

Water began to flow into kitchen..*sob*

...after 45 minutes.. *wring hand*

...next morning, after blockage was cleared... *wrinkle nose*
Our lovely kitchen was flooded some time ago.*heartache*

Many of us will encounter that situation at one time or another. In this article we shared what we did to solve our drainage problem, in the hope our experience will be useful to you.

***

So, what would you do when you encounter a drainage problem? Should you call the hdb town council? Or managing agent if you live in a private apartment? Or your own plumber?

You call the town council if the hdb common service pipe is chocked. But you call your own plumber if the blockage is in your internal kitchen pipe. Knowing whom to call will save you time, heartache and money.

Here was what we did:

We began by investigating the cause of the flooding. We recalled the last time we flushed water down our kitchen sink was barely 40 minutes ago; the water had drained from the sink without any problem. We were therefore certain no waste matter clogged our kitchen drainage pipe.

Drawing of common drainage pipe:

Take a look at the drainage pipe drawing. If blockage had occurred in the common drainage pipe, the water level discharged from all flat units above our unit level would rise and flow into our unit. That won't occur if the blockage occurred in our kitchen pipe - the water would simply stagnate until the blockage was cleared. Luckily we recalled that we last used the kitchen sink about 40 minutes prior to the flooding, which meant the common drainage pipe was blocked and caused our kitchen to be flooded!

That must be the reason, we concluded! We called the town council.

* * *

Note: We also regularly maintained our drainage piping system. You should too - find out how in a related post.

Also note that the kitchen drainage system is separate and distinct from the bathroom / toilet drainage system. Therefore you can rule out your toilet drainage pipe if only your kitchen is flooded.

* * *

Our town council ("TC") responded quite swiftly to our call. The TC maintenance supervisor and the area manager visited our premises to check on the flooding situation. After listening to our explanation and doing some tests of their own, they agreed with our assessment. It was late in the evening,

Next morning a plumber and his assistant came. They asked to view the common drainage pipe. Luckily - although we had concealed the common drainage pipe behind a partition wall - we could open the partition doors once the fridge was moved away. See how our kitchen drainage system was concealed behind a partition.

Flexible pipe to probe for obstacle

After gaining access to the common drainage pipe, the plumber used a long flexible "stick" to probe / clear any waste matter that may have caused the blockage. He confirmed there was indeed a blockage, and that the blockage was in the common drainage pipe!

Inspecting the flat unit below

Next, he went to inspect the unit below our flat. The unit was tenanted to a foreign family.

True enough, the ceiling in the unit below had flooded copiously the night before. The tenant told us he had called the landlord owner but the owner had told him to solve his own problem!!

The plumber got down to work. He decided to cut the common drainage pipe under the kitchen sink after ascertaining the location of the blockage.

After the pipe was cut, he extracted a piece of clothing from the grimy mess. That was the cause of the blockage!

Urrggh..so gross, the cause of the blockage!!

Less than 30 min later, the blockage was cleared. Hooray!

What a mess

How in the world could clothing end up in the common drainage pipe ???!!!

Dish Drainer Cabinet

Related Posts
1 Mistakes Made
2 Worktop-to-Hood Distance
3 Dish Drainer Cabinet
4 What Will We Do Differently?
5 Kitchen - Mistakes
6 Plumbing - Sinks

Most of us think the ID / Contractor is right when it comes to the finer points of kitchen design.

After all, what do we know how deep we should make the kitchen drawers? Or what should be the worktop height from the floor? Or can I have a deeper worktop, especially when the standard 2-feet depth is not deep enough for me?

All to no avail.

Each time I brought these issues up for discussion, the ID soothingly reassured me

any deviation from the standards would be disastrous.

For instance, I had bought a 2-tier Kris ss dish rack from Hoe Kee at Plaza S'pore. I couldn't do anything to the space between the two tiers, as that was the design. For standard plates, I mused.

Well, I liked the design. The build quality was good. Maybe I could build more space above the top tier to accommodate larger chinaware, I thought to myself as I placed the order.

Renovation had already begun; the contract had already been signed. I brought up

the issue with the ID nevertheless. The ID was horrified. Probably at the thought of seeing his profit shrinking.

Cannot-lah, the lift-up glass panel on the dish cabinet is fitted with hydraulic hinges. Making the cabinet taller would require a bigger, and heavier, glass panel. The hinges cannot support that large panel !

That made sense, so I didn't insist. Partly as I had overlooked the dimension issue(s) before agreeing to the contract. Any change now, I realized glumly, would mean a reworking of the numbers and changed the contract amount.

So what I have as a result is a less-than-perfect kitchen. It would be perfect if the dish drainer is taller so that the space above the top rack is high enough to accommodate the occasional large chinaware. Such as the one used to serve Fish Head Curry, a family favorite.

My advice? Next time, I will simply do away with the lift-up glass panel. Less aesthetics maybe, but more practical. Saves money too - and who can't do with more money, hahaha! For the review of this drainer rack, please go to my post.


Related Posts
1 Mistakes Made
2 Worktop-to-Hood Distance
3 Dish Drainer Cabinet
4 What Will We Do Differently?
5 Kitchen - Mistakes
6 Plumbing - Sinks

Plumbing - Sinks

Related Posts
1 Mistakes Made
2 Worktop-to-Hood Distance
3 Dish Drainer Cabinet
4 What Will We Do Differently?
5 Kitchen - Mistakes
6 Plumbing - Sinks

Plumbers -- like their Citygas counterpart -- seem to be in short supply these days.

After waiting several weeks, with no-shows on two occasions -- a plumber team of 3 young guys finally showed up at my door on Mon, May 5th. Guess what? It was 4.45 pm when they showed up!

At that hour most workers would be packing up to go home. Dusk was closing in, my flat had no ceiling light, and I wondered how they would manage in my dim kitchen. Peeved, but somewhat relieved they finally came, I agreed to let them in.

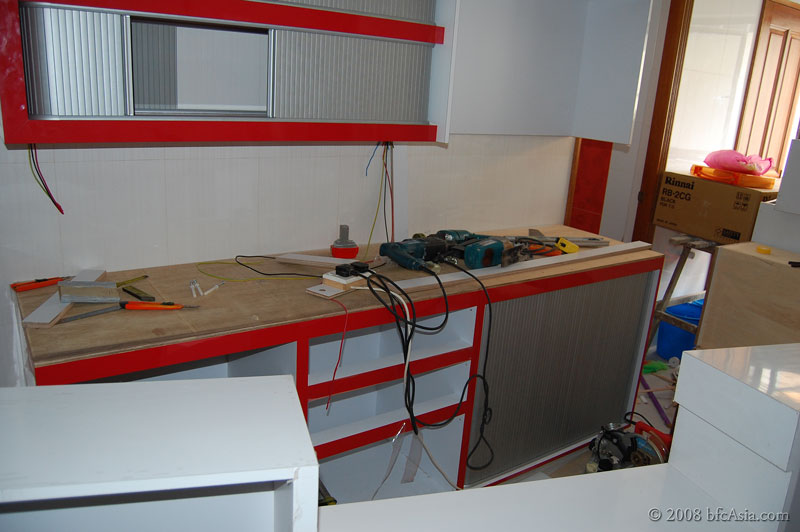
After all, though the kitchen cabinets and worktops had been completed weeks ago, my kitchen had lain idle. What good is a kitchen without the sink?

The plumbers seemed well-briefed on the jobs required.

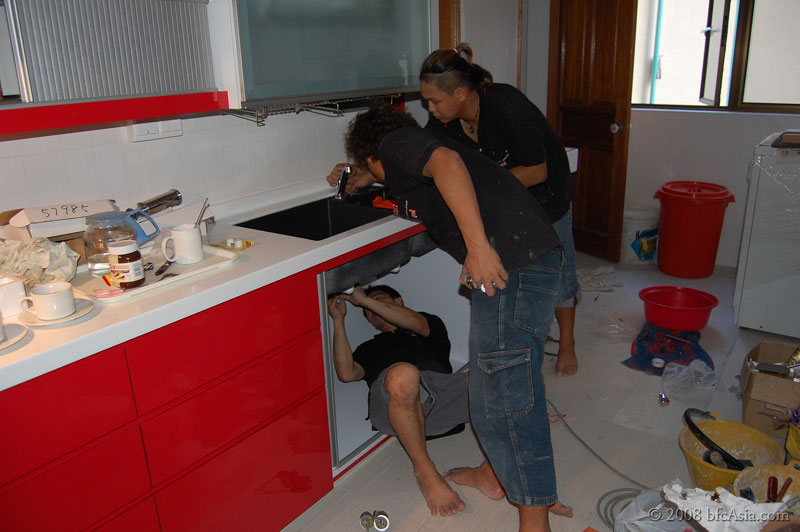
Plumbing the kitchen sink


Despite that, I decided to butt in now and then to ensure they do their job properly. I had seen enough of the previous plumber (see my earlier posts) mucking up my rain shower piping and toilet bowl installation to let the plumbers carry on as usual. Fortunately these guys did not resent my intrusions. They took the cue and sought my placement instructions when they had to install a particular accessory or fitting.

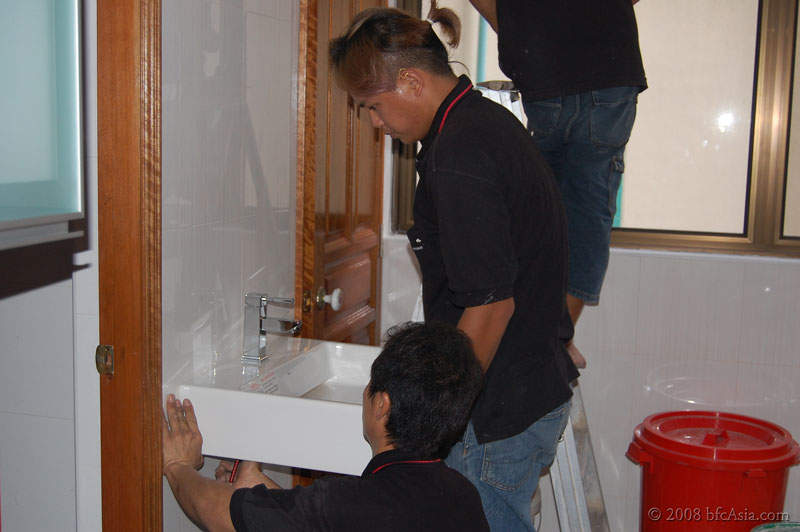
Installing the Wash Basin

The apartment came with a single bathroom and a separate toilet, both of which were too tiny for a wash basin inside. Designed in the stark 70's style -- basic, ugly

but functional, hacking the wall separating the two to create a larger bathroom-cum-toilet was impossible. The sewage and water pipes were were in the way, the largest gap between the pipes was a mere 15-inches, too narrow to facilitate movement from the shower area to the toilet.

It was also not possible to re-orient or move the squat toilet bowl needed to give a single bathroom-cum-toilet enclosure, due to the sewage pipe on the floor connecting to the ceiling of the apartment unit below. Any changes to the sewage pipe would affect the flat below.

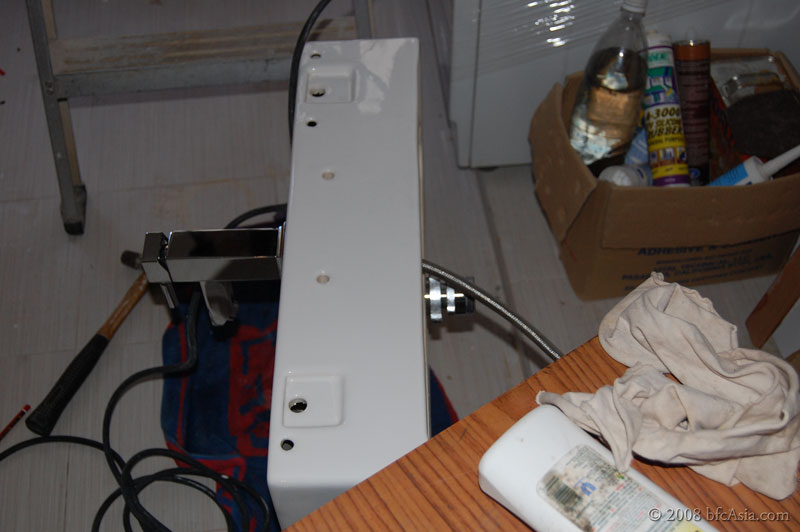
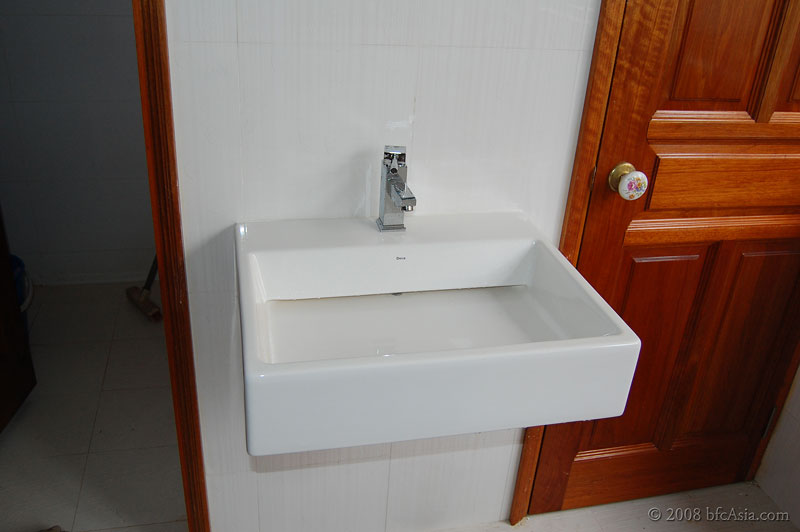
With no space inside either the bathroom or the toilet for a wash basin, the only viable location was on the wall outside between the bathroom and toilet. To mitigate the very visible and open location of the wash basin, we decided on a designer basin hung on the wall, complemented by a full-height wall mirror and glass shelving.

We chose a basin tap that is squarish in design to fit in with the rectangular basin.

Deca Wash Basin

Installing the Basin Tap and Waste Fitting

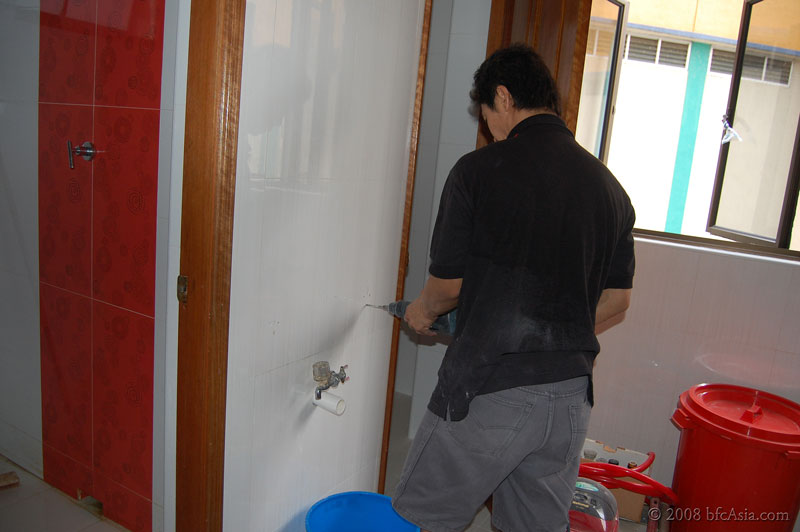
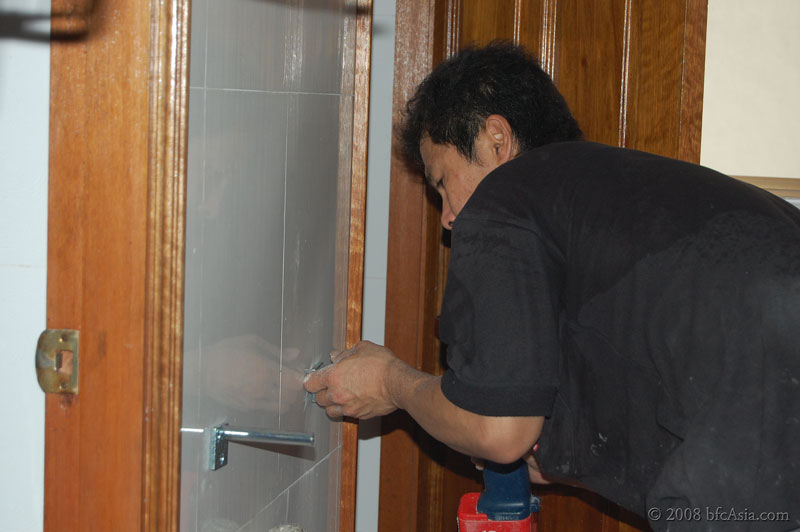
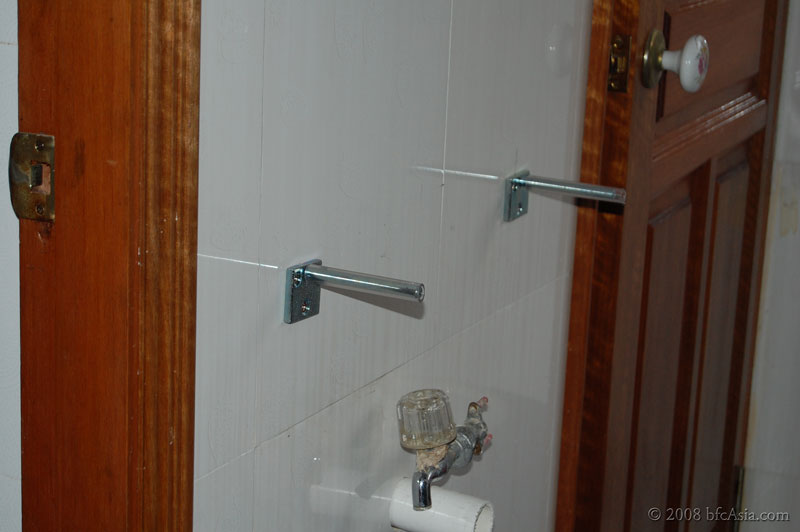
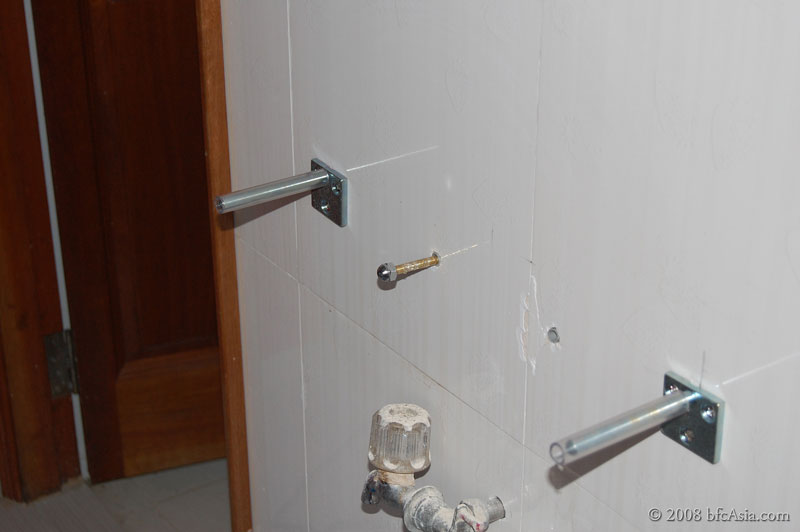
The wall anchor bolts and sink bracket support

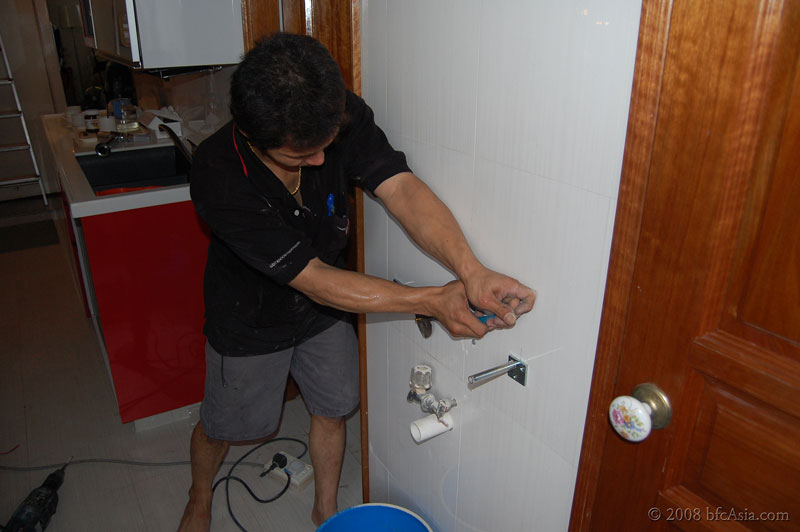
Drilling the bracket support


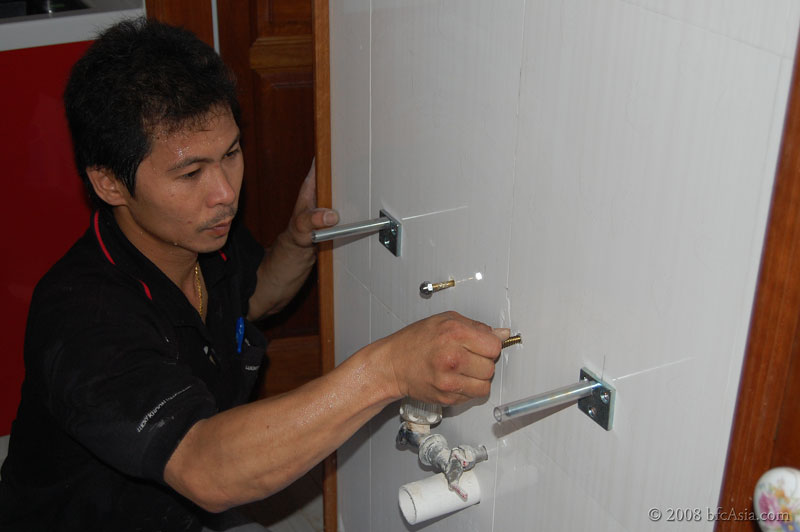
Fixing the wall anchor bolt


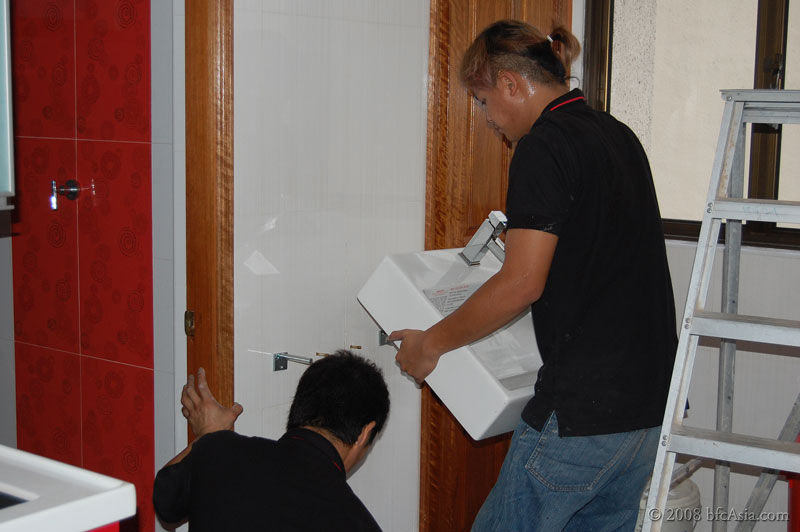
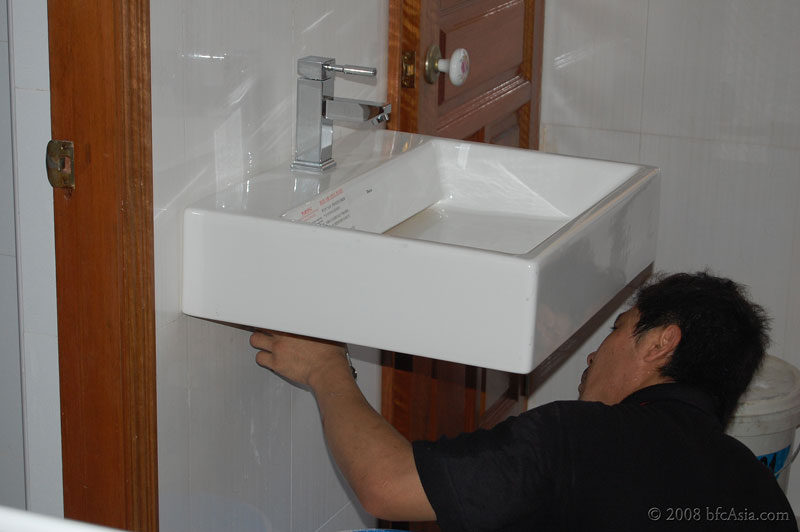
Lifting the sink onto the supports

Tightening the nut on the wall anchor bolt beneath the sink


Wall-hung Deca Wash Basin Model L87S S$350 and Basin Tap E321 S$80, both before 7% GST, from Adamas Bathroom PL


Mistakes Made
The DECA Wash Basin Model L87S does not have the usual stainless steel pop-up waste trap. Instead, the sink has a sloping base that is slightly angled to allow water to flow out to an outlet hole hidden at the back of the basin.

Obviously the angled base in the basin meant the plumber had to be extra mindful and ensure that the sink is installed perpendicular to the wall. He was probably

not familiar with the basin design. He failed to use a spirit level to check if the sink was installed strictly perpendicular to the wall and simply did the installation as per normal. As a result, the wash basin was fixed slightly angled downwards, in effect canceling the slope of the sink.

When I turned on the basin tap, I found the sink does not discharge the water to the back completely, but left a small puddle behind.

Further, the basin came with 2 hidden fittings holes precut on each side of the main tap hole. A slight but sharp knock on the precut porcelain will open up the hole to allow fittings to be fixed. The plumber however did not open up the fitting hole. He said he was afraid he might damage the sink if he did not knock out the precut porcelain correctly.

Therefore I was left with a soap dispenser that is not fixed on the wash basin.

LESSON LEARNT:

It was easy to overlook that this wash basin has a slope base and should be installed using a spirit level to check the basin is fixed strictly perpendicular to the wall. Make sure your plumber is aware of that if you choose to buy such a basin.

After looking at the photos of the installation, I realized the downward angle of the basin could be corrected, simply by inserting small pieces of rubber disc at the bottom edge below each anchor screw, so that the basin is slightly angled upwards to correct and level the basin horizontally. The adjustment will maintain the base slope at the correct angle and allow water to be quickly and completed discharged from the wash basin.

The ID noted the suggestion and will ask the plumber to make the adjustment. Without the correct tools it would be impossible to do the adjustment myself.

Second, always get the sanitary ware dealer to deliver the purchased sink item with the fitting hole for additional fittings opened. This way the dealer is responsible if the basin or sink is damaged in the process of opening the fitting hole. Otherwise your plumber will refuse to open the precut fitting hole fearing he would have to bear the cost if he damages the sink.


Related Posts
1 Mistakes Made
2 Worktop-to-Hood Distance
3 Dish Drainer Cabinet
4 What Will We Do Differently?
5 Kitchen - Mistakes
6 Plumbing - Sinks

Blanco Silgranit®

Extracted from Blanco website:

FEEL THE STRENGTH

BLANCO pioneered the concept of hard composite sinks in 1980, using some of the toughest materials available from Mother Nature. More than just a coated surface, solid material throughout the entire sink ensures consistent color and durability year after year.

The proprietary formula for Silgranit® has been perfected in our own high-tech factories, utilizing precision chemical laboratories and computer controlled mixing machinery to ensure uniform quality.

BLANCO’s Silgranit® sink facility has been awarded the coveted ISO 9001 designation from the Geneva, Switzerland based International Standards Organization for “quality assurance in design, development, production, installation and service.”

SILGRANIT® sinks feature the touch and feel of natural stone. Unlike cast iron and soft composite materials, SILGRANIT® combines the best performing ingredients to produce kitchen sinks that are durable, stain resistant, easy-to-clean, and available in a collection of dynamic designs including our popular BLANCODIAMOND™ Series.

SILGRANIT® contains 80% natural granite, mixed with acrylic resin, which gives the sink its resilience and ability to be molded into striking designs. Compare Silgranit® to cast iron and soft composite sinks:

* Heat resistant to 536°F.

* Resistant to extreme changes between hot and cold.

* Hard, durable surface is resistant to chipping.

* Unaffected by acids and alkalis typically used in the home.

* Moldable into an unusual variety of striking designs and functional features.

* Compare our innovative angles, large capacity, and extra deep bowls.

* Environmentally friendly, with recyclable raw materials.

* Resilient surface is less likely to break dinnerware and fine crystal.

* Extremely hygienic. Does not absorb odors or bacteria.

* Non-porous design resists most household stains, including coffee, tea, mustard, beet juice, red wine, hair dyes.

* Regular cleaning of BLANCO Silgranit® sinks is easy with a scrub pad such as Scotch Brite and any non-abrasive cleaner, including our own BLANCOCLEAN. Stubborn stains, caused by prolonged contact, can be removed with bleach and water, baking soda, or vinegar.

As tough and durable as they are good looking, all SILGRANIT® sinks are backed by our no-hassle, limited lifetime warranty. SILGRANIT® is the ideal solution for the most frequently used area in your kitchen.


INTRODUCING TRUE UNDERMOUNT DESIGNS

BLANCO Silgranit® sinks are now available for true undermount installations in 1-3/4 bowl, double bowl, and single bowl designs. Sink rims have been specially designed to allow for easy positioning and installation of the faucet, without sink interference, for a sleek, contemporary look.

o o o

IMPORTANT NOTE

When installing the sink, ensure that grout does not fall into the Silgranit sink. Seemed some people have experience a dull "haze" covering on the sink as a result, which is difficult to remove. However, the dull film coating can be successfully removed, as some have shared on forums:

RE: Blanco Silgranit Sink


* Posted by sundodger (My Page) on
Tue, Aug 22, 06 at 3:31

I'm a bit late on this follow-up, but I figured I'd share my experience. Story time, story time, gather 'round.

I have a black Silgranit sink, and recently grouted my tile backsplash. When it was all done, the backsplash looked good, the sink, not so much. I didn't know about how the grout can leave a haze on the Silgranit finish until after seeing it happen to my sink (and reading this thread to see it's a known issue).

I got in touch with the distributor, who told me that she had accompanied a Blanco rep on a "house call". To remove a similar haze, the rep had used CLR and a regular green Scotch-Brite scouring pad.

So it was now my turn. Bottle of CLR, and instead of the green "heavy duty" pad, I went with the blue "no scratch" pad. Poured some CLR into a glass container, dunked the pad, and scoured the sink rather lightly. About 2-3 minutes later, rinsed the sink and dried it. The haze was still there. Second try, this time I put some muscle into it, scouring in circles. Again, after about 2-3 minutes, rinsed and dried. This time, the haze was mostly gone. For grins, I did a final, third pass with the CLR, scrub, and rinse. After the rinse, I made sure all the CLR was gone by going over the sink with soap and water. It works!

Now, I don't know if it's fully recovered, but I think it's darn close. I also have a Silgranit bar sink that I never use, and that sink seems to be blacker, and the water pools better. That may just be a coat of oil or something left over from manufacturing (did I mention I never use my bar sink?). But it's definitely looking nice again. No more ugly haze.

The Sink Unit

Workmanship: Kitchen Works
1 Kitchen: Cooking & Food Storage Zone
2 Kitchen: Microwave Oven Cabinet
3 Kitchen: The Sink Unit
4 Kitchen: Food Preparation & Cleaning Zone
5 Kitchen: Worktop & Kitchen Sink
6 Kitchen: Kitchen Splashback

Completed Food Prep Unit & Sink Unit

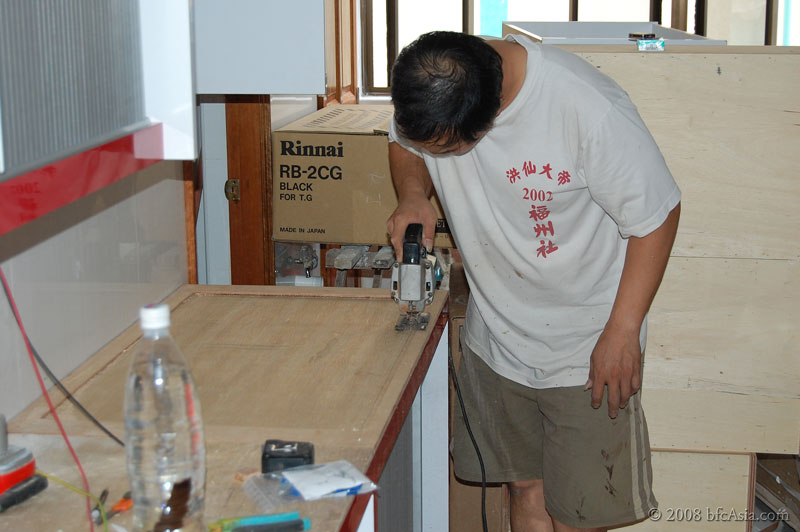
Making the Cutout for the Sink

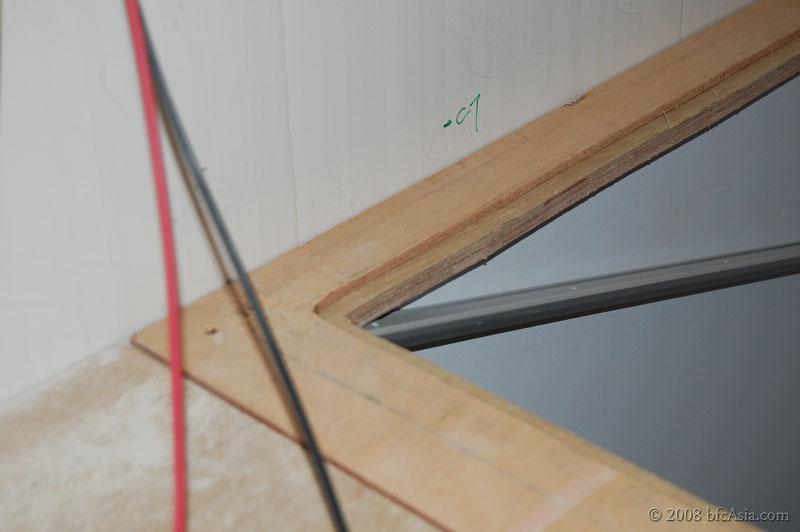
Closeup of Plywood Cutout for Sink

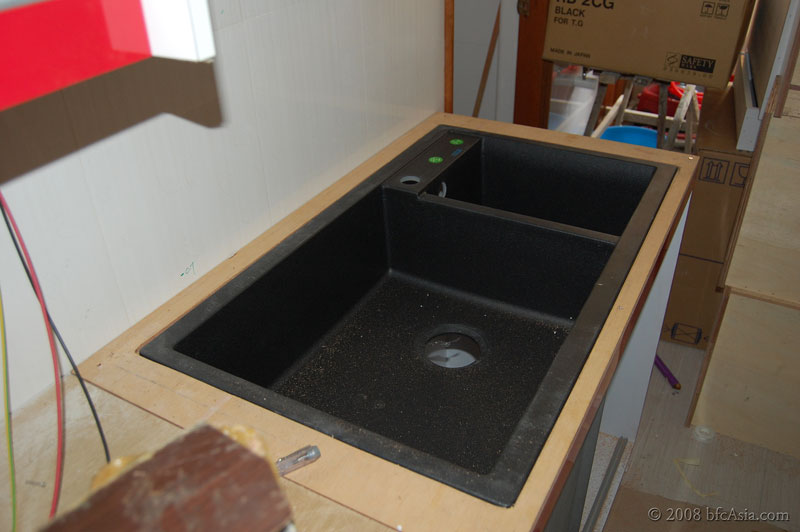
Sink fitted into plywood top

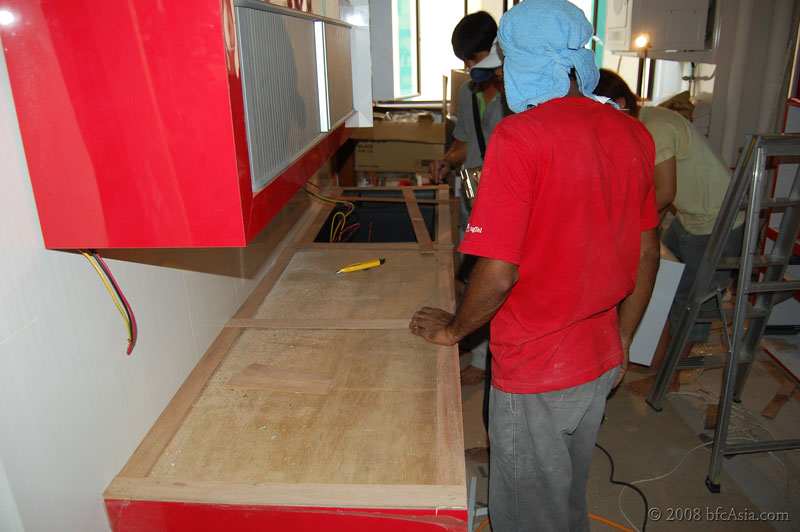
Making template for acrylic worktop

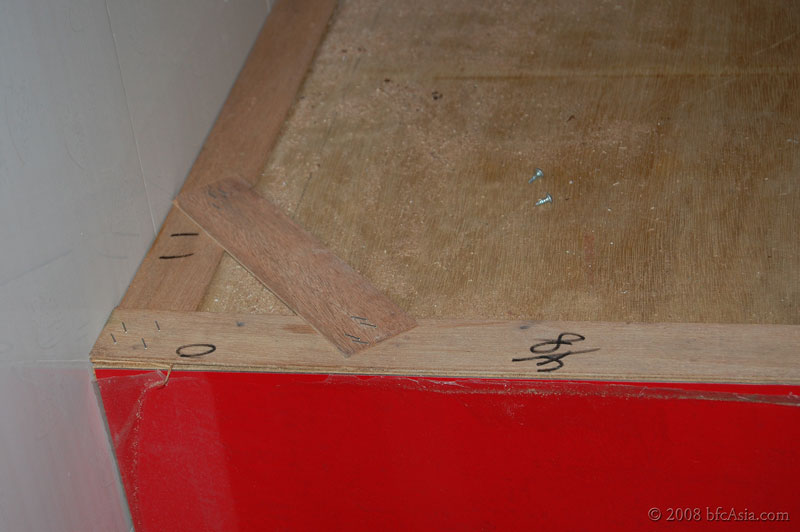
Closeup of template corner

Stapling template strips together

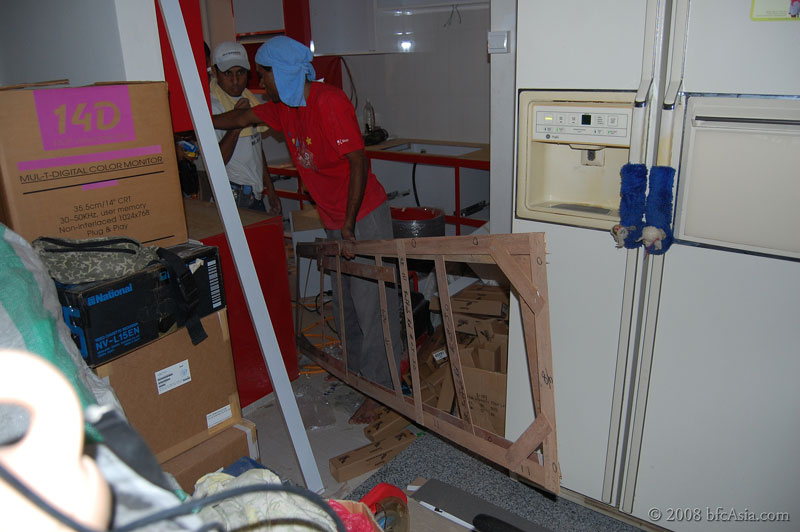
Finished templates now go to workshop


Workmanship: Kitchen Works
1 Kitchen: Cooking & Food Storage Zone
2 Kitchen: Microwave Oven Cabinet
3 Kitchen: The Sink Unit
4 Kitchen: Food Preparation & Cleaning Zone
5 Kitchen: Worktop & Kitchen Sink
6 Kitchen: Kitchen Splashback
 

Copyright © 2008-2011 bfcAsia - All photos and contents are copyrighted material of shunFoto.com • All Rights Reserved